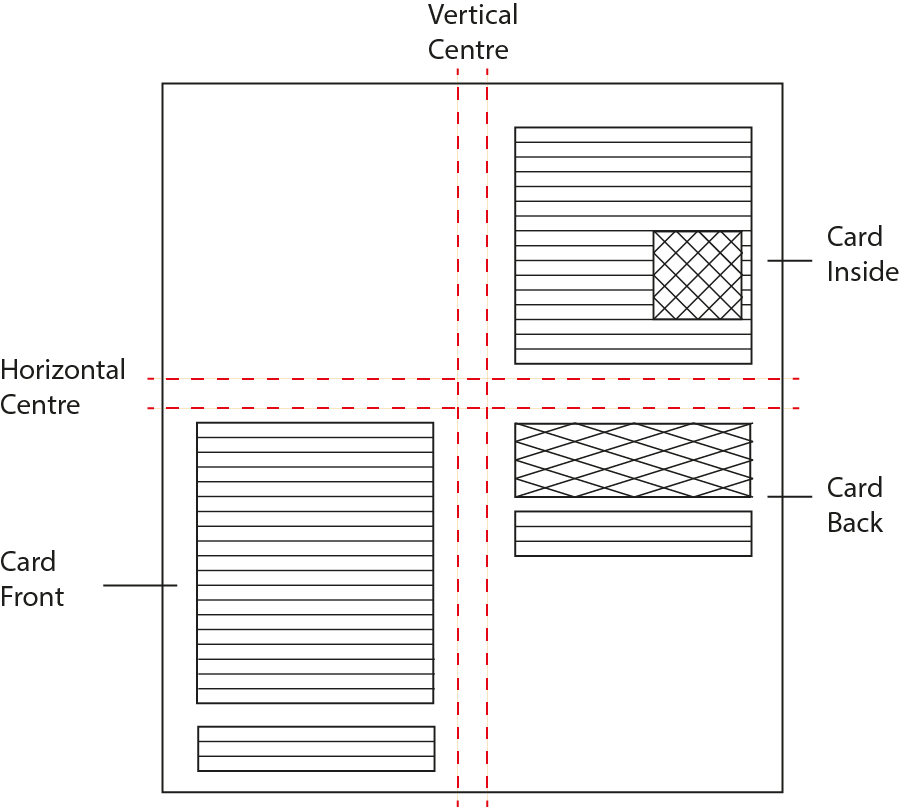
Greeting cards are a good way to acknowledge special effects. When you create greeting cards you split a page into quarters and print two quarters upside down. The thumbnail sketch for the card you will create is shown in the following diagram.
A page with vertical and horizontal guidelines through the centre of the page will be created. This will divide the page into quarters and allow it to fold accurately.
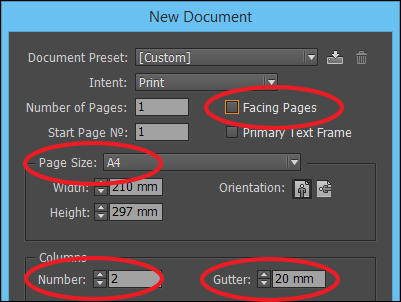
Start a new document and in the NEW DOCUMENT dialogue box set the PAPER SIZE to A4, turn off FACING PAGES and set the COLUMNS to 2 with a 20 mm GUTTER, then select OK. Note: The column and gutter settings will place two vertical guidelines through the centre of the page.
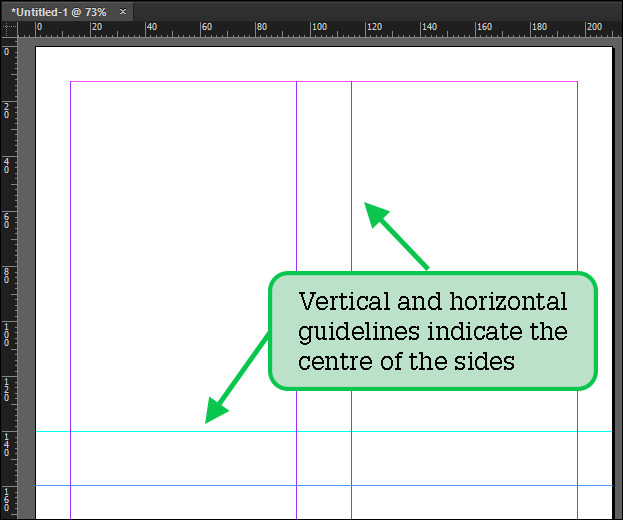
An A4 page is 297 mm high. The centre is at 148.5 mm. Drag guidelines from the top Ruler to 140 mm and 160 mm to show the horizontal centre of the page.
Completing the front of the card
The front of the card will be entering in the lower left quarter of the page then the content rotated 180° so that the content is upside down.
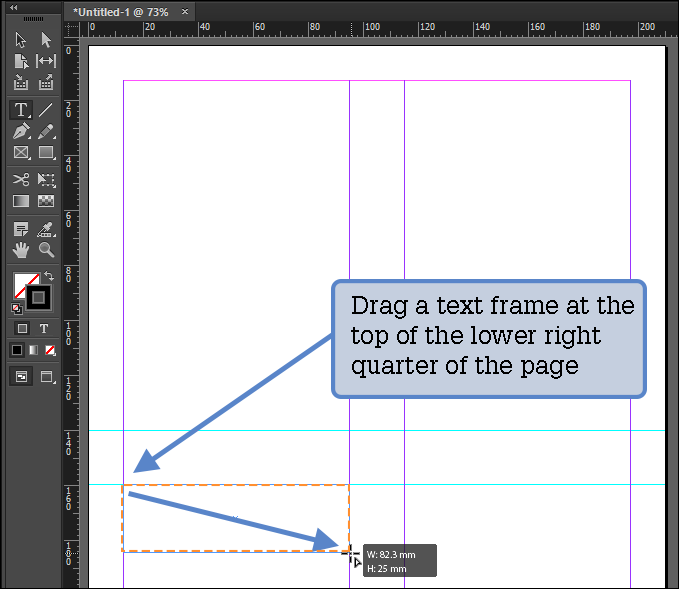
Select the TYPE TOOL and drag a text frame across the top of the bottom right quarter of the page and 25 mm down.
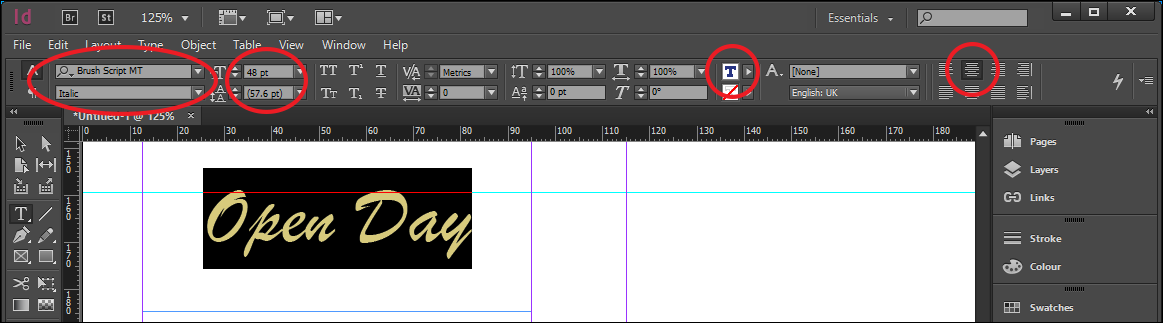
Enter: Open Day then highlight the text and, in the CONTROL panel, set the FONT to a script font such as BRUSH SCRIPT MT, the SIZE to about 48 pt, the FILL COLOUR to DARK BLUE and click on the ALIGN CENTRE icon.
The text can be vertically centred in the text frame, display the OBJECT menu and select TEXT FRAME OPTIONS. Under VERTICAL JUSTIFICATION set the ALIGN box to CENTRE and select OK.
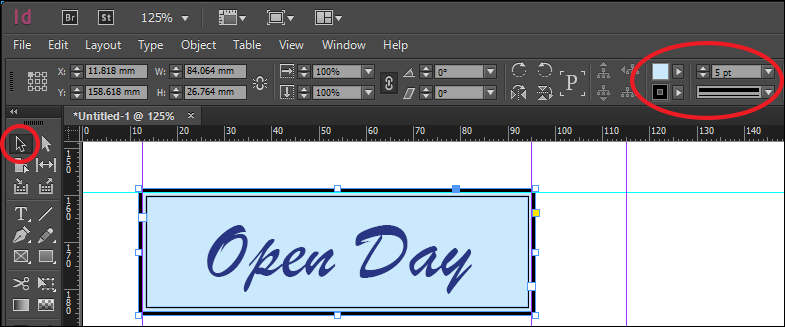
A rectangle does not need to be added to shade the text; the text frame can be shaded directly. Select the SELECTION TOOL and the text frame should be selected. In the CONTROL panel set the FILL COLOUR to CYAN with a 25% tint, the STROKE WEIGHT to 5 pt and the STROKE TYPE to THICK THIN.
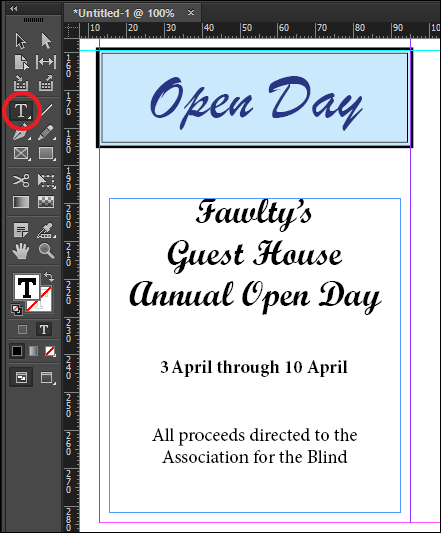
Use the TYPE TOOL to drag a text frame 20 mm below the previous text frame to the bottom right of the quarter and enter the text shown.
Highlight the text and set it to 14 pt and CENTRE.
Format the first three lines to a script font, Bold (if available) and 24 pt.
Format the fourth line to be bold.
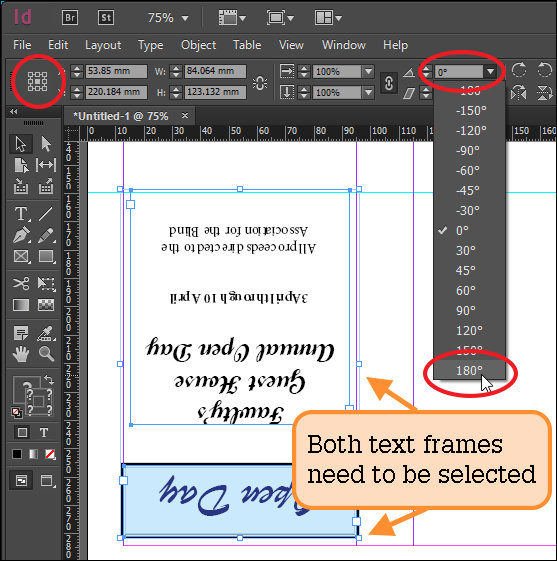
The text frames need to be turned upside down so the card can be folded. Select the SELECTION TOOL, and <Shift+Click> on the text frames so both are selected.
In the CONTROL panel set the REFERENCE POINT to CENTRE then click on the arrow next to the ROTATION ANGLE box and select 180°.
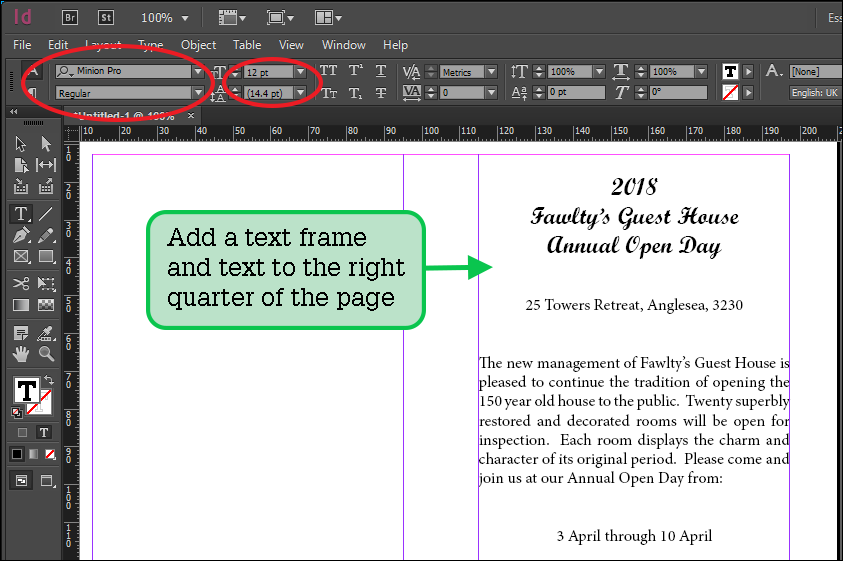
The inside of the card will be placed in the top right quarter of the page. The text has been prepared for you.
Select the TYPE TOOL and drag a text frame around the top right quarter of the page.
Display the FILE menu and select PLACE. Access the text file downloaded from the above link.
Highlight all of the text and, in the CONTROL panel, set the FONT to MINION PRO, the SIZE to 12 pt and click on the JUSTIFY WITH LAST LINE LEFT ALIGNED button.
Highlight the first three lines of text and set their FONT to the same script font that you used for the Open House heading, 18 pt, CENTRE and a text colour if you wish to.
Highlight the address line and centre it.
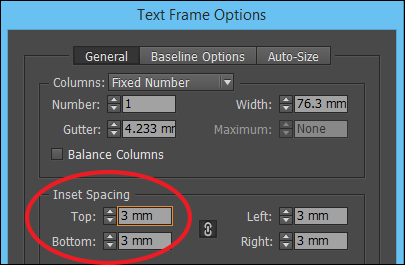
The text can be indented so that a border can be placed around the text. Select the SELECTION TOOL and the text frame should be selected. Display the OBJECT menu and select TEXT FRAME OPTIONS.
Set the INSET SPACING boxes to 5 mm and select OK. Note: With the MAKE ALL SETTINGS THE SAME icon turned on, only one INSET needs to be entered.
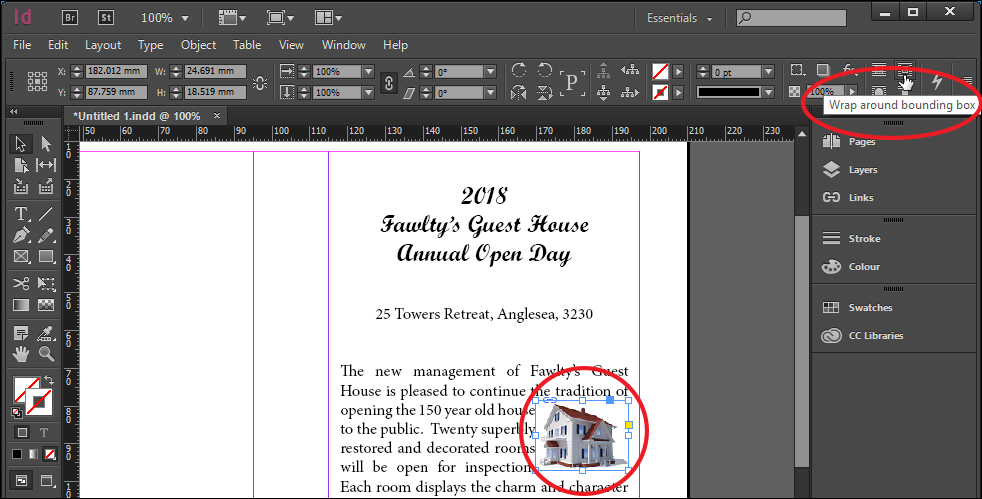
A graphic can be added to the text. Select the SELECTION TOOL and click outside the text frame to deselect it.
Display the FILE menu and select PLACE. Access the House image downloaded from the above link.
Drag a small frame at the right of the right side of the paragraph to insert the image.
The text needs to be told to wrap around the image. Click on the WRAP AROUND BOUNDING BOX icon in the CONTROL panel.
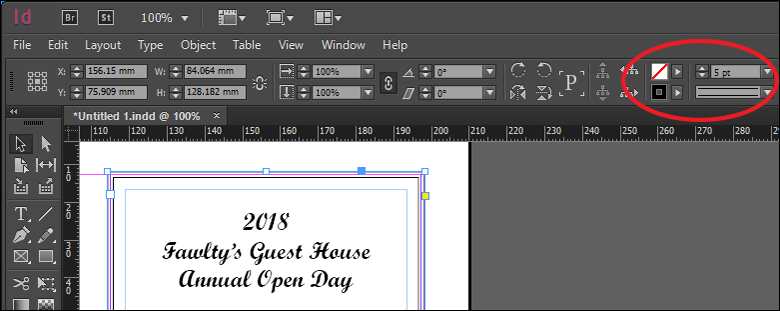
Select the text frame and, in the CONTROL panel, set the STROKE COLOUR to BLACK, the STROKE WEIGHT to 5 pt and the STROKE TYPE to THIN to add a border around the text frame.
Note: You can use the bottom centre handle to adjust the height of the text frame so that the text is evenly displayed. Also, if all the text does not fit in the frame, reduce the size of the image so that it does.
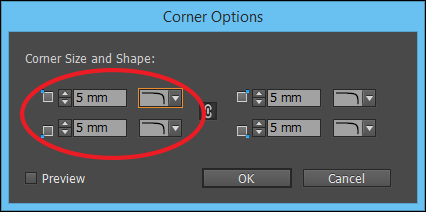
The text frame can be set to have rounded corners. Display the OBJECT menu and select CORNER OPTIONS.
Enter 5 mm in the first box, click on the arrow next to the box and select ROUNDED and select OK.
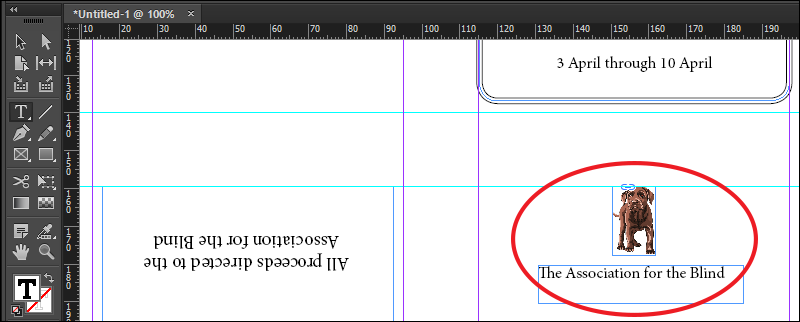
The back of the card will display a small image of a dog and a short message.
Select the SELECTION TOOL, click on the canvas to deselect the previous item then display the FILE menu and select PLACE.
Access the Dog image downloaded from the above link.
Drag a small frame at the top of the bottom right quarter of the page.
Select the TYPE TOOL, add a small text frame below the image and enter the message The Association for the Blind and centre the text under the image.
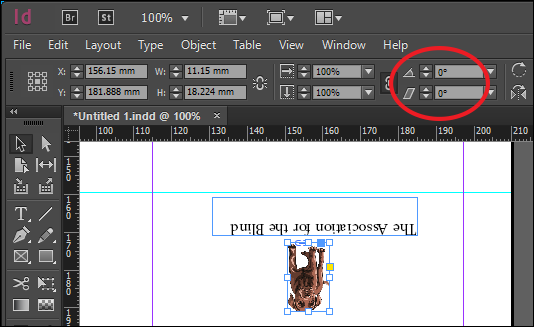
The text and image need to be rotated so that they are upside down. Use the SELECTION TOOL and <Shift> key to select both the image and text frame.
In the CONTROL panel set the ROTATION ANGLE box to 180°.
If necessary, move the items so that they are centred at the top of the quarter. If the image isn’t displayed correctly, click on the FIT CONTENT PROPORTIONALLY button in the CONTROL panel.
Save the document in your Storage folder as Greeting Card.
Check over the document then print a copy and fold it into quarters.