Flyers are advertisements or announcements. They can be very effective if you keep the design simple so that the message stands out. Flyers can announce:
events, such as social outings, meetings and news
promotional events or special offers
a new business venture
a new product or service.
Flyers usually include more, or simply larger, graphics than other publications. So you will need to spend some time working with the graphics in the creation of your flyer. With any form of desktop publishing, careful preparation can save you hours of work.
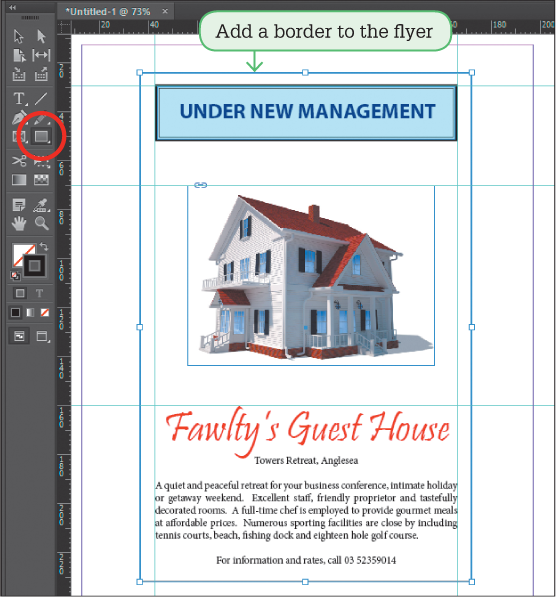
In this exercise, the above flyer for a guest house will be created.
Starting a new document
When you start a publication, the page dimensions are inserted.
Load Adobe InDesign and click on the NEW button in the Welcome screen.
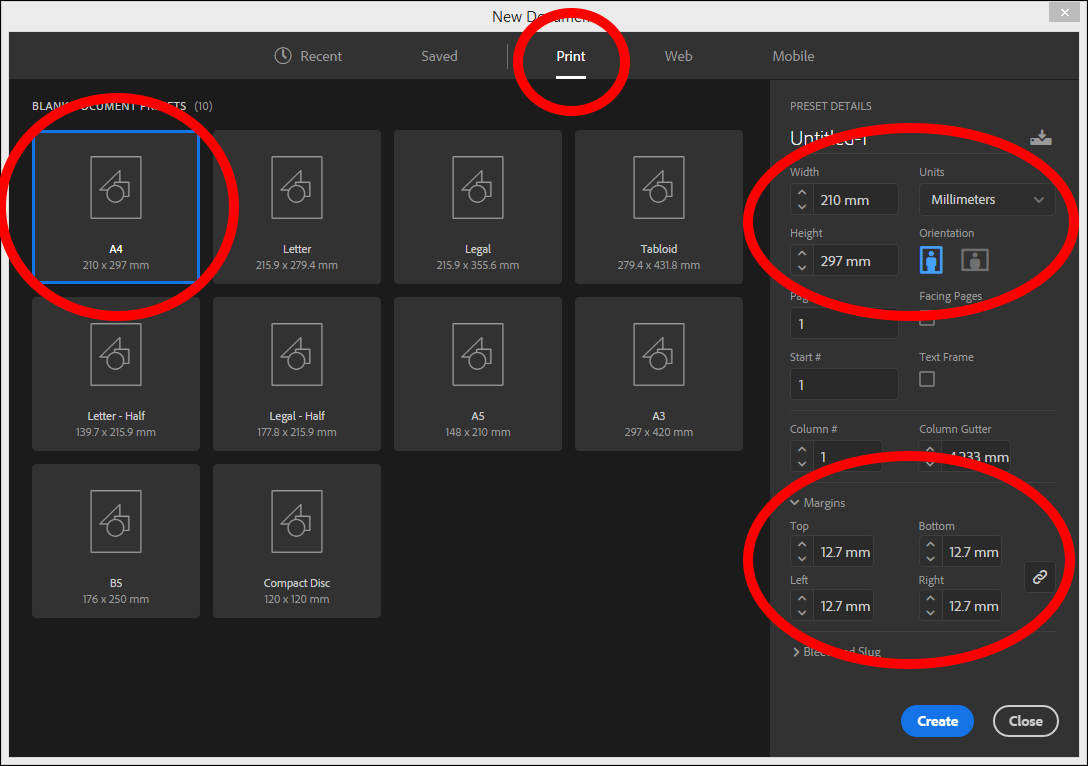
In the NEW DOCUMENT dialogue box select the PRINT category and select the A4 Preset.
Check that the UNITS are set to MILLIMETRES, turn off FACING PAGES and leave the MARGINS at their default settings (12.7 mm). These settings can be changed when needed.
Select CREATE to start the document.
Laying out the page
Guidelines can be added to the page to make the placement of text and graphics easier. These guidelines do not print and they can be moved at any time using the Selection Tool.
Move the Pointer into the top Ruler and drag a guideline down to 30 mm in the left Ruler. Note: A popup box displays the position of the guideline as you drag it.
Drag two more guidelines down to 70 mm and 160 mm.
Entering the main heading
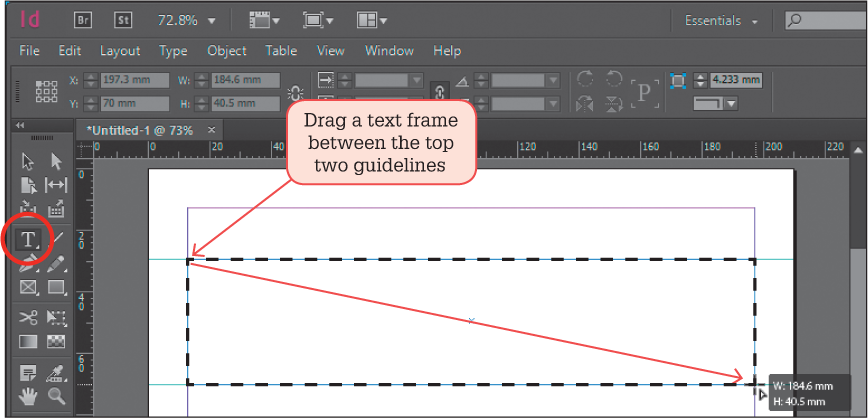
The main heading will be a text frame inside a rectangle.
Select the TYPE TOOL from the Tools panel at the left of the screen and drag a frame from the top left of the first guideline to the bottom right of the second guideline.
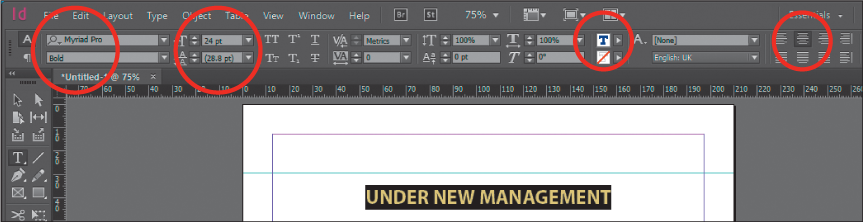
Press <Enter> or <Return> to leave a blank line and enter Under new management and press <Enter> or <Return>.
Highlight the text and, in the CONTROL panel at the top of the screen, set the FONT to MYRIAD PRO, the SIZE to 24 pt, the STYLE to BOLD, the TEXT COLOUR to DARK BLUE and click on the ALIGN CENTRE icon.
Note: The CONTROL panel has two sections, CHARACTER and PARAGRAPH. You swap between the two sections by clicking on the A or ¶ buttons at the left of the panel.
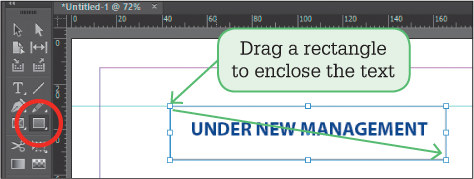
Select the RECTANGLE TOOL from the Tools panel and drag a rectangle around the text from the top guideline and starting at about 40 mm in the top Ruler.
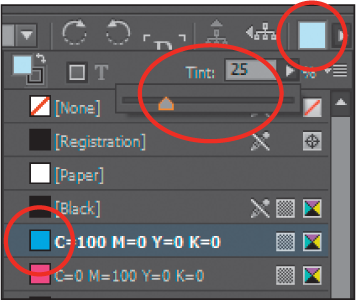
In the CONTROL panel click on the arrow next to the FILL COLOUR box and set the colour to CYAN and the TINT slider to 25%.
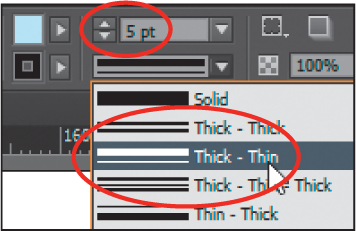
In the CONTROL panel click on the arrow next to the LINE WEIGHT box and set it to 5 pt, then click on the arrow next to the LINE TYPE box and set it to THICK THIN. This will set the border of the rectangle to have two lines, one thick and one thin.
Display the OBJECT menu, highlight ARRANGE and select SEND TO BACK so that the rectangle is behind the text frame.
A graphic will be added below the heading. Guidelines can be added to ensure that the graphic is centred under the heading.
Select the SELECTION TOOL from the Tools panel and click on the canvas to deselect the rectangle.
Drag two guidelines from the left ruler to the left and right edges of the rectangle.
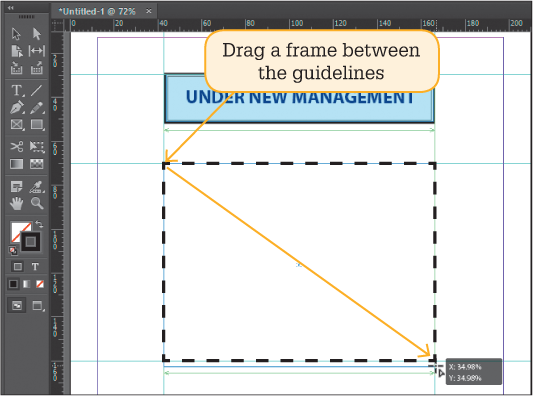
Display the FILE menu and select PLACE. Access the image downloaded from the above link.
Drag a frame between the guides below the heading and the image will be resized to fit within the frame.
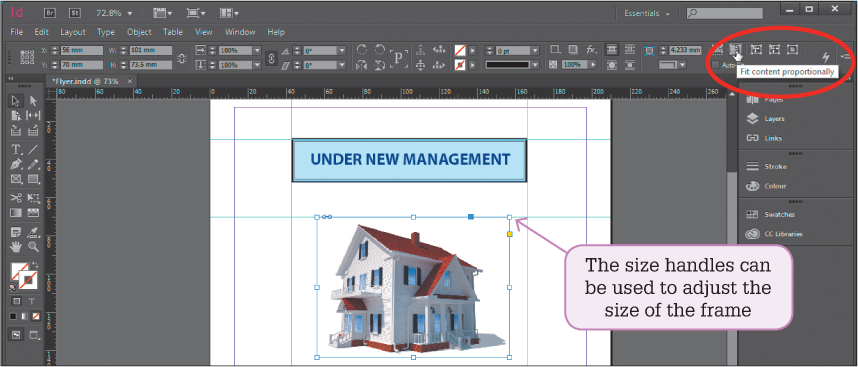
Use the handles around the image to reduce the size of the frame a little.
Use the FIT CONTENT PROPORTIONALLY icon in the CONTROL panel to resize the image within the resized frame.
Note: If you are using a smaller screen, the OBJECT menu, FITTING – FIT CONTENT PROPORTIONALLY can be used to display the image within the frame.
Adding some text
Some text can be added below the image.
Select the TYPE TOOL from the Tools panel and drag a frame from the guideline below the image to the bottom of the page.
Enter the text shown in the diagram below without any formatting.
Highlight the first line and change the FONT to a script font, increase the FONT SIZE and select a TEXT COLOUR.
Highlight the first two lines and click on the ALIGN CENTRE icon in the CONTROL panel to centre them.
Highlight the rest of the text, set its FONT to MINION PRO, 12 pt and click on the JUSTIFY WITH LAST LINE ALIGNED LEFT icon in the CONTROL panel.
Highlight just the last line and CENTRE the text.
Adding a border
To complete the flyer a border will be added around the outside of it.
Select the RECTANGLE TOOL and drag a rectangle around the flyer components.
Display the OBJECT menu, highlight ARRANGE and select SEND TO BACK to send the rectangle behind the other components of the flyer.
Check over the flyer and save it in your storage folder as: Flyer.
Print a copy of the flyer or share your work electronically.