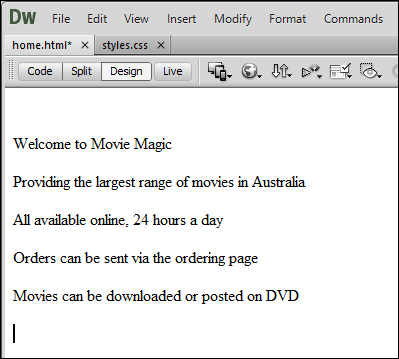
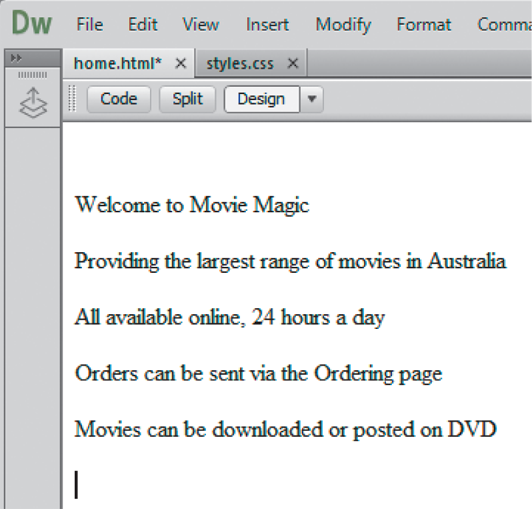
Open the home.html page and set the view at the top of the screen to DESIGN or LIVE.
Press <Enter> or <Return> to leave a blank line and enter the text shown at the right, pressing <Enter> or <Return> after each line.
You can spell check the text using CHECK SPELLING from the COMMANDS menu.
Formatting the text
Each paragraph can be formatted individually, but it is much more efficient to create a series of styles, called CSS styles, which will be recorded in a styles.css file.
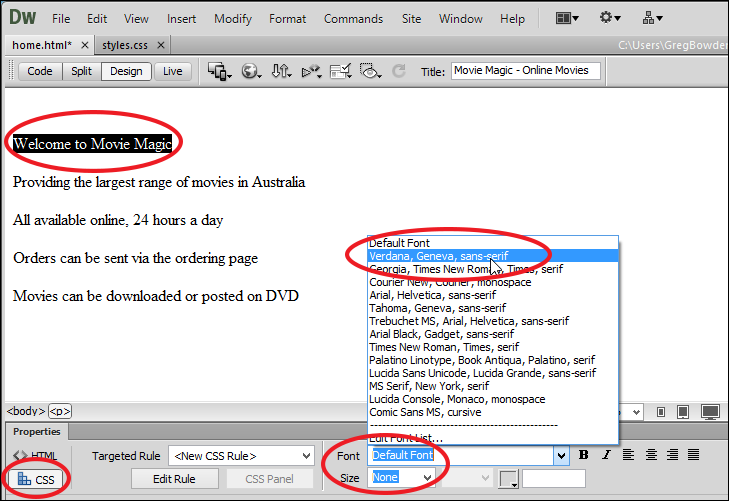
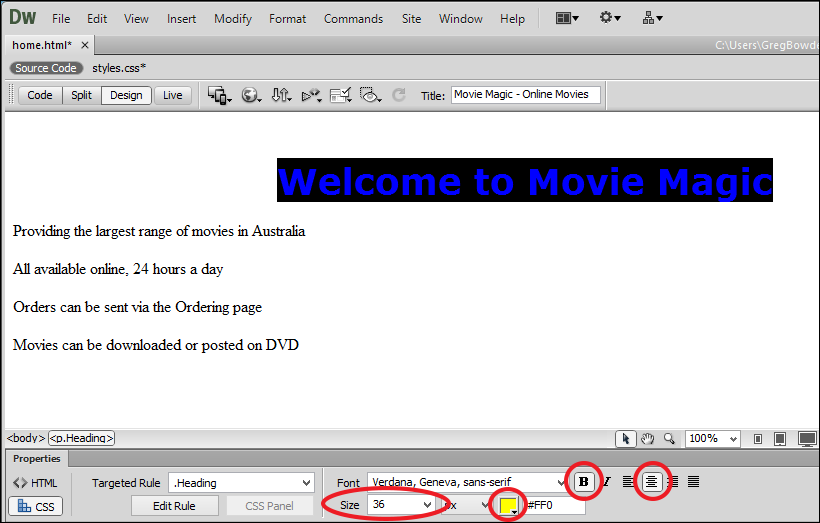
Highlight the first line of text and, in the PROPERTIES panel, turn on the CSS button then set the FONT box to VERDANA.
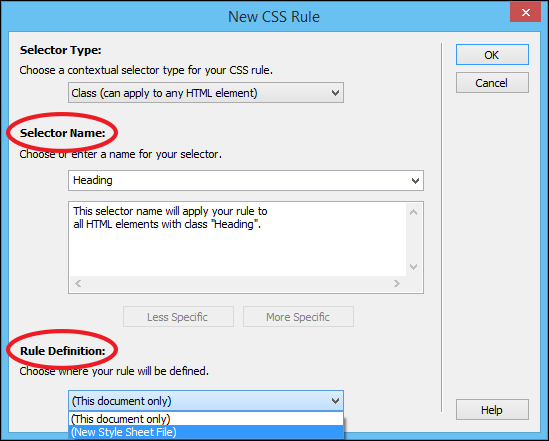
The NEW CSS RULE dialogue box should open. Set the SELECTOR NAME to HEADING, the RULE DEFINITION box to NEW CSS RULE and select OK.
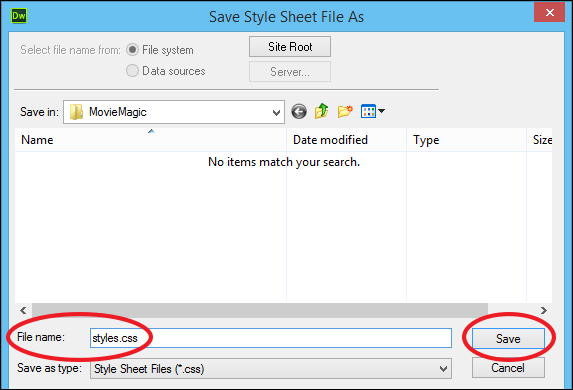
You will be asked to save the CSS RULE. Its file will store all the formatting that you do for the site. Enter the filename styles.css and select SAVE.
In the PROPERTIES panel set the FONT-WEIGHT to BOLDER, the SIZE to 36 px, the COLOUR to YELLOW and the ALIGNMENT to CENTRE to complete the formatting. These formats will be added to the HEADING style.
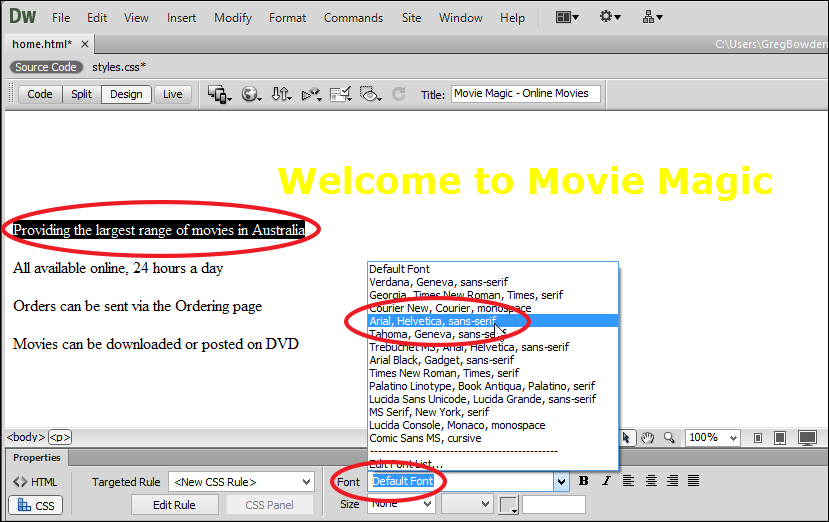
Highlight the next line of text and, in the PROPERTIES panel, turn on the CSS button and set the FONT to ARIAL, HELVETICA, SANS SERIF.
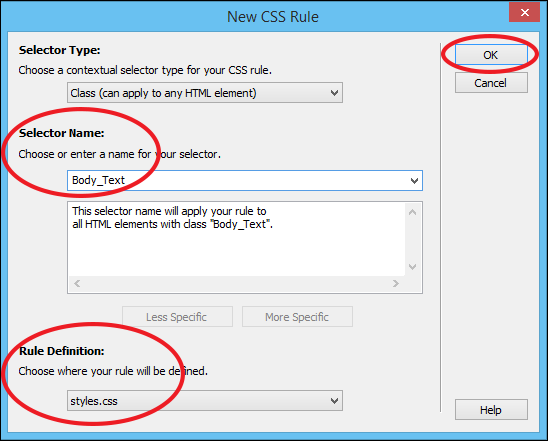
In the CSS RULE dialogue box set the SELECTOR NAME box to Body_Text, the RULE DEFINITION box to the styles.css file and select OK.
Complete the style by setting the FONT-WEIGHT to BOLD, the SIZE to 18 px, the COLOUR to PALE BLUE and the ALIGNMENT to CENTRE.
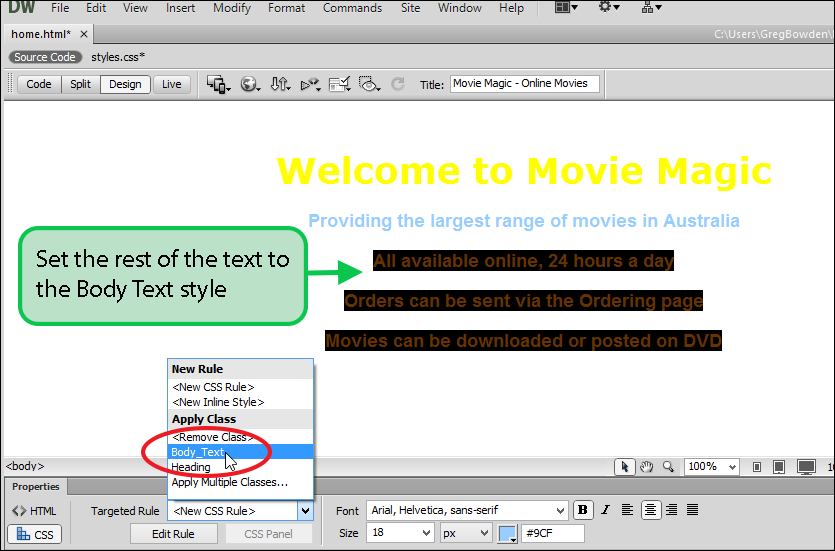
Highlight the last 3 lines of text and set the TARGETED RULE box in the PROPERTIES panel to the Body_Text style.
Adding a background colour to the page
A background colour can be applied to the page.
In the PROPERTIES panel click on the PAGE PROPERTIES button.
Click on the BACKGROUND COLOUR box, select a DARK BLUE or DARK TEAL and press <Enter> or <Return>.
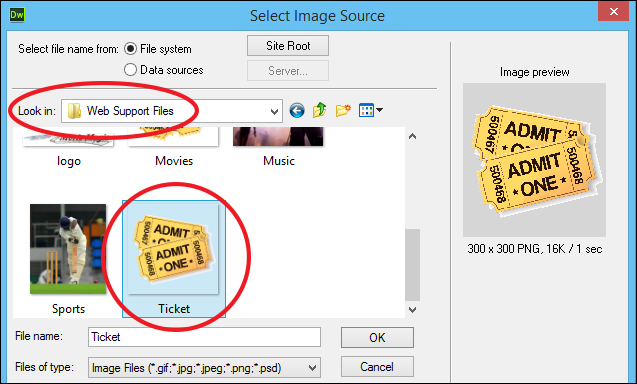
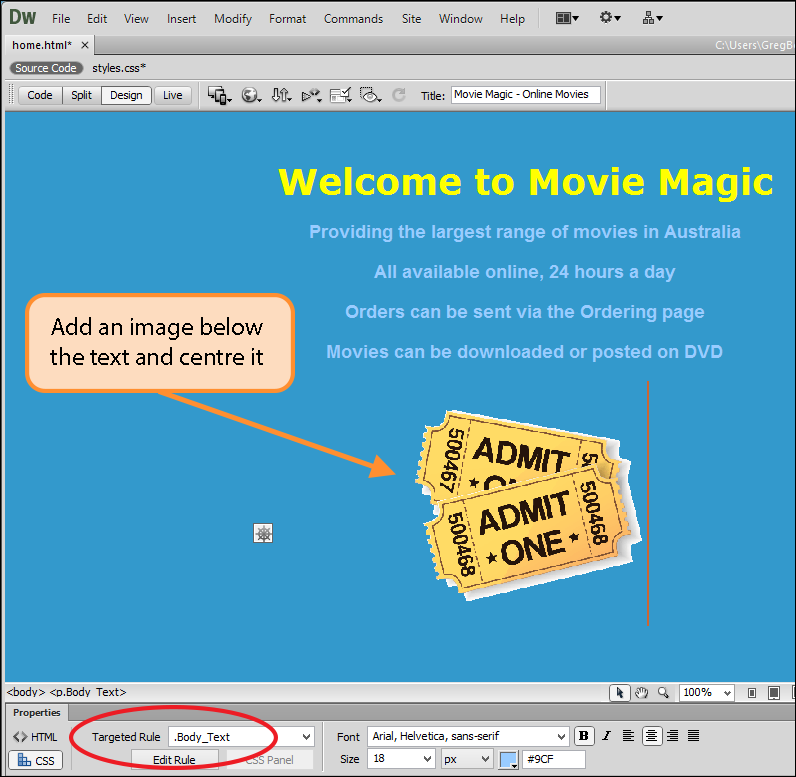
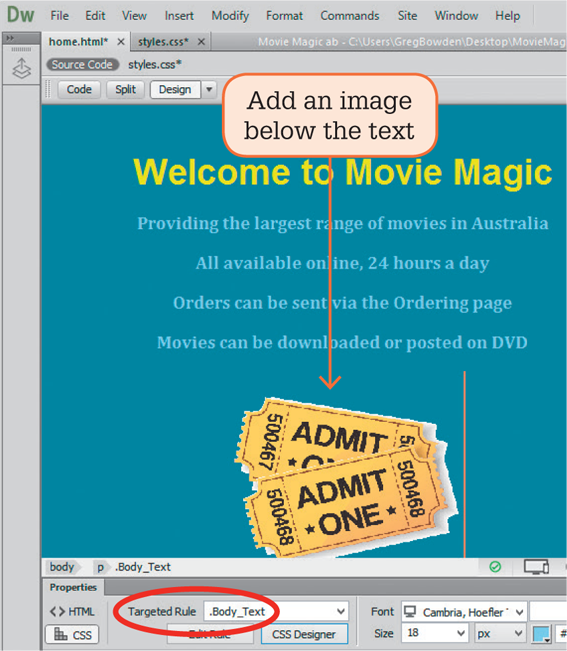
Click on the blank line after the last text then display the INSERT menu and select IMAGE.
Open the Ticket image downloaded from the link above.
You will be asked to copy the file to your site’s ROOT FOLDER, select YES.
Create a NEW FOLDER called images. Open the folder and select SAVE to store the image in that folder.
In the ALTERNATE TEXT dialogue box set the TEXT NAME to Ticket image and select OK to insert the image.
You can use the bottom right handle of the image to adjust its size. Holding down the <Shift> key will maintain the proportions of the image.
The Body_Text style can be used to centre the image. Click to the right of the image and set the TARGETED RULE box in the PROPERTIES panel to Body_Text.
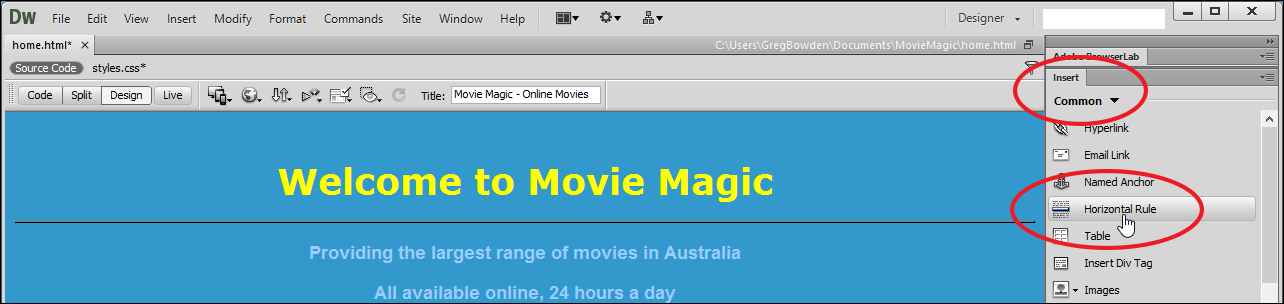
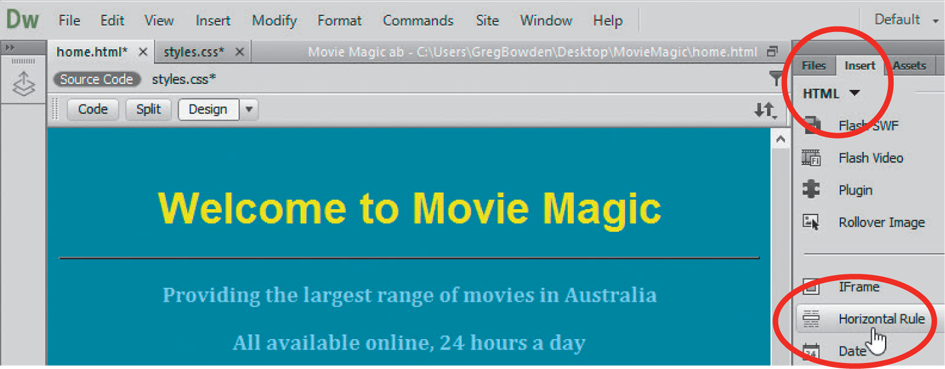
Adding a line to separate the heading
A horizontal line can be added to the page to separate the heading from the text.
Click at the beginning of the second line of text.
Open the INSERT tab in the PANEL GROUP at the right of the screen and, in the COMMON section, click on the HORIZONTAL RULE option. Note: The PROPERTIES panel can be used to format the line. If the INSERT panel is not in the PANEL GROUP, you can open it from the WINDOW menu.
Select SAVE ALL from the FILE menu to save both the HOME and STYLES pages.
You can click on the PREVIEW/DEBUG IN BROWSER icon in the STATUS BAR at the base of the page and select a browser to see how the page will look in a browser, then close the browser.
You might also like to open the styles.css file from the files panel to see what formatting information has been recorded. Once you understand the code, you can enter the style code manually.
Open the home.html page and set the view at the top of the screen to DESIGN or LIVE.
Press <Enter> or <Return> to leave a blank line and enter the text shown at the right, pressing <Enter> or <Return> after each line.
You can spell check the text.
Formatting the text
Each paragraph can be formatted individually, but it is much more efficient to create a series of styles, called CSS styles, which will be recorded in the styles.css file.
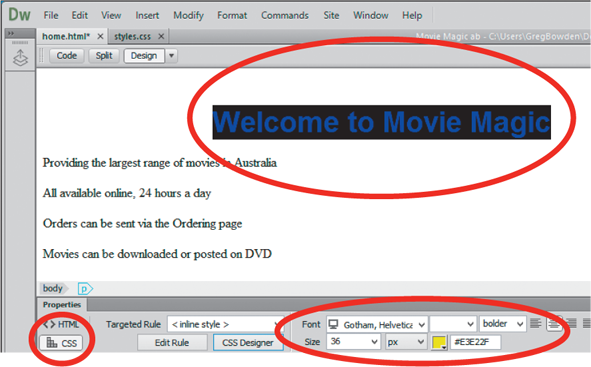
Highlight the first line of text and, in the Properties panel, turn on the CSS button and set the FONT to GOTHAM, the FONT-WEIGHT to BOLDER, the SIZE to 36 px, the COLOUR to YELLOW and the ALIGNMENT to CENTRE.
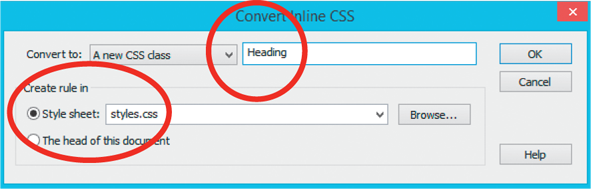
Display the TOOLS menu, highlight CSS and select CONVERTINLINE CSS TO RULE.
Call the style Heading and use the BROWSE button to set the STYLE SHEET box to your styles.css file, then select OK.
Highlight the next line of text and, in the Properties panel, turn on the CSS button and set the FONT to CAMBRIA, the FONT-WEIGHT to BOLD, the SIZE to 18 px, the COLOUR to PALE BLUE and the ALIGNMENT to CENTRE.
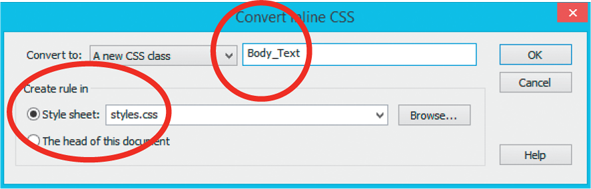
Display the TOOLS menu, highlight CSS and select CONVERTINLINE CSS TO RULE.
Call the style: Body_Text and check that the STYLE SHEET box is set to your styles.css file, then select OK.
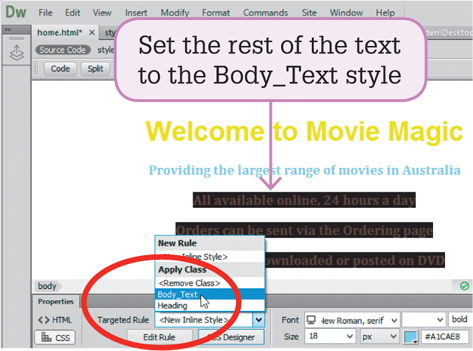
Highlight the last three lines of text and set the TARGETED RULE box in the Properties panel to the BODY_TEXT style.
Adding a background colour to the page
A background colour can be applied to the page.
In the Properties panel, click on the PAGE PROPERTIES button.
Click on the BACKGROUND COLOUR box, select a DARK BLUE or DARKTEAL and press <Enter> or <Return>.
Click on the blank line after the last text then display the INSERT menu and select IMAGE.
Open the Ticket image downloaded from the link above.
When asked to copy the file to your site’s ROOT FOLDER, select YES.
Create a NEW FOLDER called Images. Open the folder and select SAVE to store the image in that folder.
You can use the bottom right handle of the image to adjust its size. Holding down the SHIFT key will maintain the proportions of the image.
The BODY_TEXT style can be used to centre the image. Click to the right of the image and set the TARGETED RULE box in the Properties panel to BODY_TEXT.
Adding a line to separate the heading
A horizontal line can be added to the page to separate the heading from the text.
Click at the beginning of the second line of text.
Open the INSERT tab in the PANEL GROUP at the right of the screen and, in the HTML section, scroll down and click on the HORIZONTAL RULE option. Note: The Properties panel can be used to format the line.
Select SAVE ALL from the FILE menu to save both the Home and Styles pages.
You can click on the REAL-TIME REVIEW icon in the STATUSBAR at the base of the page and select a browser to see how the page will looks.