Companies usually like to show all the data they are dealing with on the one screen. Professional-looking screen layouts can be created to make the data entry process easier. Fields can be moved, graphics, shading and lines can be added and so on.
Also, you can set fields to just display specific values in a popup list or through the use of check boxes or radio buttons. The easier the data entry process is made, the less chance there is of incorrect data being entered. Data entry screens are not usually printed.
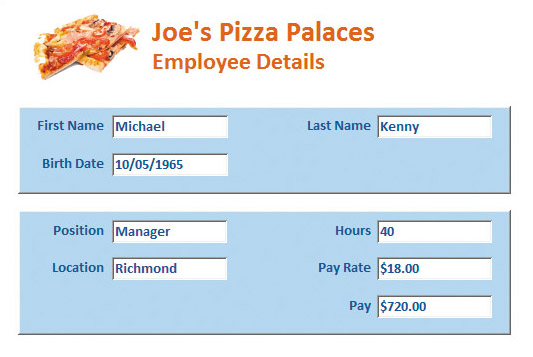
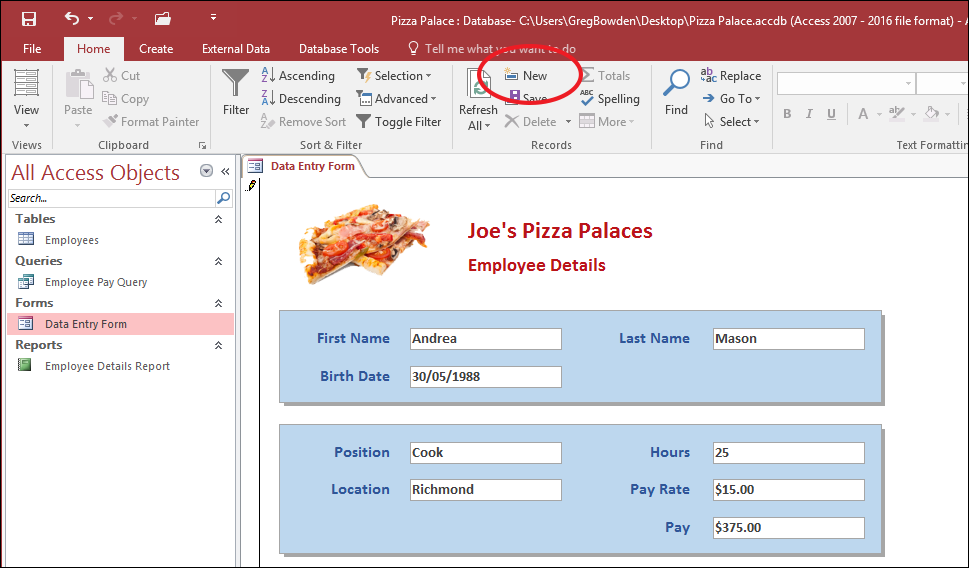
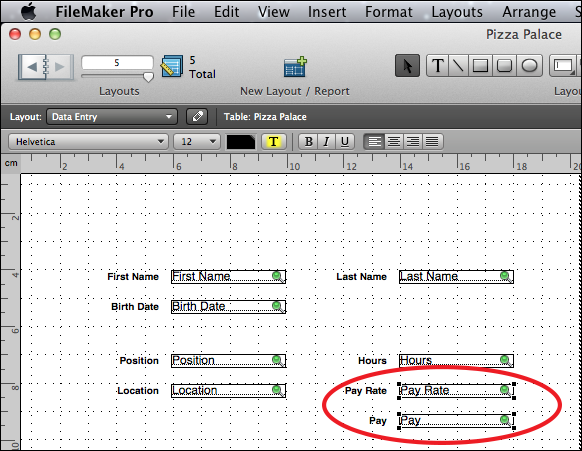
The following data entry screen for Joe’s Pizza Palaces needs to be created. There are simplified steps below or more detailed steps in the following additional exercise. Locate the sample Pizza image downloaded from the above link or you can find your own image.
For Microsoft Access:
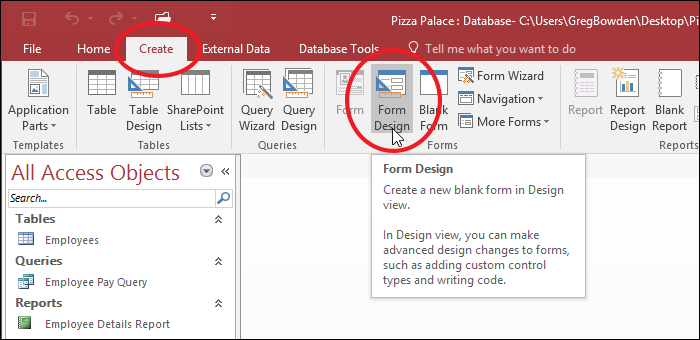
Open the CREATE tab in the ribbon and select FORM DESIGN to start a new form.
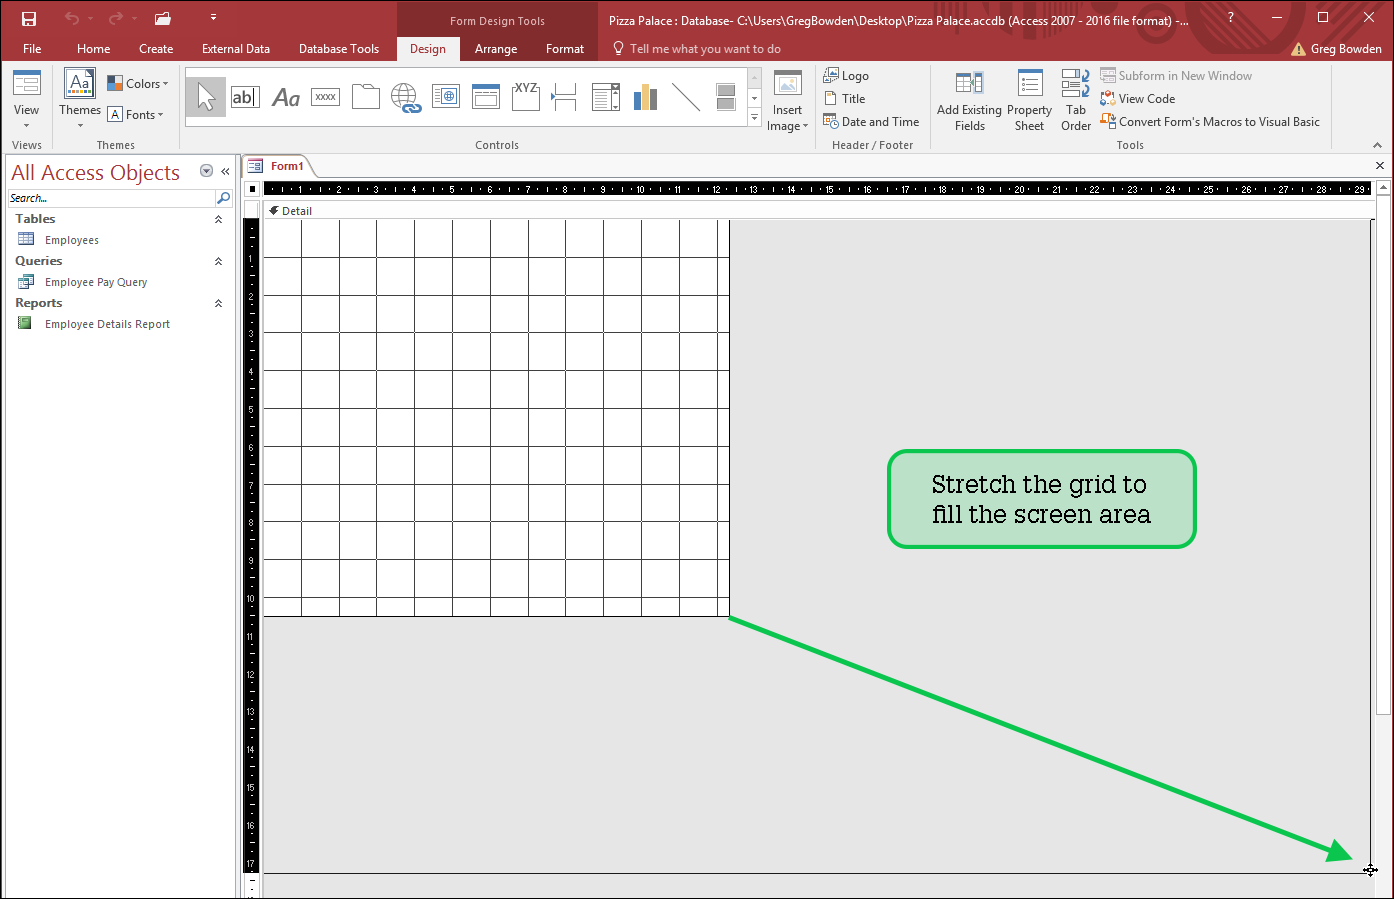
Drag the bottom right corner of the grid so that the grid fills the whole screen.
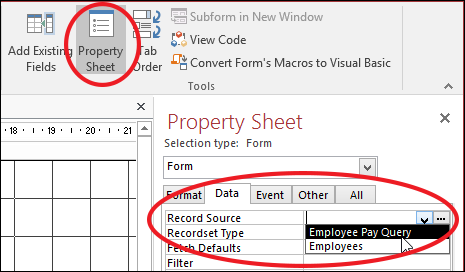
Click on the PROPERTY SHEET icon in the DESIGN tab of the ribbon to open the PROPERTY SHEET pane.
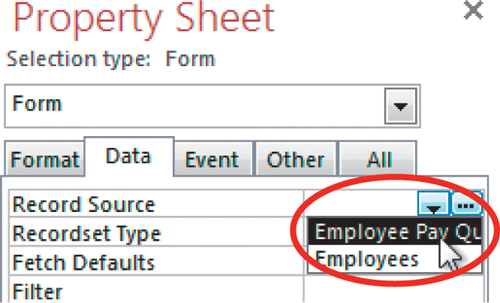
Open the DATA tab in the PROPERTY SHEET pane and set the RECORD SOURCE box to the EMPLOYEE PAY QUERY. This links the form to data in the database. You can link the form to the query or the table, but the query shows the PAY calculation.
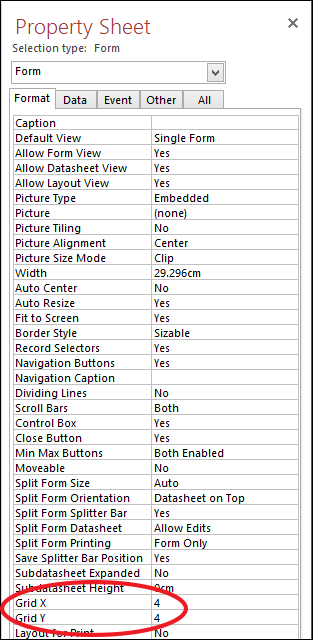
Click on the FORMAT tab in the PROPERTY SHEET pane and set the GRID X and GRID Y values to 4 to create a more accurate grid.
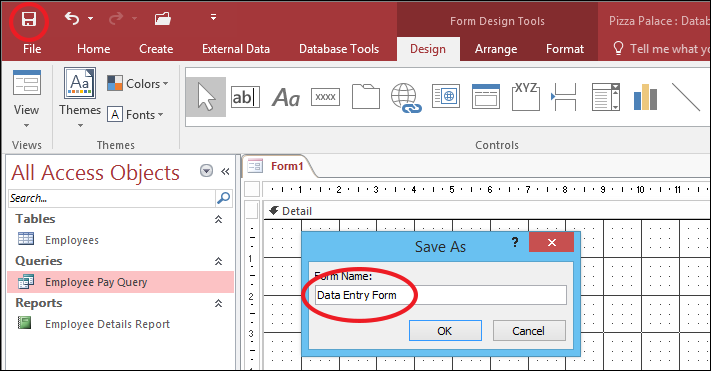
Click on the SAVE icon in the QUICK ACCESS TOOLBAR and save the form as DATA ENTRY FORM.
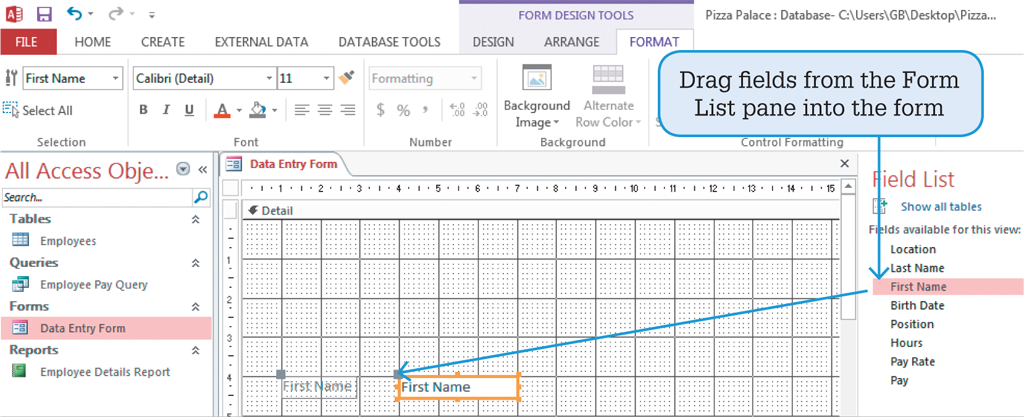
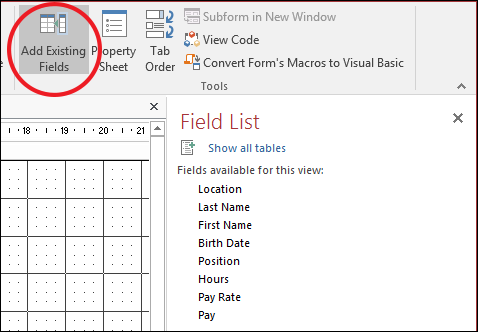
Click on the ADD EXISTING FIELDS icon in the DESIGN tab of the ribbon and drag fields one by one from the FIELDS pane to the positions shown in the diagram at the start of the exercise.
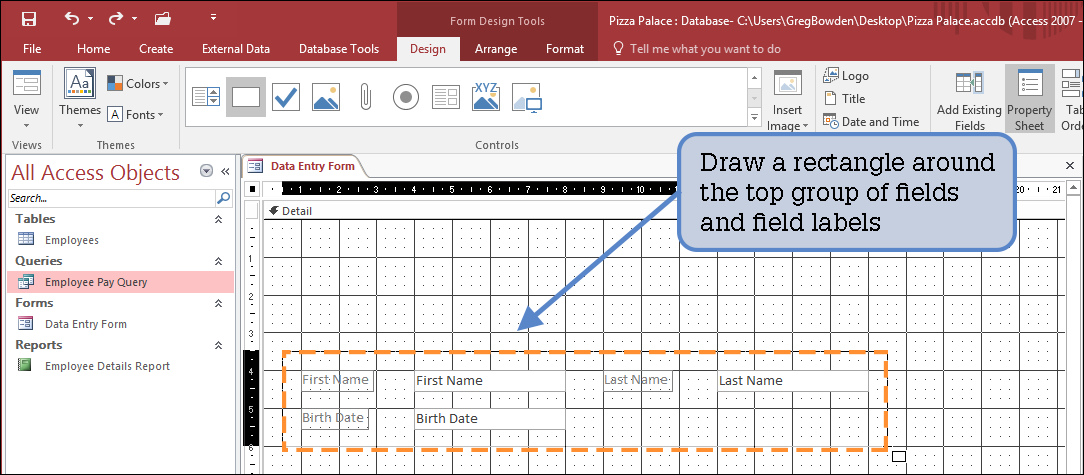
Use the RECTANGLE control from the DESIGN tab to add rectangles around the field boxes, shade the rectangles and send them behind the field boxes (ARRANGE tab).
Add an image and labels at the top of the form using the controls in the DESIGN tab. Format the labels and fields.
Save the form and set the view to FORM VIEW. If you need to return to the form design to make adjustments, select FORM DESIGN from the VIEW tab.
For FileMaker Pro:
Set the screen to LAYOUT MODE by pressing <Ctrl+L> or <Command+L>.
Display the LAYOUTS menu, select NEW LAYOUTS/REPORT, call the layout ‘Data entry’, select BLANK LAYOUT and click on FINISH.
Delete the HEADER and FOOTER parts from the layout by selecting each tab and pressing the DELETE key, then drag the BODY part down so that it fills the whole screen.
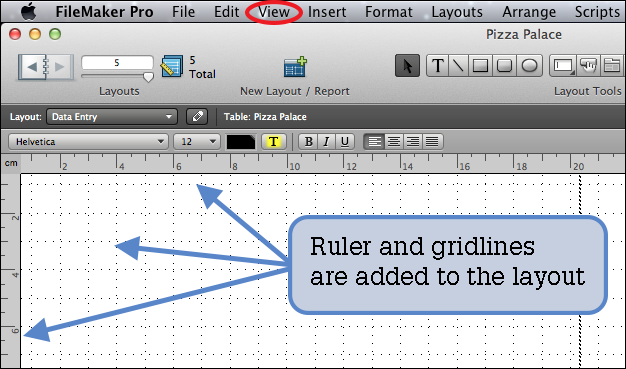
Use the VIEW menu to turn on GRAPHICS RULERS, TEXT RULER and RULER LINES.
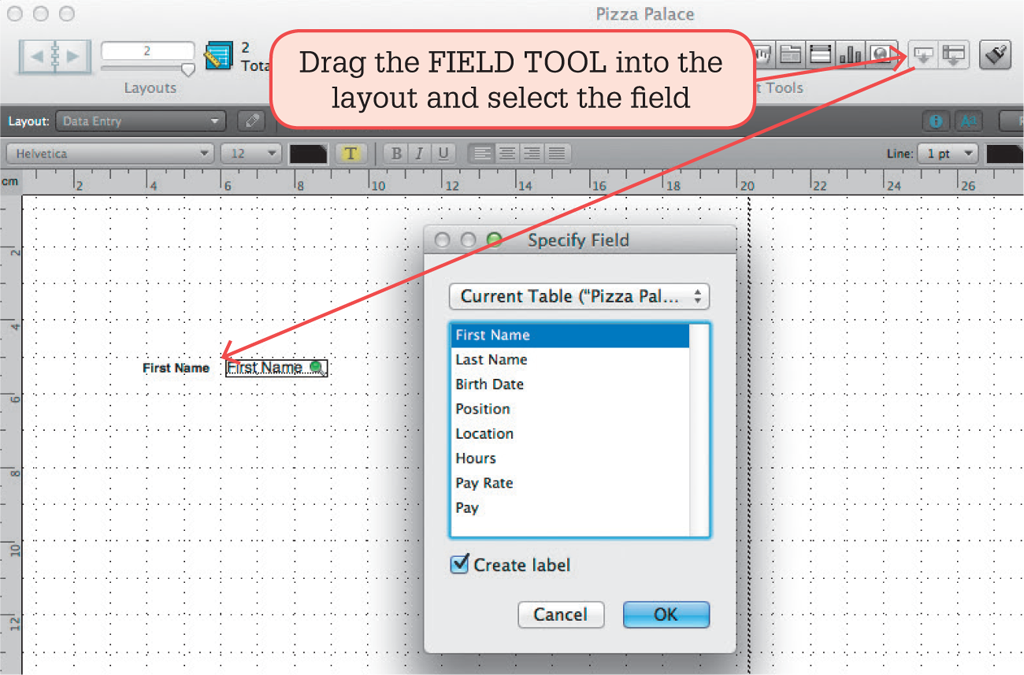
Click on the FIELD TOOL box in the LAYOUT TOOLS and drag the box to the left of the layout.
In the provided field list click on FIRST NAME and select OK to insert the field.
Drag the FIELD TOOL to the positions shown in the diagram at the start of the exercise to insert the rest of the fields.
Use the RECTANGLE TOOL from the LAYOUT TOOLS to add rectangles around the field boxes, shade the rectangles using the FORMATTING BAR and send the rectangles behind the field boxes (ARRANGE menu).
Use the INSERT menu – PICTURE to add a pizza image to the top of the layout then use the TEXT TOOL from the LAYOUT TOOLS to add headings. Format the labels and fields.
Press <Ctrl+B> or <Command+B> to return to BROWSE MODE. If you need to return to the layout to make adjustments, <Ctrl+L> or <Command+L> can be pressed.
Use your data entry screen to enter the following records:
Open the CREATE tab in the RIBBON and click on the FORM DESIGN icon.
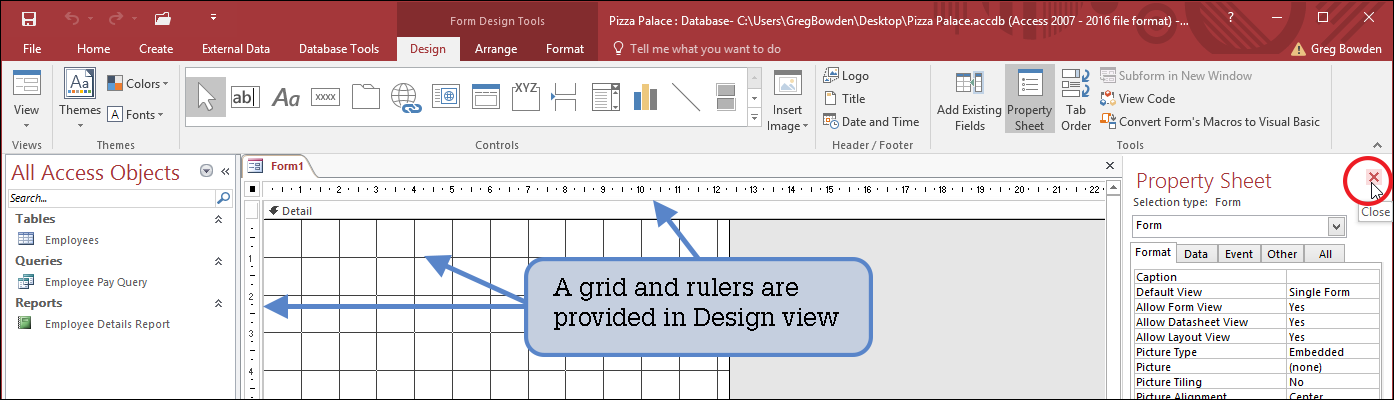
The form is opened in DESIGN VIEW, which has a grid in the DETAIL section and rulers at the top and left.
Close the PROPERTY SHEET pane at the right of the screen if it is open to make it easier to resize the form.
Move the pointer over the bottom right corner of the grid. The cursor should change to a cross-hair with arrows. Hold down the mouse button and drag the corner to the bottom right corner of the screen. Note: When creating a detailed data entry screen, usually as much of the screen as possible is used.
Linking the form to the data table
Before entering content into a form, the table or query that stores the data must be specified.
Click on the PROPERTY SHEET icon in the FORM DESIGN TOOLS – DESIGN tab to open the PROPERTY SHEET pane.
Open the DATA tab and set the RECORD SOURCE box to the EMPLOYEE PAY QUERY.
Setting the grid
The grid that is provided can be changed to show fewer dots.
In the PROPERTY SHEET pane open the FORMAT tab.
Set the GRID X and GRID Y boxes, which are near the bottom of the list, to 4 so that there are 4 dots per cm.
Inserting fields
Fields and labels can be placed anywhere in the form. The purpose of a data entry form is to make the data as easy as possible to view and enter, so time is usually taken to make data entry screens look attractive.
Click on the ADD EXISTING FIELDS icon in the FORM DESIGN TOOLS – DESIGN tab and the FIELD LIST pane replaces the PROPERTY SHEET pane.
Inserting the First Name field
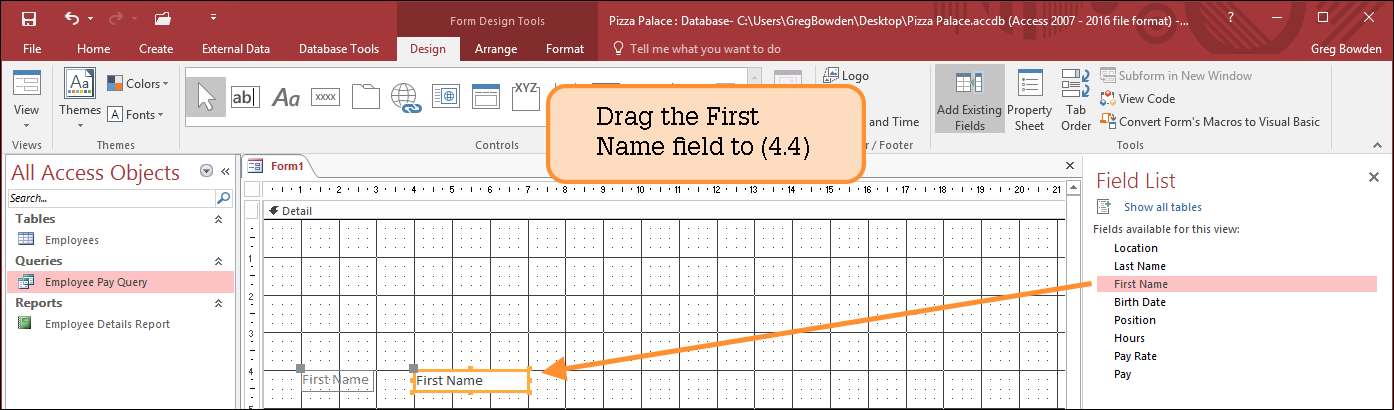
Fields can be inserted into the form one at a time. The FIRST NAME field will be inserted first.
Select the FIRST NAME field in the FIELD LIST pane then drag the field (which attaches to the pointer) to be in line with 4 cm in the top Ruler and 4 cm in the left Ruler.
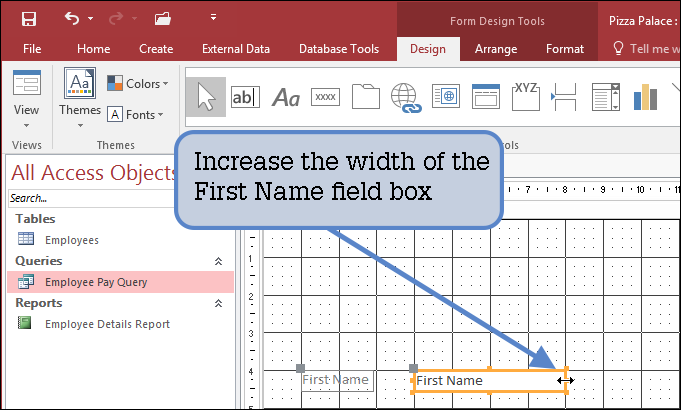
Drag the centre right ‘handle’ of the FIRST NAME field box across to 8 cm in the top Ruler to increase its width to 4 cm.
Inserting the Last Name field
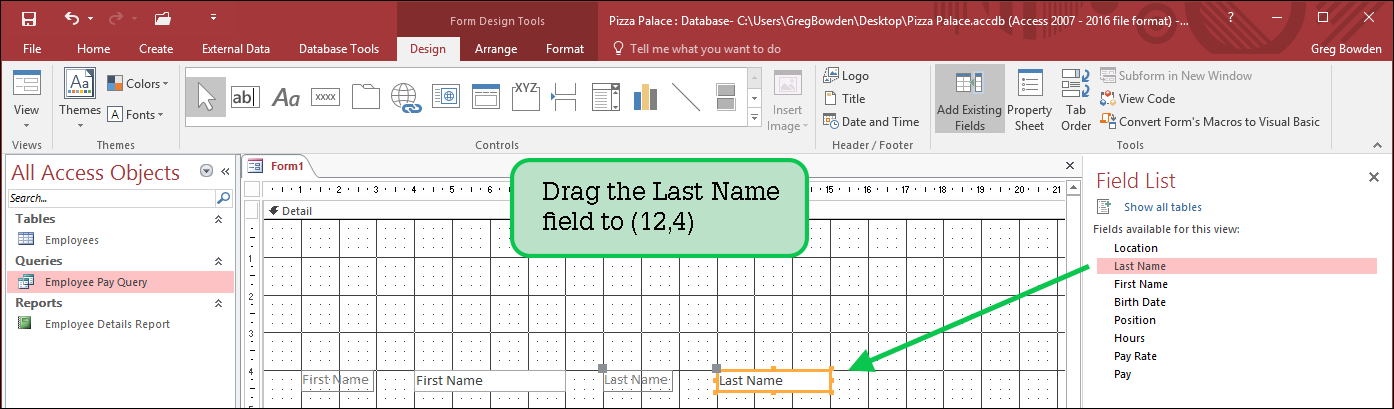
Select the LAST NAME field in the FIELD LIST pane then drag the field to be in line with 12 cm in the top Ruler and 4 cm in the left Ruler.
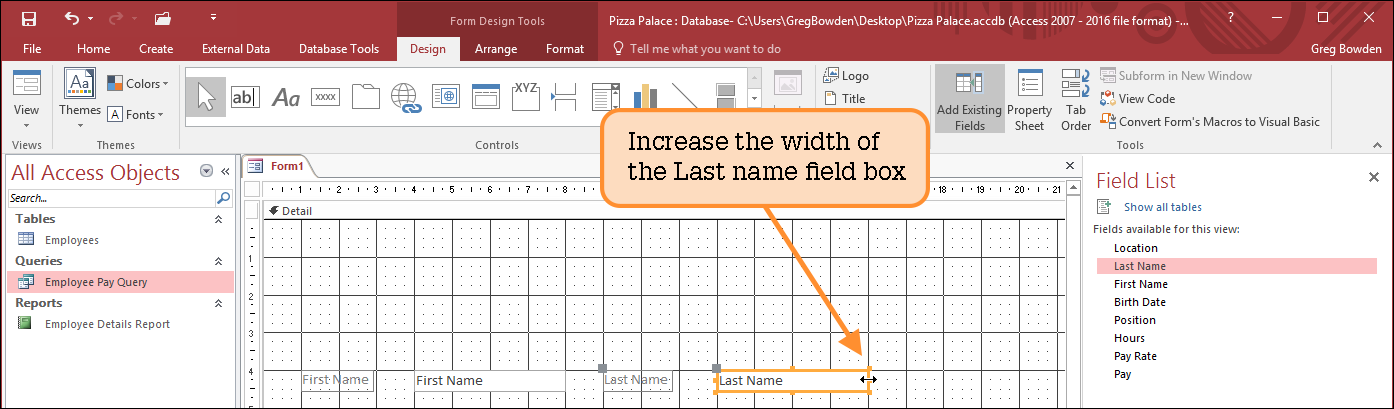
Drag the centre right ‘handle’ of the LAST NAME field box across to 16 cm in the top Ruler to increase its width to 4 cm. Note: The coordinates on the grid are read as (12, 4); that is, 12 cm in the top Ruler and 4 cm in the left Ruler.
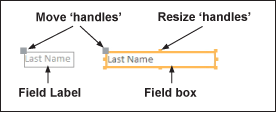
When you drag a field into the form, a series of ‘handles’ are placed around the field box and its label. These ‘handles’ allow the object (called a control in Access) to be moved or resized. The diagram summarises the ‘handles’. Note:
• Dragging a MOVE HANDLE just moves the field label or field box, not both.
• Dragging the field box border or field label border moves both controls together.
• Moving a RESIZE HANDLE resizes just the selected control.
Inserting the Birth Date field
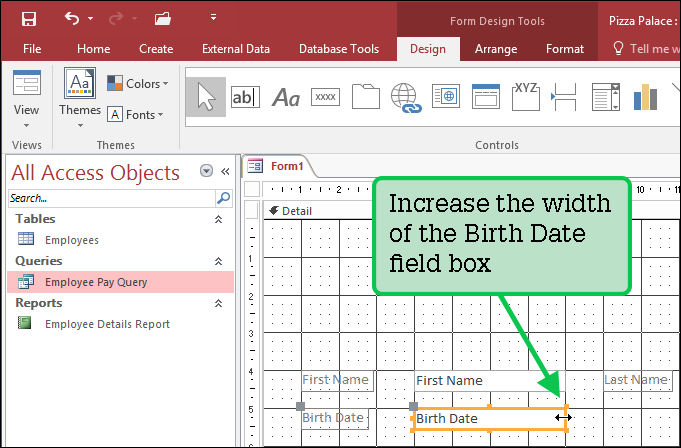
Select the BIRTH DATE field in the FIELD LIST pane then drag the field to (4, 5).
Drag the centre right ‘handle’ of the BIRTH DATE field box across to 8 cm in the top Ruler to increase its width to 4 cm.
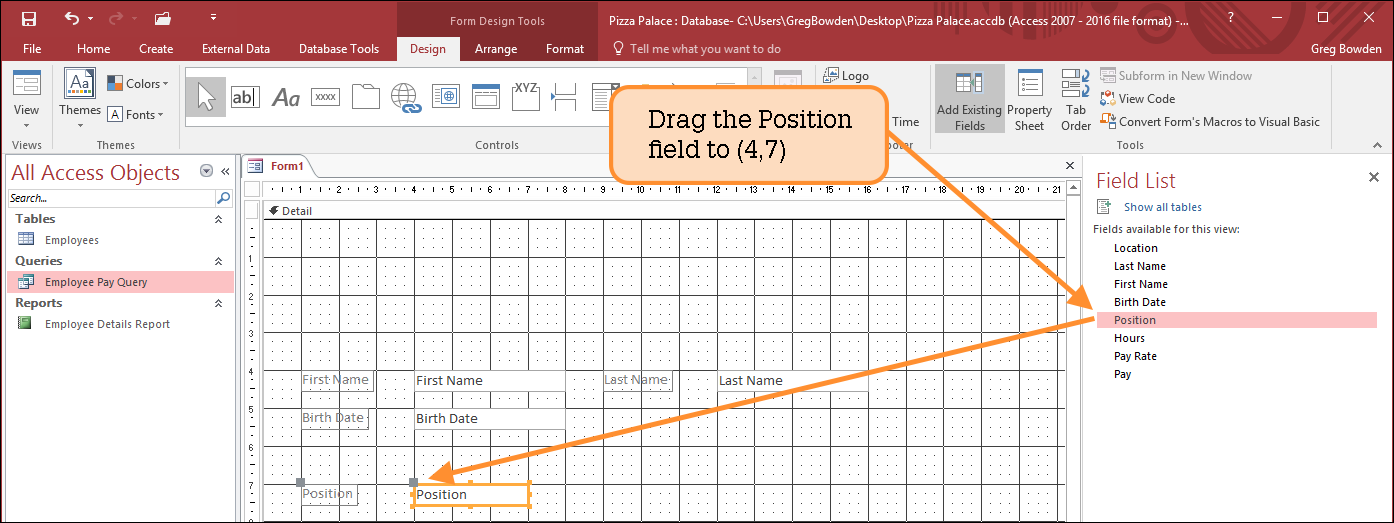
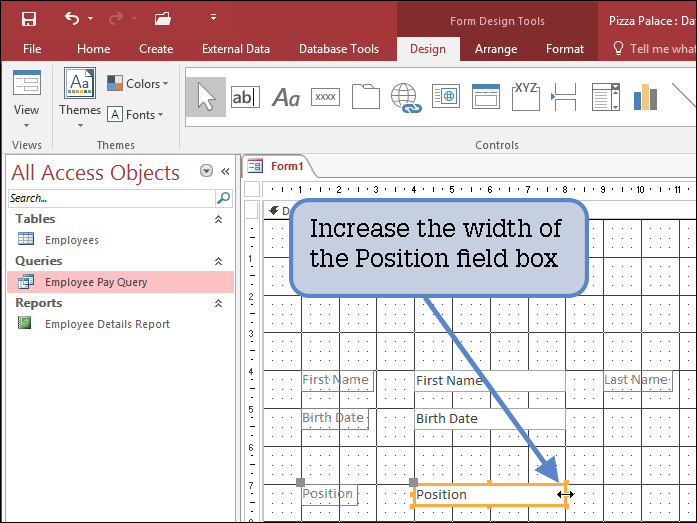
Inserting the Position field
Select the POSITION field in the FIELD LIST pane then drag the field to (4, 7).
Drag the centre right ‘handle’ of the POSITION field box across to 8 cm in the top Ruler to increase its width to 4 cm.
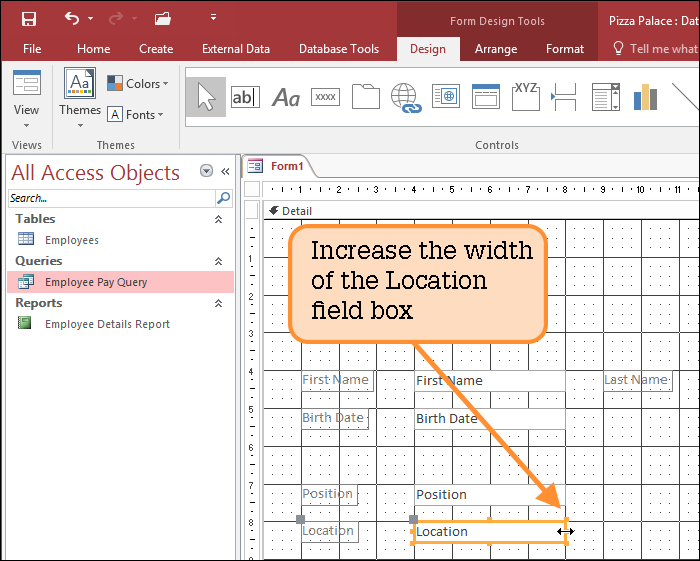
Inserting the rest of the fields
Select the LOCATION field in the FIELD LIST pane then drag the field to (4, 8).
Drag the centre right ‘handle’ of the LOCATION field box across to 8 cm in the top Ruler to increase its width to 4 cm.
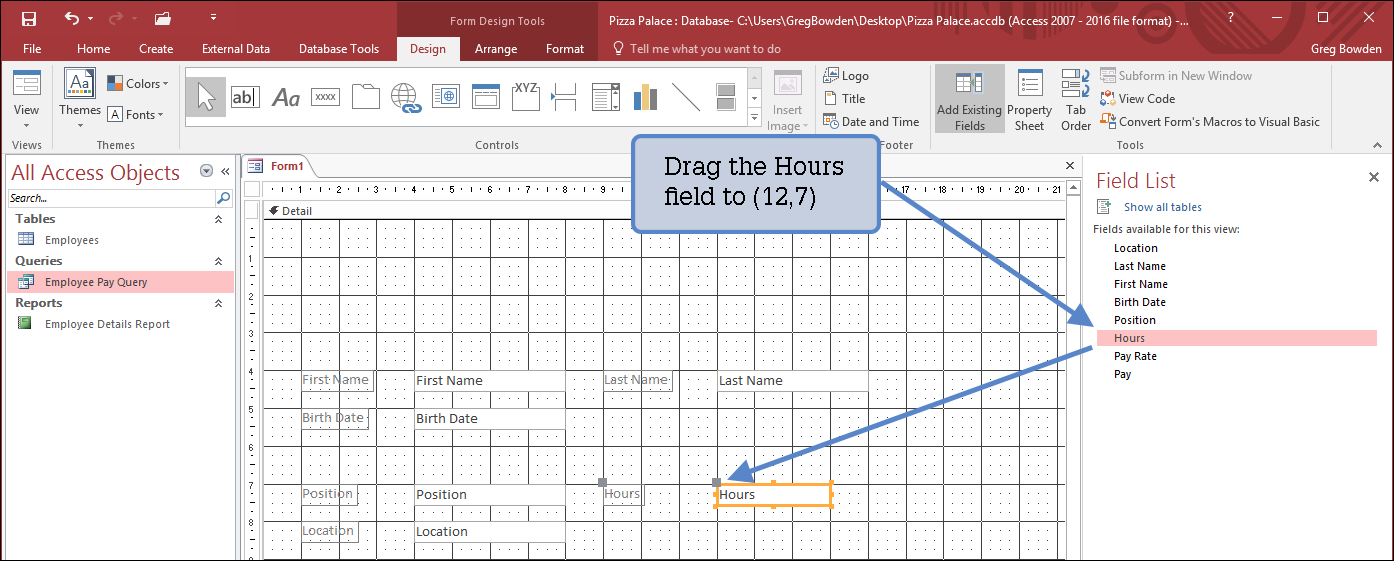
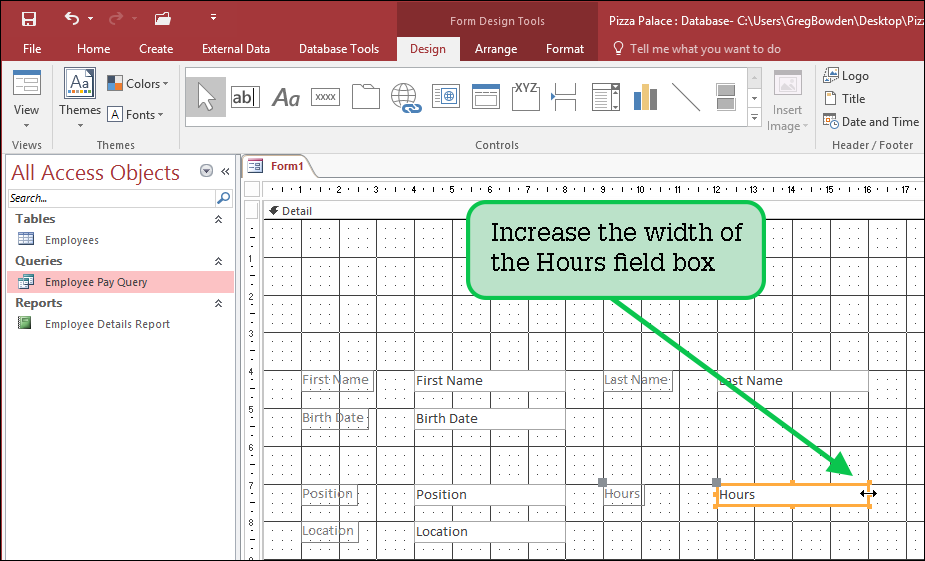
Select the HOURS field in the FIELD LIST pane then drag the field to (12, 7).
Drag the centre right ‘handle’ of the HOURS field box across to 16 cm in the top Ruler to increase its width to 4 cm.
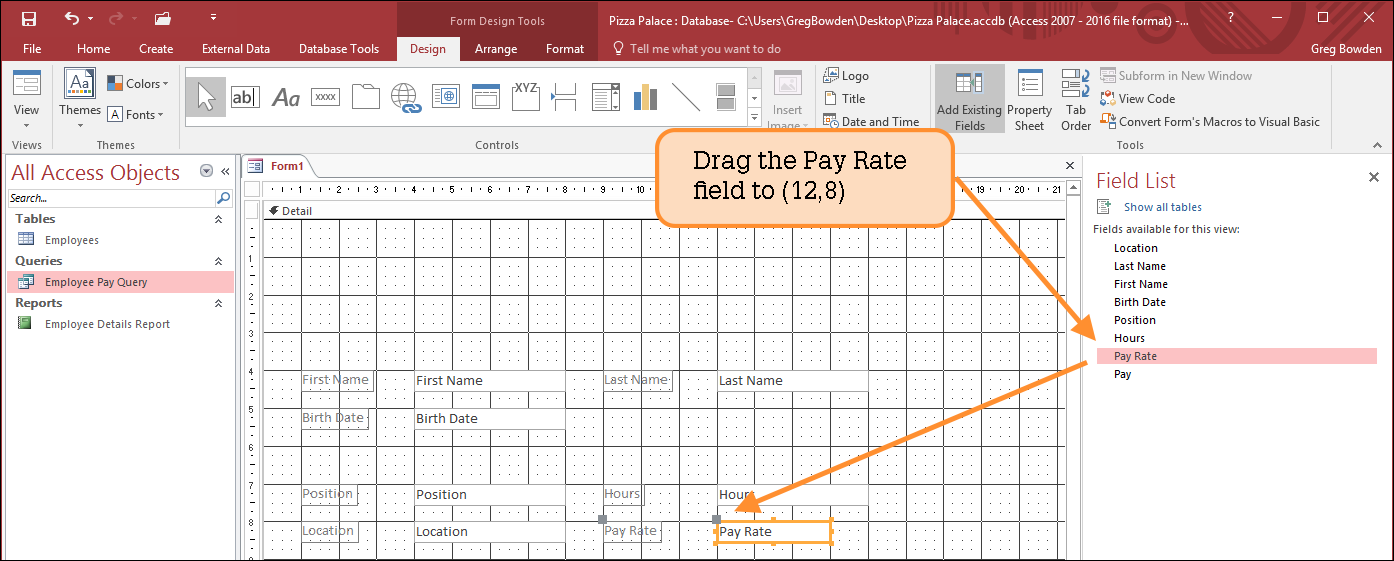
Select the PAY RATE field in the FIELD LIST pane then drag the field to (12, 8).
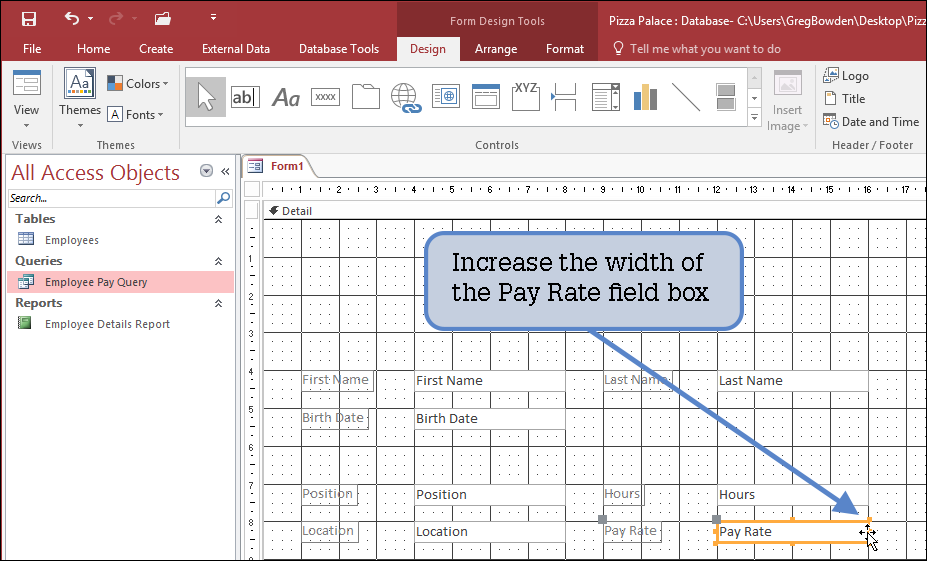
Drag the centre right ‘handle’ of the PAY RATE field box across to 16 cm in the top Ruler to increase its width to 4 cm.
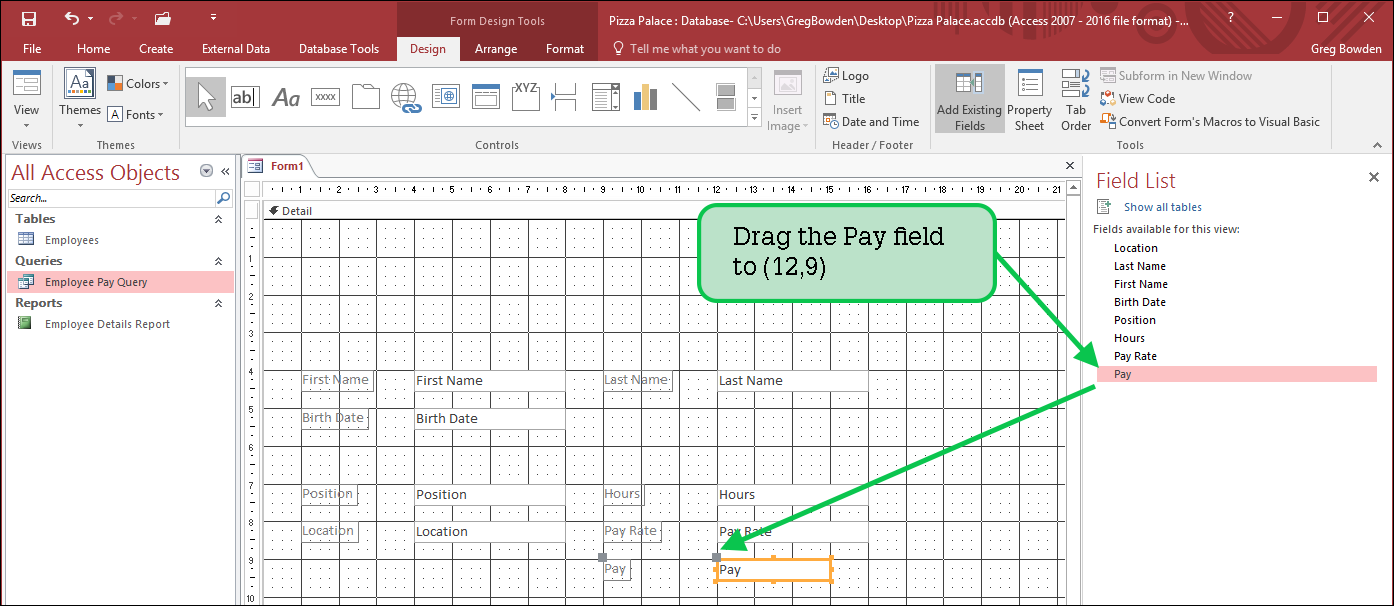
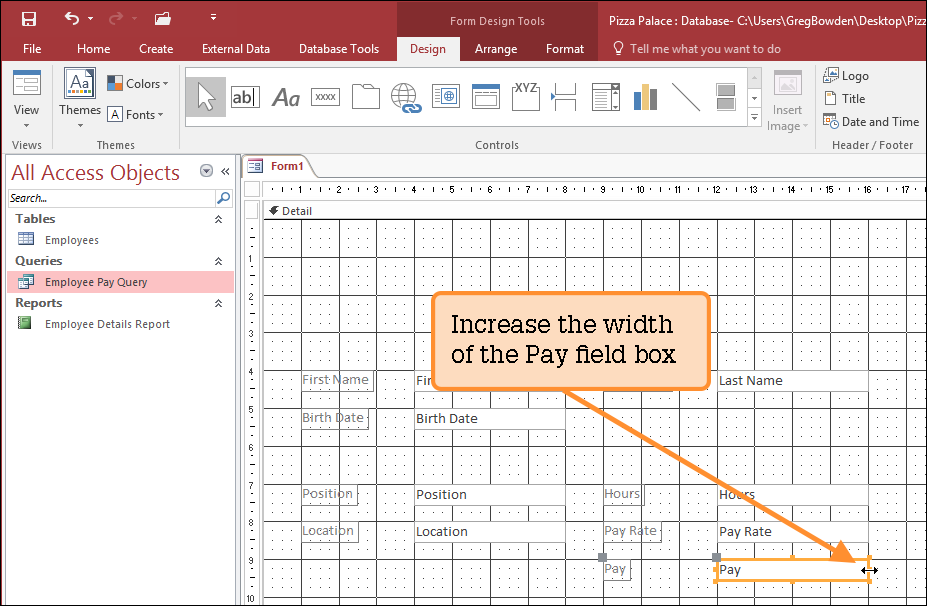
Select the PAY field in the FIELD LIST pane and drag the field to (12, 9).
Drag the centre right ‘handle’ of the PAY field box across to 16 cm in the top Ruler to increase its width to 4 cm.
Saving the form
You should save the form regularly as you build it. Microsoft Access saves any data that you enter into a form automatically, but it does not automatically save any of the designing that you carry out.
Click on the SAVE icon in the QUICK ACCESS TOOLBAR, call the form: Data Entry Form and select OK to save the form.
Formatting the fields
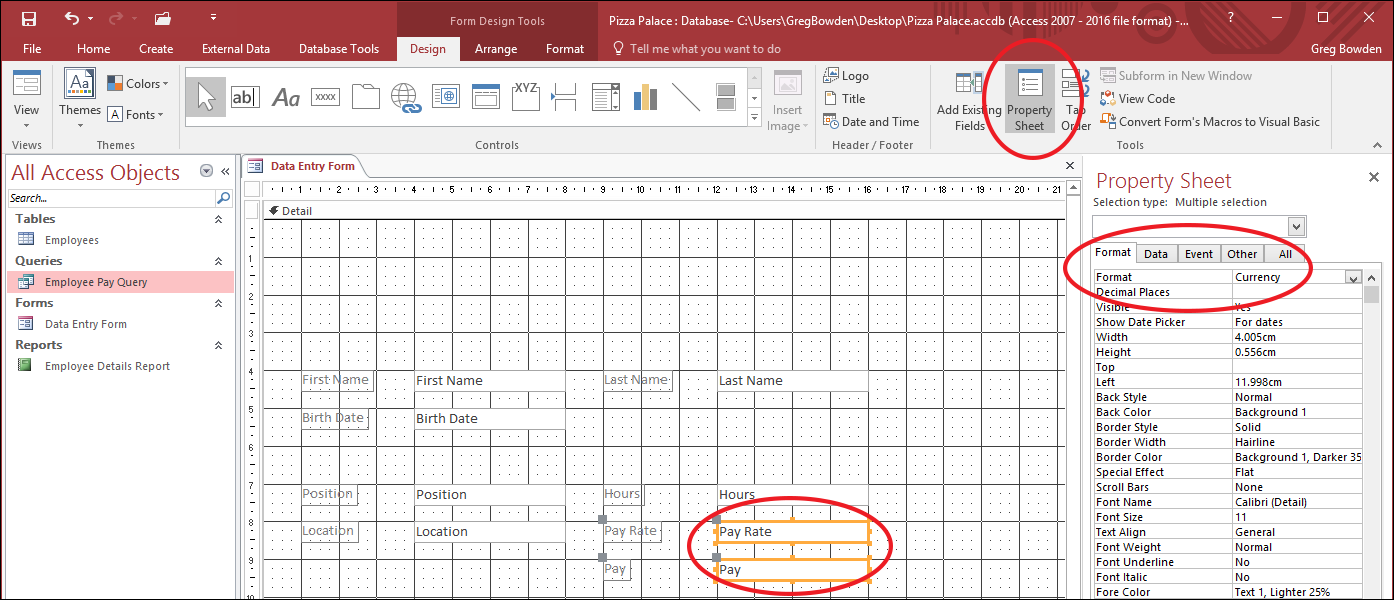
Click on the PAY RATE field box, hold down the <Shift> key and click on the PAY field box so that both are selected.
Click on the PROPERTY SHEET icon in the FORM DESIGN TOOLS – FORMAT tab to open the PROPERTY SHEET pane and set the FORMAT box in the FORMAT tab to CURRENCY.
Adding rectangles
The appearance of the screen can be enhanced by the use of rectangles. Let’s create two shaded rectangles.
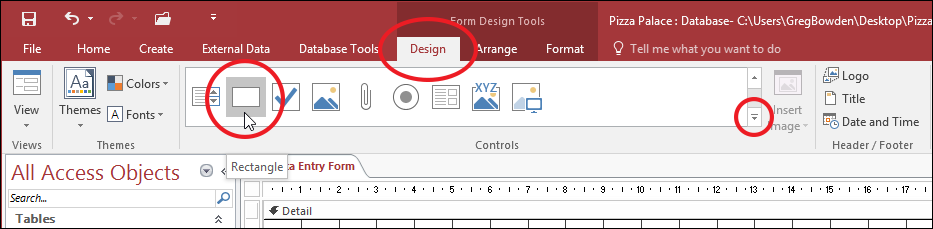
In the FORM DESIGN TOOLS – DESIGN tab select the RECTANGLE TOOL (you might need to click on the MORE button to see the RECTANGLE TOOL).
Draw a rectangle that encloses the FIRST NAME, LAST NAME and BIRTH DATE controls starting at (0.5, 3.5) and finishing at (16.5, 6).
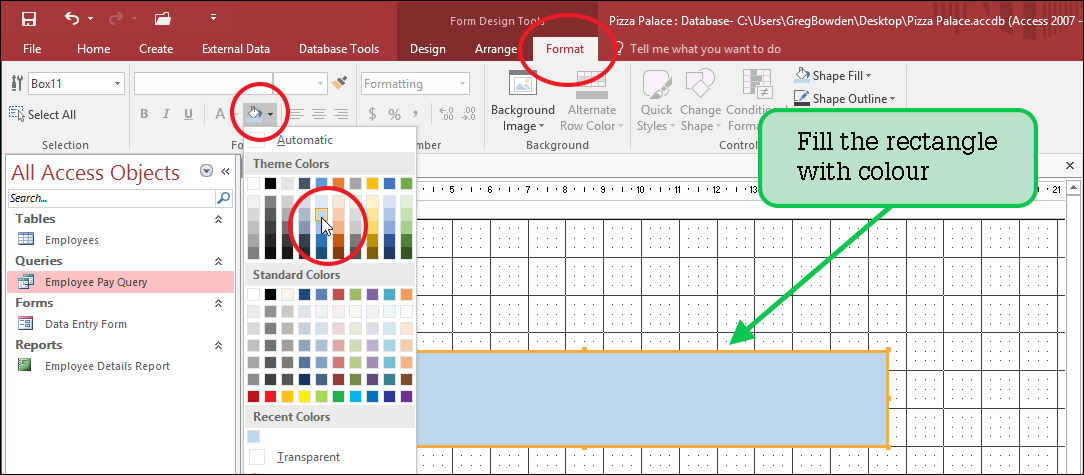
Open the FORM DESIGN TOOLS – FORMAT tab, click on the FILL/BACK COLOUR icon arrow in the FONT group and select a light blue shade to fill the rectangle.
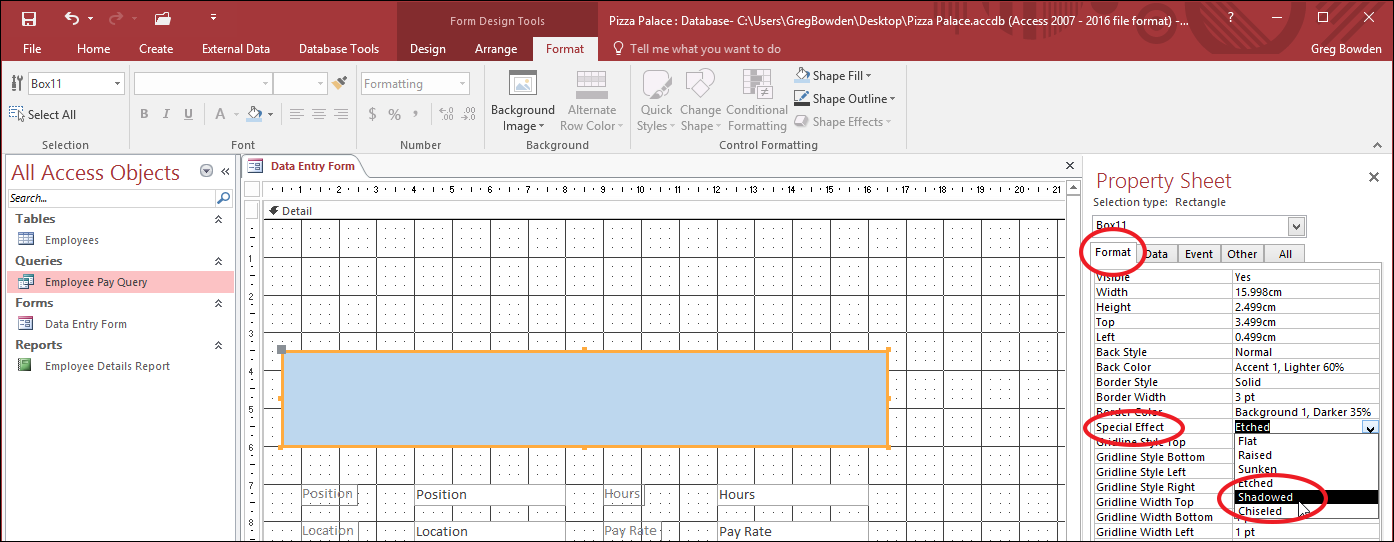
In the PROPERTY SHEET pane set the SPECIAL EFFECT in the FORMAT tab to SHADOWED to add a shadow effect to the rectangle.
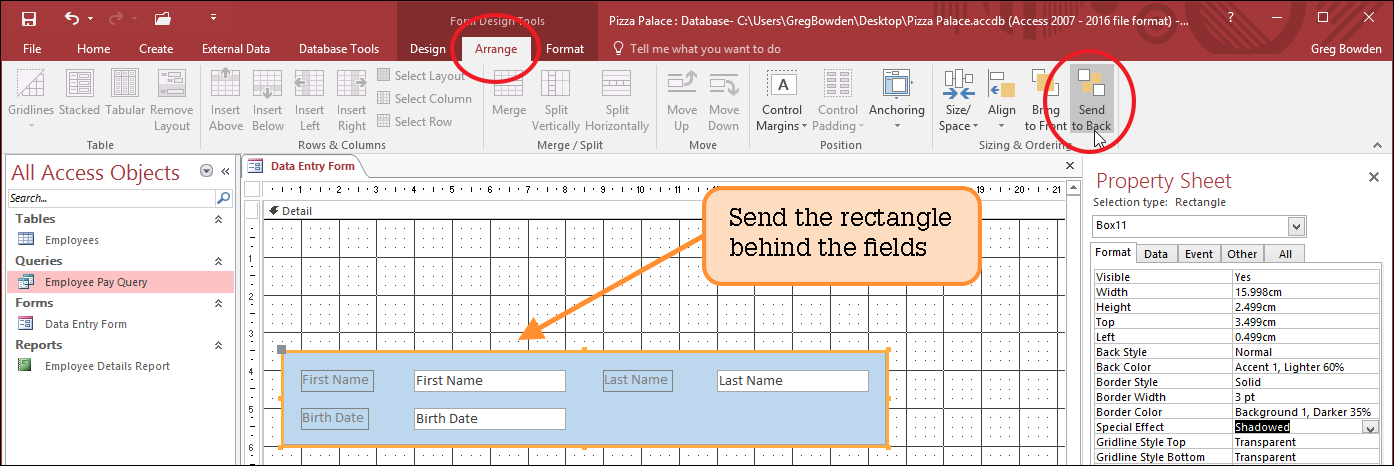
Open the FORM DESIGN TOOLS – ARRANGE tab and click on the SEND TO BACK icon to send the rectangle behind the fields and labels. Note: You can hold down the <Ctrl> key and use the arrow keys to nudge the rectangle so that it neatly encloses the fields and labels.
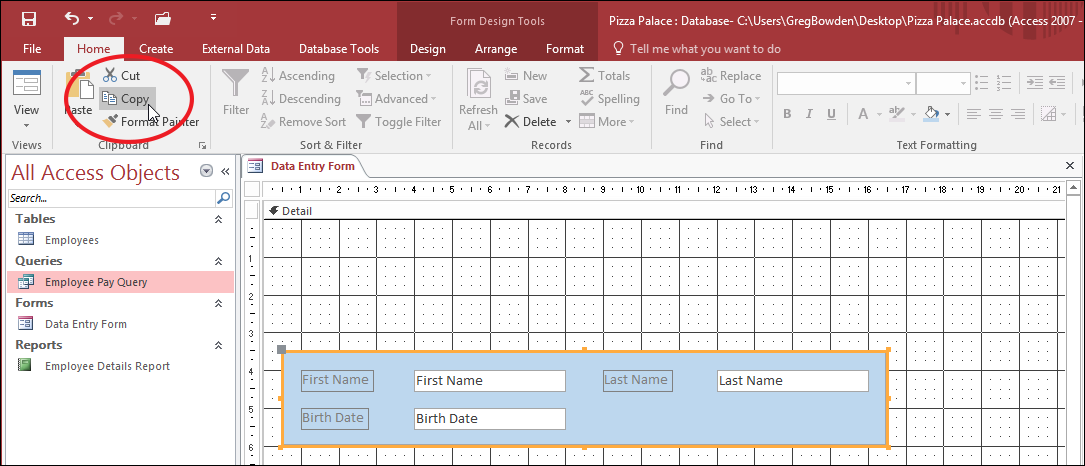
Copying the shaded rectangle
The rectangle can be copied to the lower set of fields.
With the rectangle selected, click on the COPY icon in the HOME tab of the RIBBON (or press <Ctrl+C>).
Click on the PASTE icon in the HOME tab (or press <Ctrl+V>) to paste a copy of the rectangle.
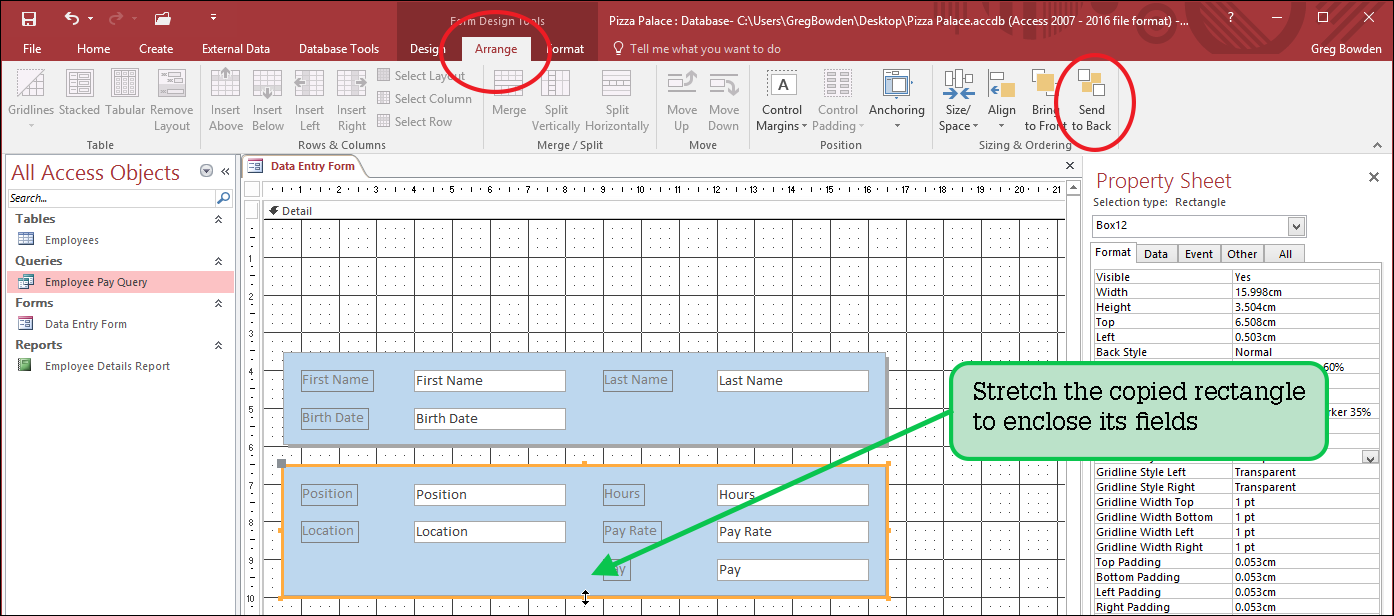
Move the copy so that its top left corner is at (0.5, 6.5).
Open the FORM DESIGN TOOLS – ARRANGE tab and click on the SEND TO BACK icon to send the rectangle behind the fields and labels.
Drag the bottom centre handle of the rectangle down to 10 cm to enclose the fields and labels.
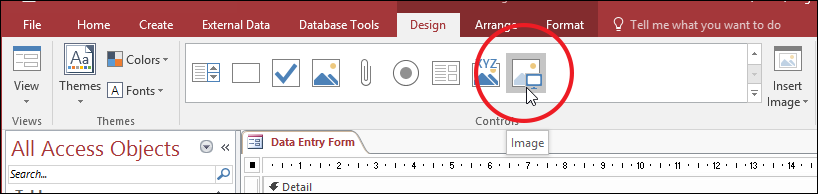
The graphic to be used in the company logo can be downloaded from the above link or you can use a pizza image from your school’s graphics library.
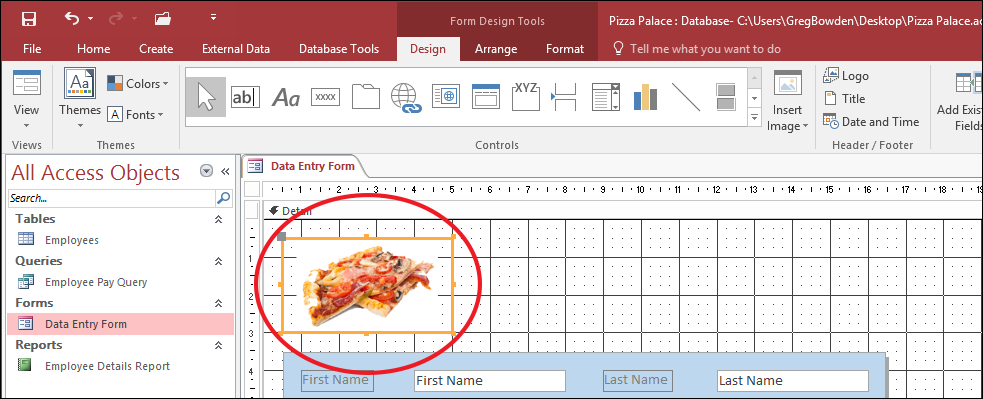
Open the FORM DESIGN TOOLS – DESIGN tab, click on the MORE icon at the right of the CONTROLS group and select the IMAGE icon. Note: You can also click on the INSERT IMAGE button and BROWSE for an image.
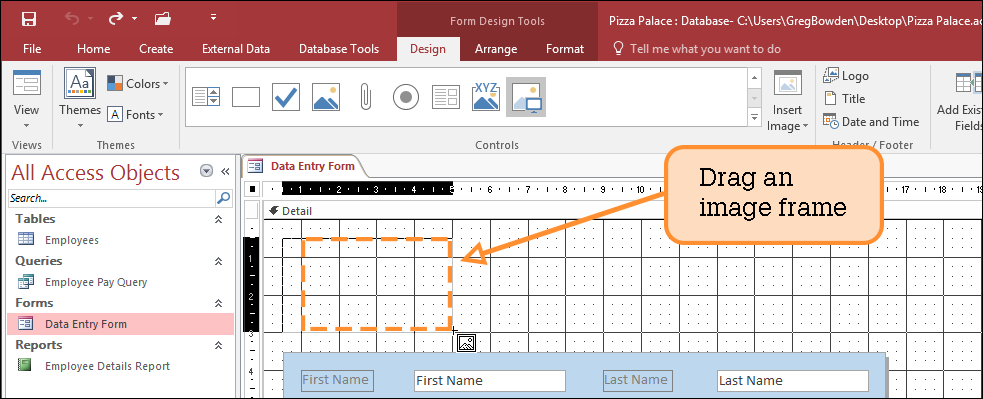
Drag an image frame from (0.5, 0.5) to (5, 3).
Access the image downloaded from the above link, open the DATABASES folder and load the PIZZA image (or find an image from your school’s graphics library).
The image should be inserted into the frame.
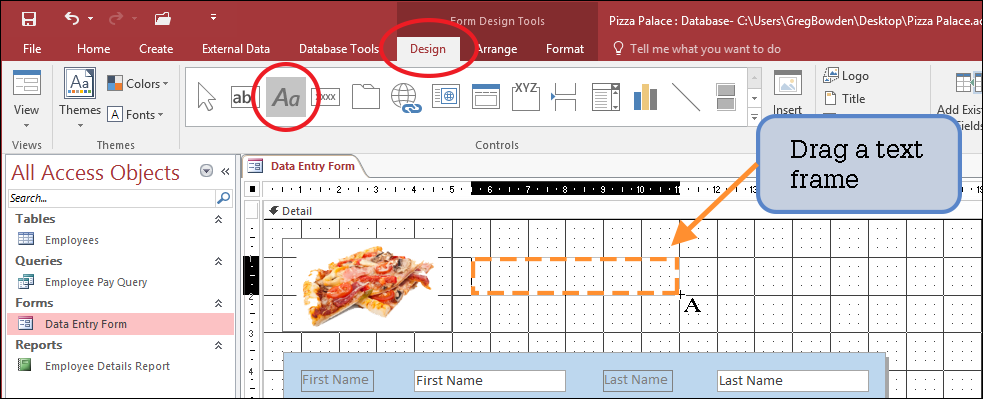
Unfortunately, Microsoft Access does not allow different-sized text in the one text frame, so we will set two text frames in the logo.
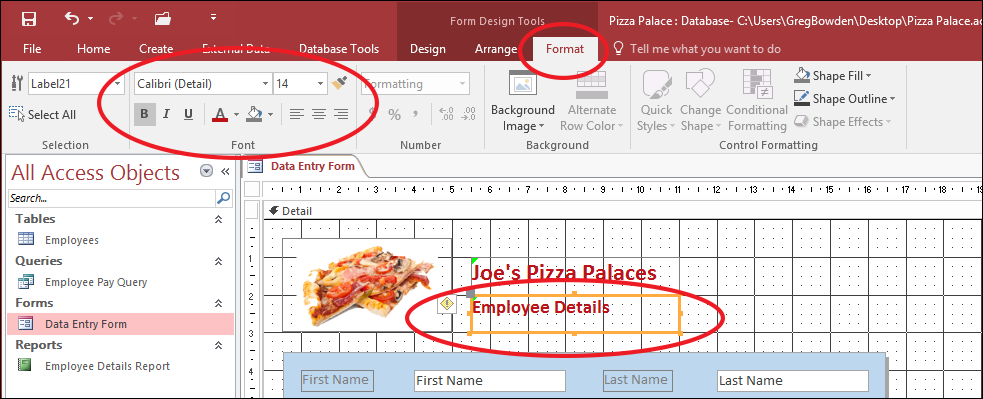
Select the LABEL icon in the CONTROLS group of the DESIGN tab and drag a frame from (5.5, 1) to (11, 2).
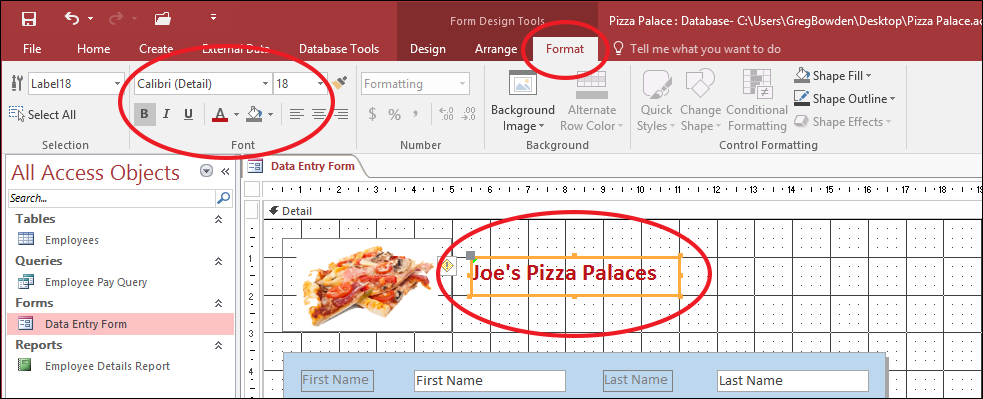
Enter: Joe’s Pizza Palaces and press the <Enter> key to select the frame. Then in the FONT group of the FORM DESIGN TOOLS – FORMAT tab, set the text to bold, 18 pt and dark red.
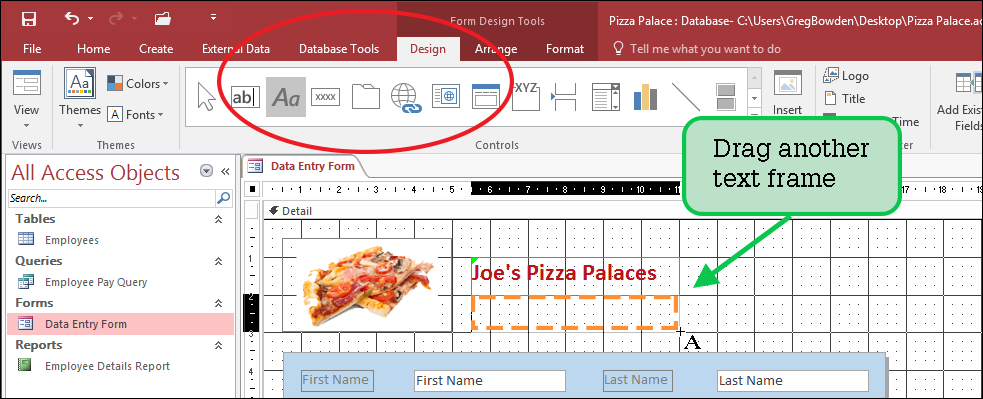
Select the LABEL icon in the CONTROLS group of the FORM DESIGN TOOLS – DESIGN tab and drag a frame from (5.5, 2) to (11, 3).
Enter: Employee Details then press the <Enter> key to select the frame. In the FONT group of the FORM DESIGN TOOLS – FORMAT tab, set the text to bold, 14 pt and dark red.
Final adjustments
The form simply needs some final checks and adjustments.
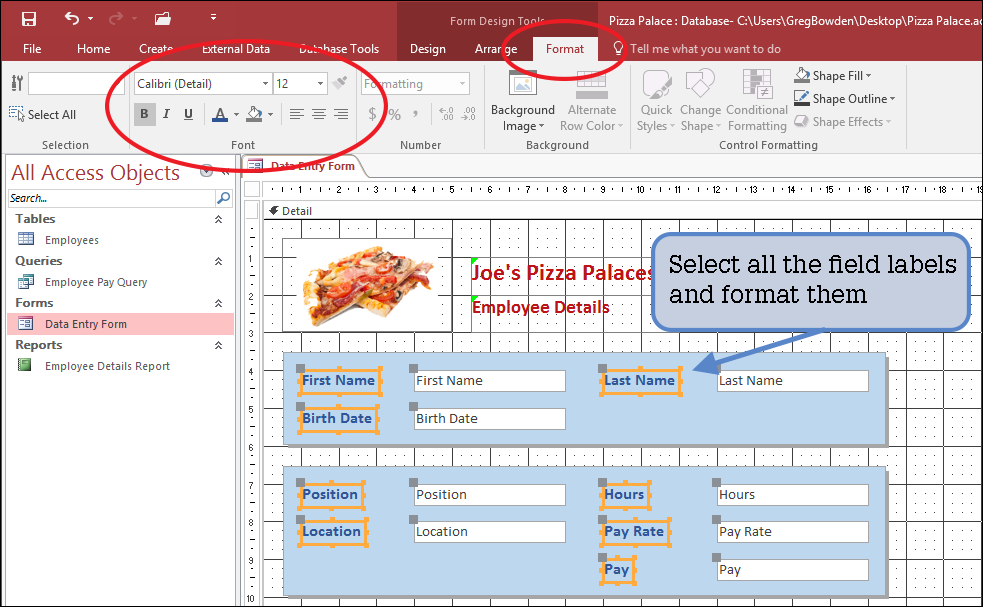
Use the <Shift> key to select all the field labels and set them to 12 pt, bold and dark blue then double click on a handle to enlarge each frame to fit the text.
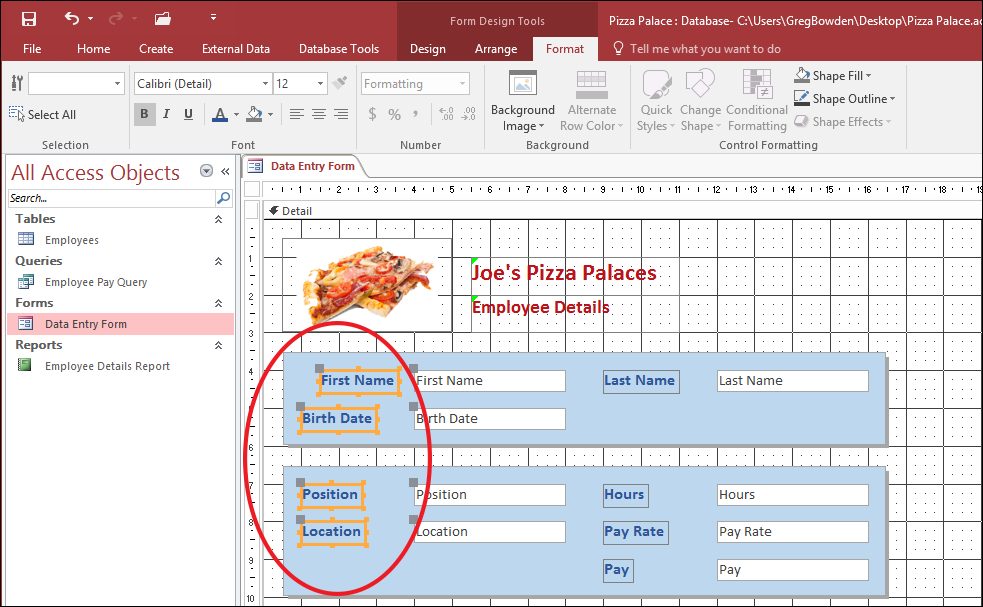
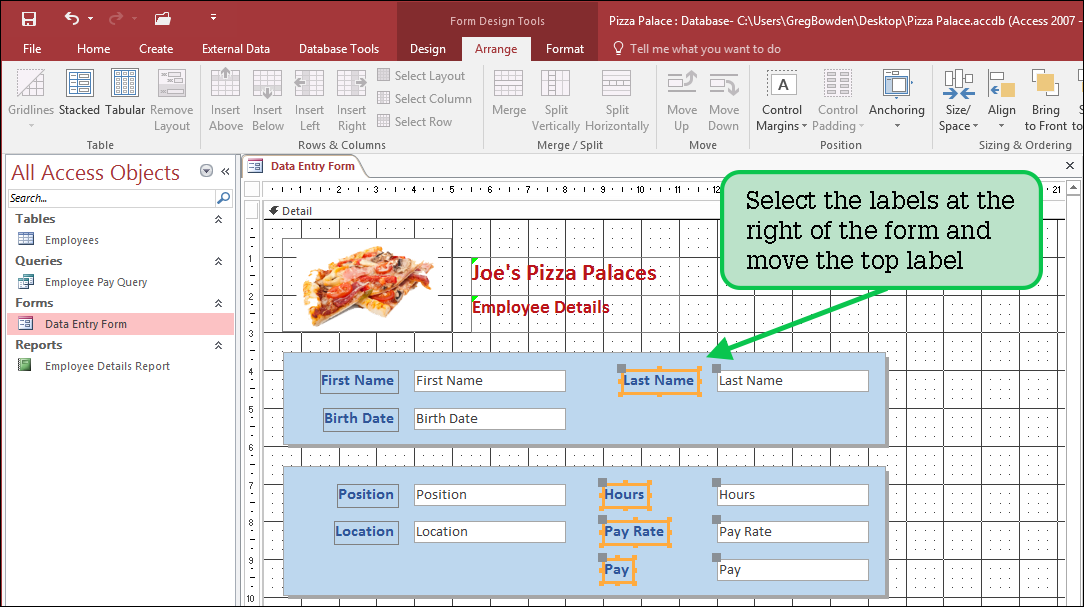
The labels can be moved closer to their field boxes, but this needs to be done separately for each column of labels.
Use the <Shift> key to select just the four field labels along the left of the form then use the FIRST NAME label’s move handle to move the label about 0.5 cm closer to its field box.
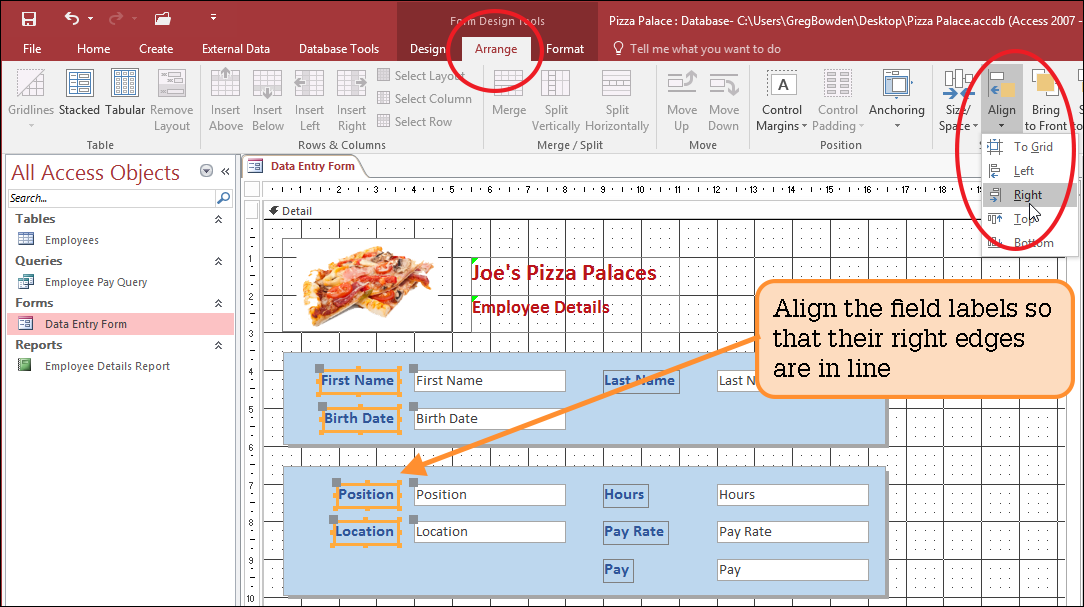
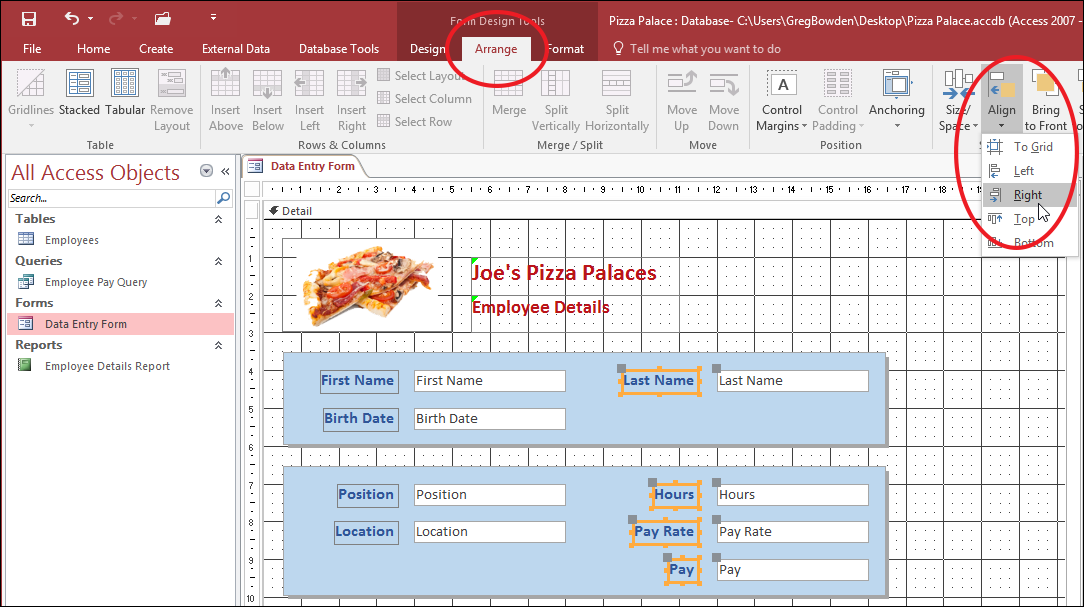
Open the FORM DESIGN TOOLS – ARRANGE tab, click on the ALIGN icon and select RIGHT to align the right edges of the labels.
Use the <Shift> key to select just the four field labels along the right of the form then use the LAST NAME label’s move handle to move the label about 0.5 cm closer to its field box.
In the FORM DESIGN TOOLS – ARRANGE tab click on the ALIGN icon and select RIGHT to align the right edges of the labels.
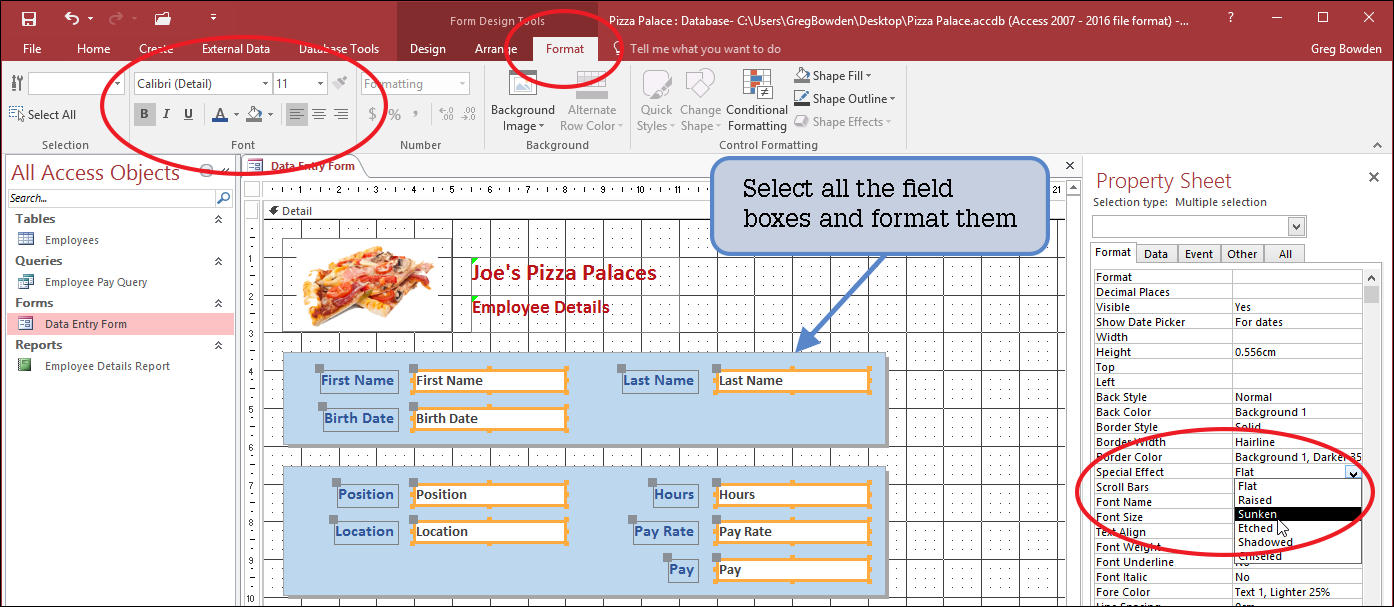
Use the <Shift> key to select all the field boxes and, in the FORM DESIGN TOOLS – FORMAT tab, set the STYLE to bold, the TEXT ALIGNMENT to LEFT and the SPECIAL EFFECT (in the PROPERTY SHEET pane) to SUNKEN.
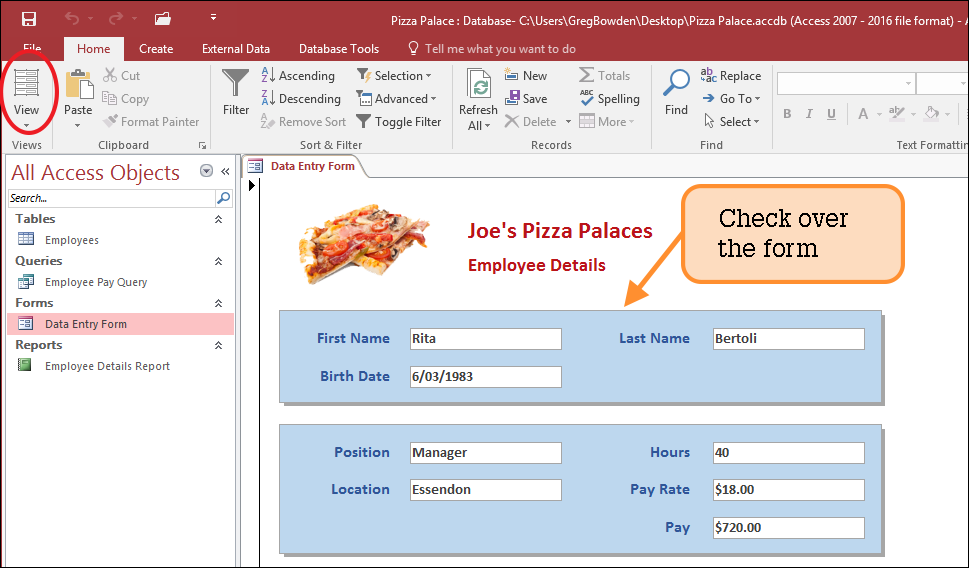
Checking the form
Open the FORM DESIGN TOOLS – DESIGN tab, use the VIEW icon to set the screen to FORM VIEW and check over the form.
If necessary, return the screen to DESIGN VIEW and make any necessary adjustments to the form.
Entering data
Let’s add a few records to see how effective the data entry form is.
Set the view to FORM VIEW.
Click on the NEW icon in the HOME tab of the RIBBON to add a new record and enter:
Andrea
<Tab>
Mason
<Tab>
30/5/88
<Tab>
Cook
<Tab>
Richmond
<Tab>
25
<Tab>
15
Enter another record:
Keith
<Tab>
Gilchrist
<Tab>
14/3/91
<Tab>
Delivery
<Tab>
Essendon
<Tab>
30
<Tab>
11
Note: You can use the RECORD buttons in the STATUS BAR at the base of the screen to scroll through the records in FORM VIEW.
Open the EMPLOYEE DETAILS table and the new records should be present. If they are not, close the table and reopen it to view them.
Printing
This is a data entry screen intended to make the data entry process easier. In normal circumstances you would create a report to print the data. However, if your teacher wishes you to do so, print a LANDSCAPE ORIENTATION copy of just the two new records that you entered, or ask your teacher to check your data entry screen.
A BLANK layout is used to create a data entry screen. It is basically easier to place fields where you want them to be placed and to insert graphics.
The PIZZA PALACE database should be open. Set the screen to LAYOUT MODE by pressing <Ctrl+L> or <Command+L>.
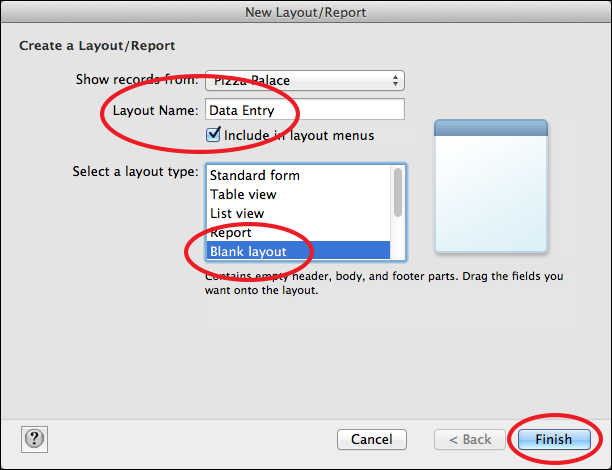
Select NEW LAYOUT/REPORT from the STATUS TOOLBAR (or from the LAYOUTS menu) and you will receive the NEW LAYOUT dialogue box.
Enter the layout name: Data Entry
Click on BLANK LAYOUT in the SELECT A LAYOUT TYPE frame and select FINISH.
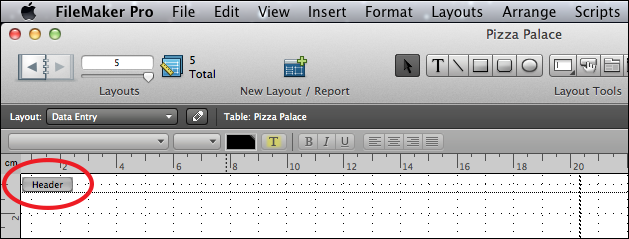
As this will be a screen display, the HEADER and FOOTER parts are not needed.
Click on the HEADER PART label and press the <Delete> key to remove it.
Repeat step 5 to delete the FOOTER part.
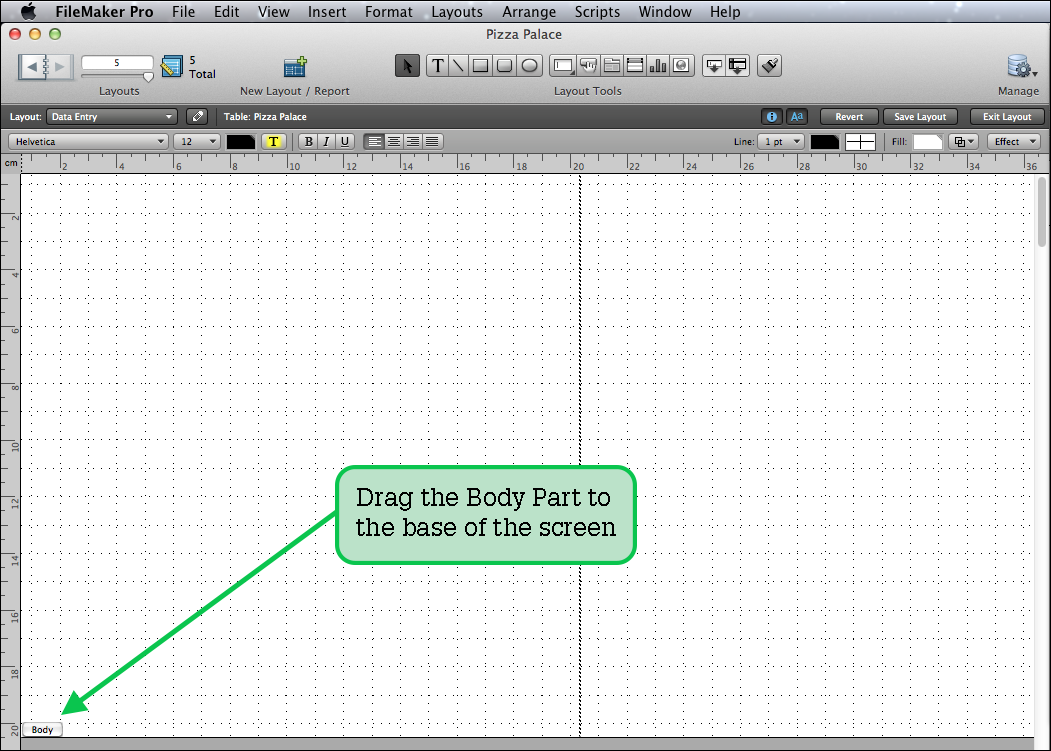
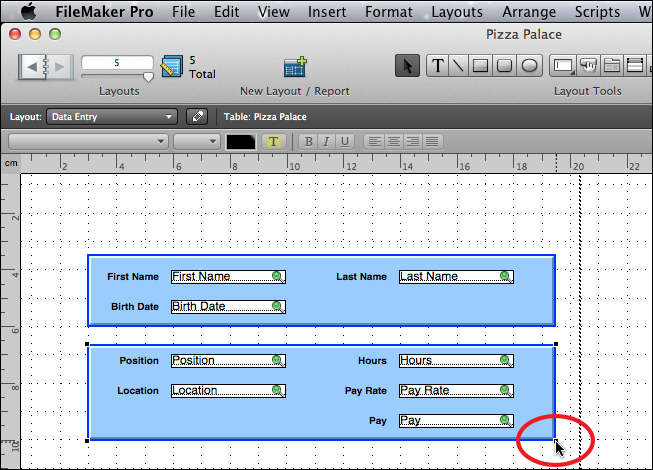
Drag the bottom border of the BODY PART down to about 20 cm to create space for the fields.
Turning on the layout tools
FileMaker Pro provides a range of layout tools that help you create data entry screens.
Use the VIEW menu to turn on the GRAPHICS RULERS, the TEXT RULER and RULER LINES.
The Rulers and gridlines are added to the screen.
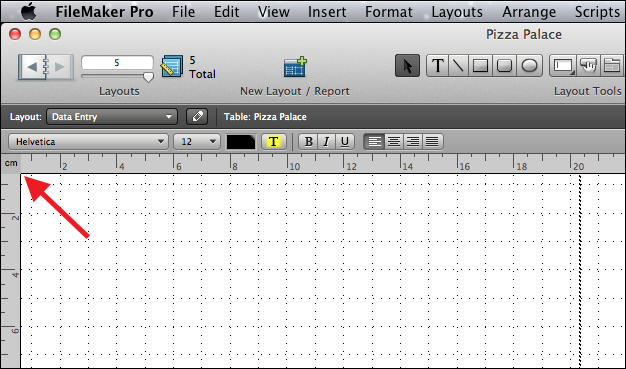
If the RULER UNITS are not in CENTIMETRES, click on the box at the top of the vertical Ruler until CM is displayed.
Note: When indicating a screen position, the top Ruler position is given first, followed by the left Ruler position. So the position (10, 4) would be the intersection of 10 cm in the top Ruler and 4 cm in the left Ruler.
Inserting the fields
Fields can be inserted into the layout one at a time.
Inserting the First Name field
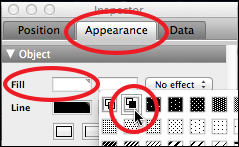
If the INSPECTOR panel is not displayed, use the VIEW menu to open it and move it to the right of the layout.
In the APPEARANCE tab of the INSPECTOR panel, set the FILL COLOUR box to WHITE and the PATTERN box to SOLID (second icon) so that the fields will have a white background.
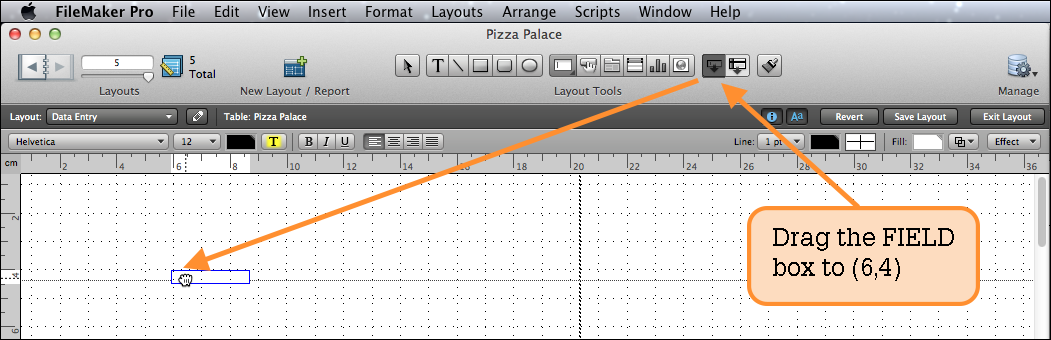
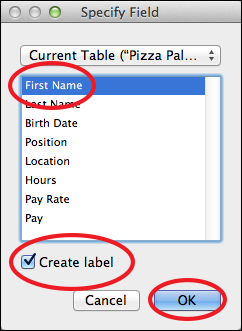
Click on the FIELD box in the STATUS TOOLBAR and drag it to 6 cm in the top Ruler and 4 cm in the left Ruler; that is, to (6, 4).
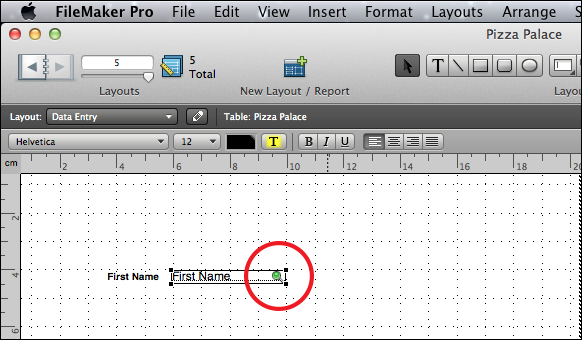
You will be asked to specify the field, select FIRST NAME, check that CREATE LABEL is selected and click on OK.
Drag the bottom right ‘handle’ of the FIRST NAME field box across to 10 cm in the top Ruler to increase its width to 4 cm.
Inserting the Last Name field
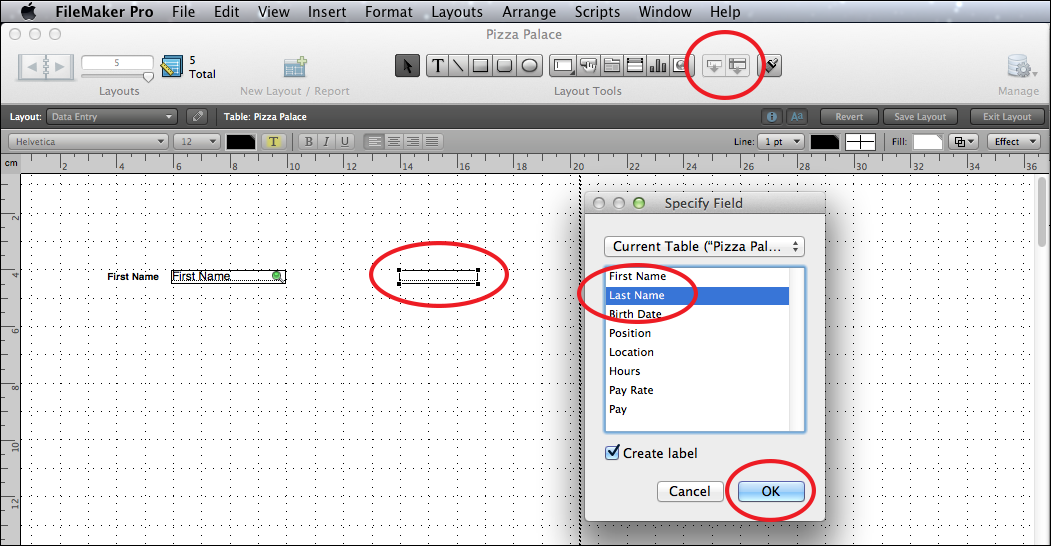
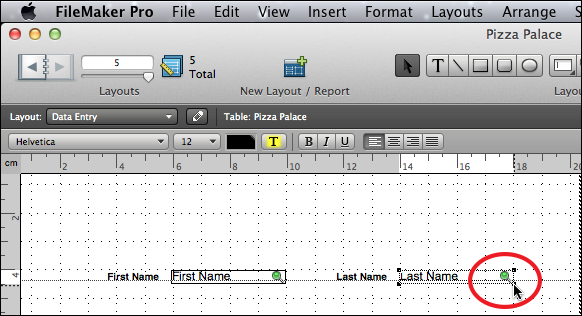
Drag the FIELD button to (14, 4), select the LAST NAME field in the SPECIFY FIELD dialogue box and select OK.
Drag the bottom right ‘handle’ of the LAST NAME field box across to 18 cm in the top Ruler to increase its width to 4 cm.
Note: You can use the ARRANGE menu to turn off OBJECT GRIDS if you have trouble positioning objects. With OBJECT GRIDS off you are able to move objects over small distances. With OBJECT GRIDS on you can only move to invisible grid positions.
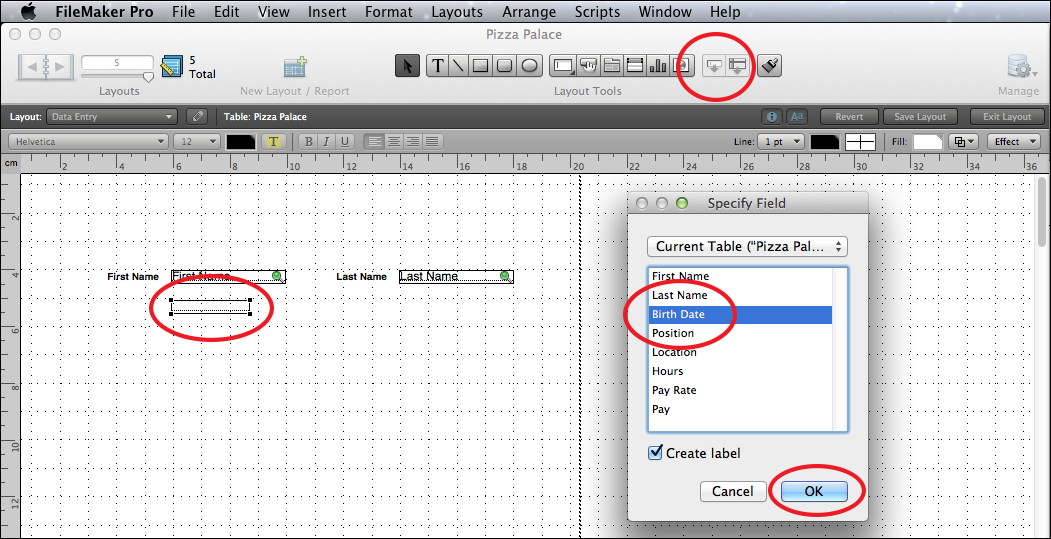
Inserting the Birth Date field
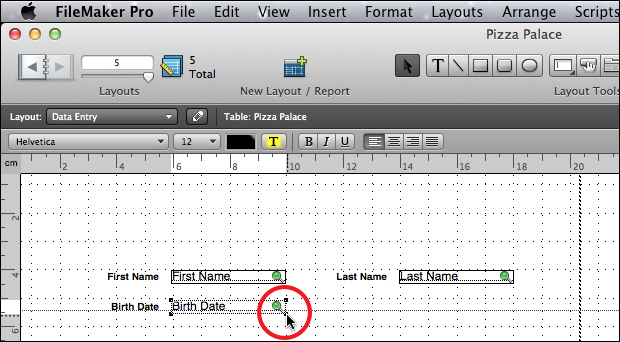
Drag the FIELD button to (6, 5), select the BIRTH DATE field in the SPECIFY FIELD dialogue box and select OK.
Drag the bottom right ‘handle’ of the BIRTH DATE field box across to 10 cm in the top Ruler to increase its width to 4 cm.
Note: If necessary, you can use the <Arrow> keys to nudge the objects into position.
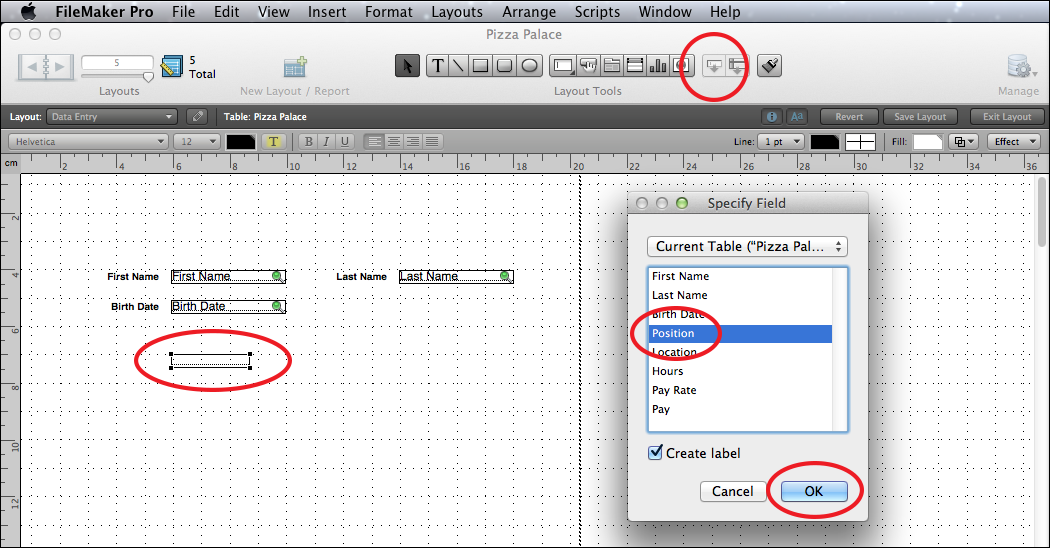
Inserting the Position field
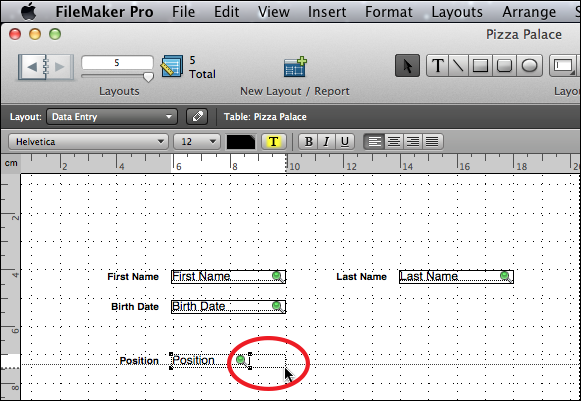
Drag the FIELD button to (6, 7), select the POSITION field in the SPECIFY FIELD dialogue box and select OK.
Drag the bottom right ‘handle’ of the POSITION field box across to 10 cm in the top Ruler to increase its width to 4 cm.
Inserting the rest of the fields
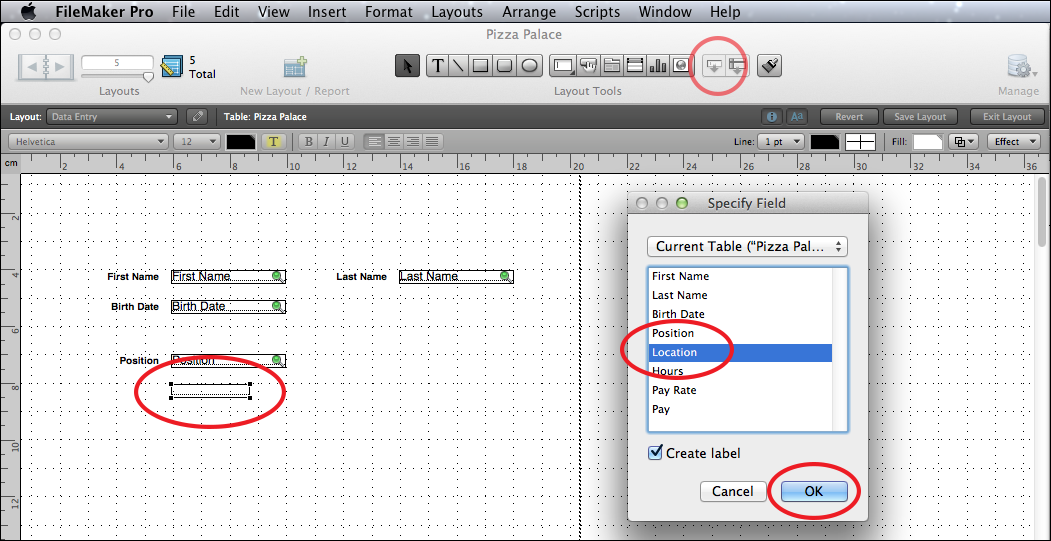
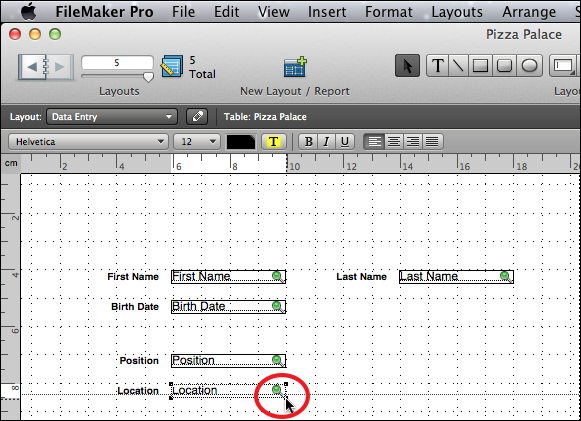
Drag the FIELD button to (6, 8), select the LOCATION field in the SPECIFY FIELD dialogue box and select OK.
Drag the bottom right ‘handle’ of the LOCATION field box across to 10 cm in the top Ruler to increase its width to 4 cm.
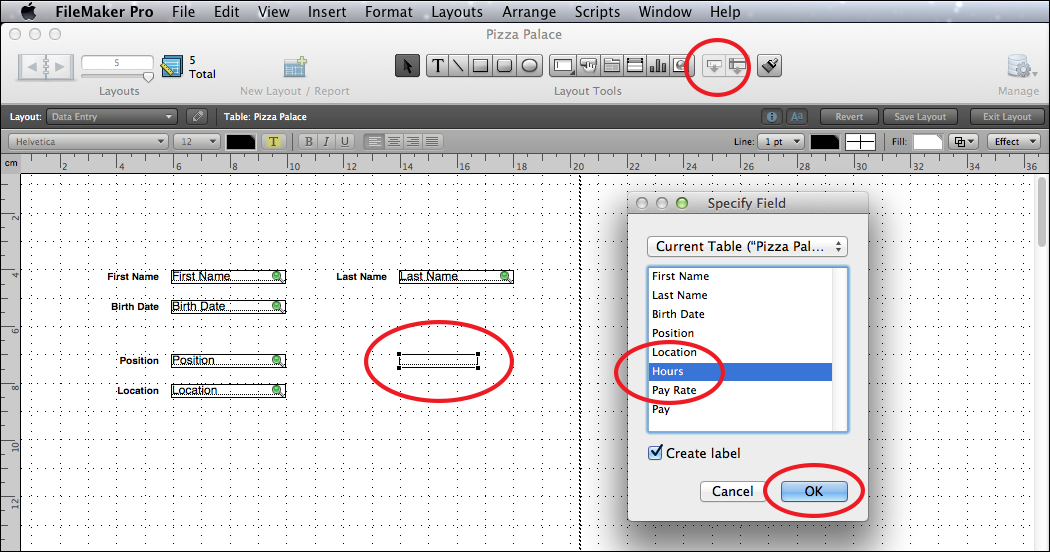
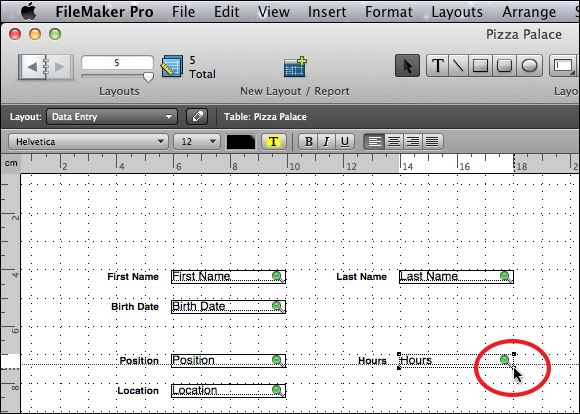
Drag the FIELD button to (14, 7), select the HOURS field in the SPECIFY FIELD dialogue box and select OK.
Drag the bottom right ‘handle’ of the HOURS field box across to 18 cm in the top Ruler to increase its width to 4 cm.
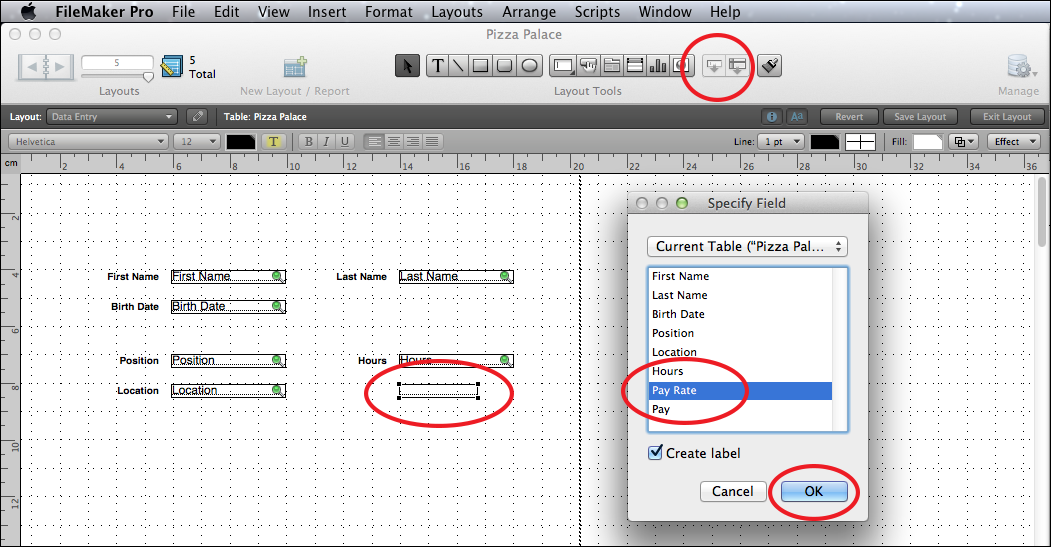
Drag the FIELD button to (14, 8), select the PAY RATE field in the SPECIFY FIELD dialogue box and select OK.
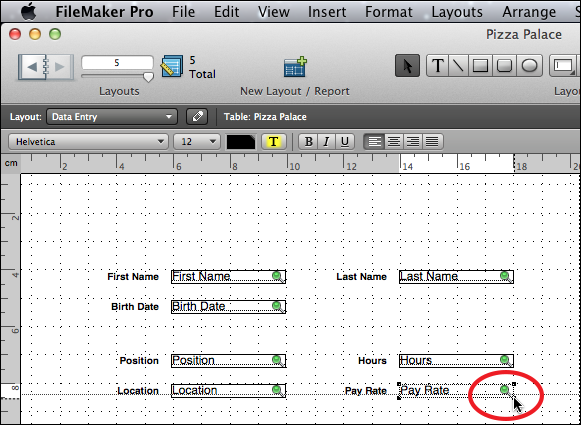
Drag the bottom right ‘handle’ of the PAY RATE field box across to 18 cm in the top Ruler to increase its width to 4 cm.
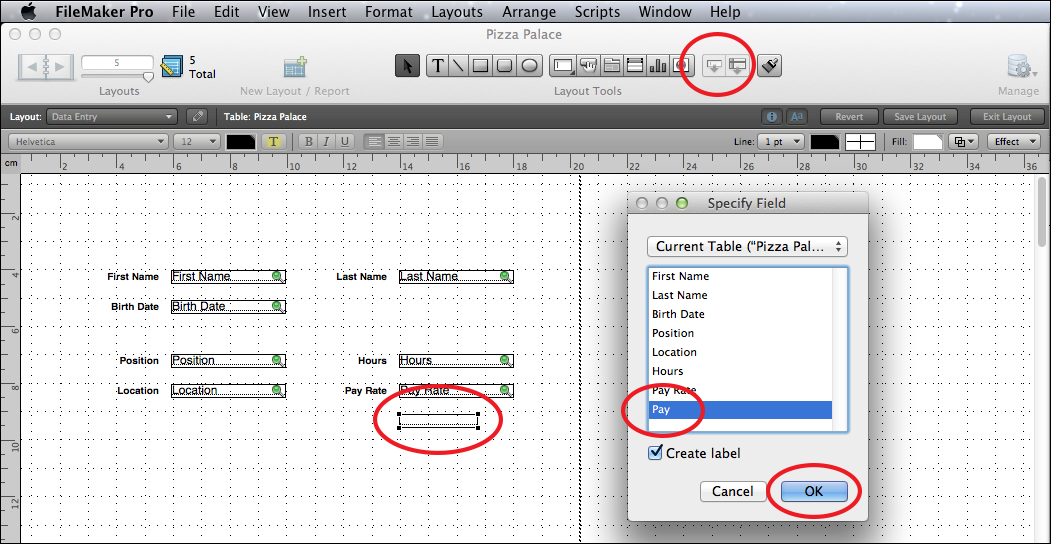
Drag the FIELD button to (14, 9), select the PAY field in the SPECIFY FIELD dialogue box and select OK.
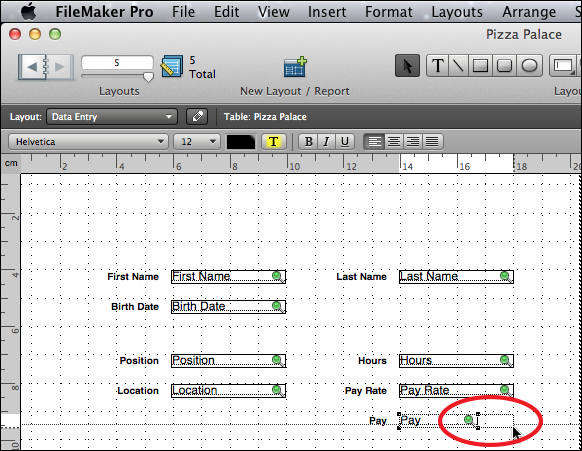
Drag the bottom right ‘handle’ of the PAY field box across to 18 cm in the top Ruler to increase its width to 4 cm.
Note: You can <Shift+Click> on the fields and field labels and use the alignment options from the ALIGN section of the ARRANGE menu to accurately align them.
Formatting the fields
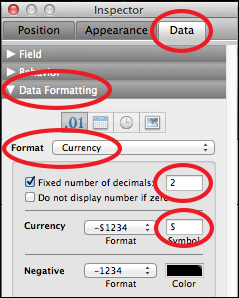
The PAY RATE and PAY fields need to be formatted to CURRENCY.
Click on the PAY RATE field box then <Shift+Click> on the PAY field box so that both are selected.
Open the DATA tab in the INSPECTOR panel and, in the DATA FORMATTING section, set the FORMAT box to CURRENCY.
Turn on the FIXED NUMBER OF DECIMALS box, which should be set to 2 and check that the CURRENCY SYMBOL is set to $.
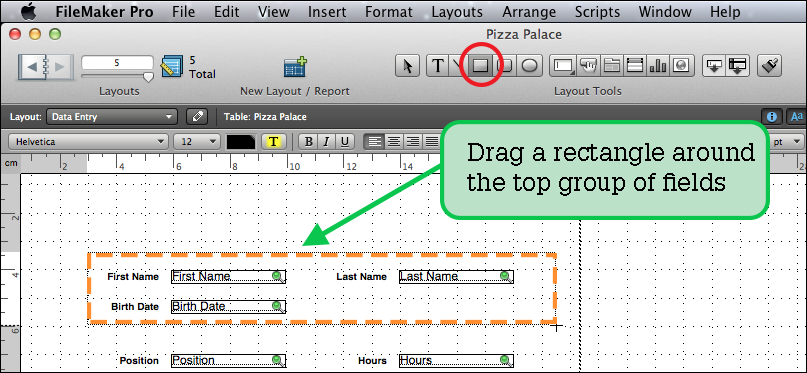
Adding rectangles
The appearance of the screen can be enhanced by the use of rectangles. Let’s create two shaded rectangles behind the fields.
Select the RECTANGLE TOOL from the STATUS TOOLBAR and draw a rectangle that encloses FIRST NAME, LAST NAME and BIRTH DATE fields starting at (3, 3.5) and finishing at (18.75, 6).
Open the APPEARANCE tab on the INSPECTOR panel and set the FILL COLOUR to LIGHT BLUE and the EFFECT to EMBOSSED to add a three-dimensional effect to the rectangle.
Set the LINE COLOUR to DARK BLUE and the LINE THICKNESS to 2 pt to enhance the three-dimensional effect.
Display the ARRANGE menu and select SEND TO BACK so that the rectangle is behind the fields and field labels.
You can use the arrow keys to nudge the rectangle so that it neatly encloses the fields and labels.
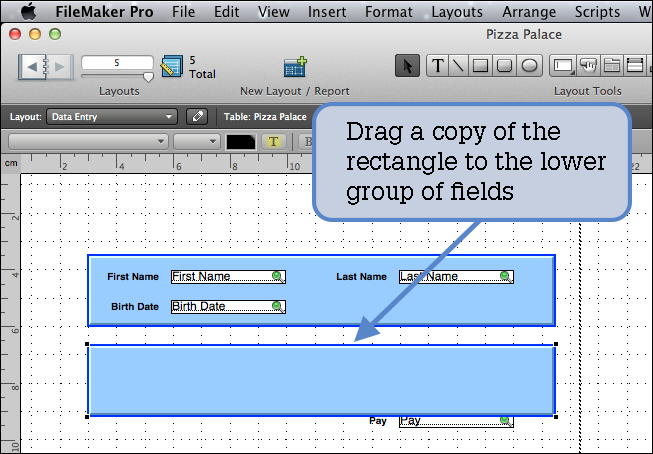
Copying the shaded rectangle
The rectangle can be copied to the lower set of fields.
Hold down the <Ctrl> or <Option> keys and drag the rectangle down so that that copy’s top left corner is at (3, 6.75).
Display the ARRANGE menu and select SEND TO BACK so that the rectangle is behind the fields and field labels.
Drag the bottom right ‘handle’ down to 10 cm in the top Ruler to enclose the fields.
Use the <Arrow> keys to nudge the rectangle into position if need be.
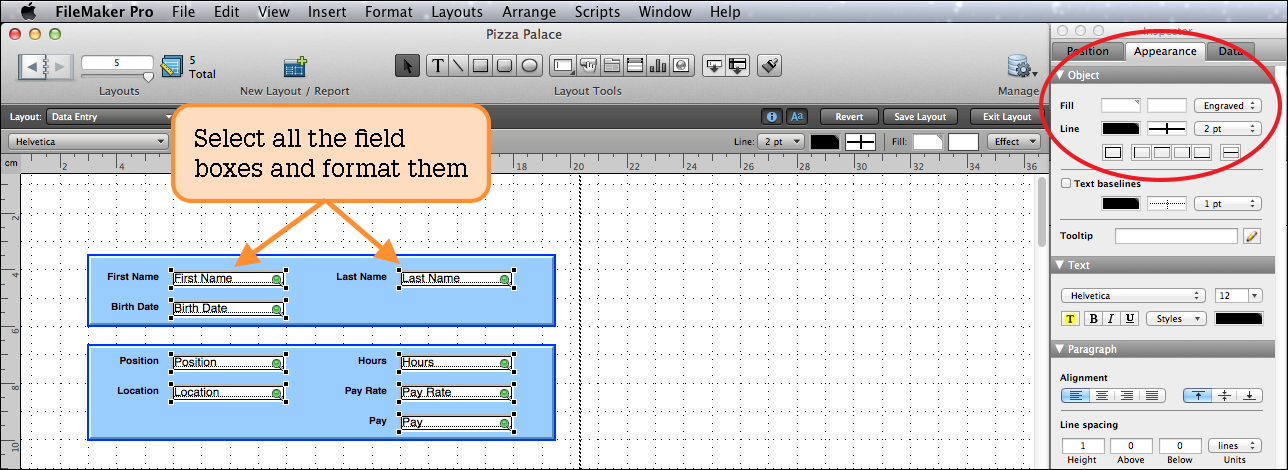
Setting the field formats
When shaded rectangles are used it is a good idea to format the field boxes.
Click on the FIRST NAME field box then <Shift+Click> on the other field boxes so that each has its ‘handles’ displayed.
Select an EFFECT such as ENGRAVED from the INSPECTOR panel. You can set the LINE WEIGHT to 2 pt to enhance the effect and increase the height of the field boxes by dragging a right handle down.
A graphic to be used in the company logo can be downloaded from the above link or from your school's graphics library.
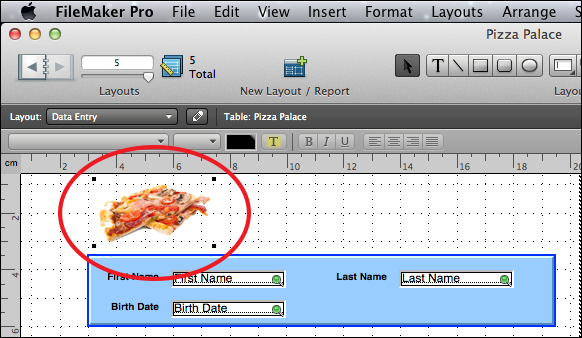
Display the INSERT menu and select PICTURE.
Access the image downloaded from the above link, open the DATABASE folder and load the PIZZA image (or find a pizza image from your school's graphics library).
Resize the image and move it to top left of the layout.
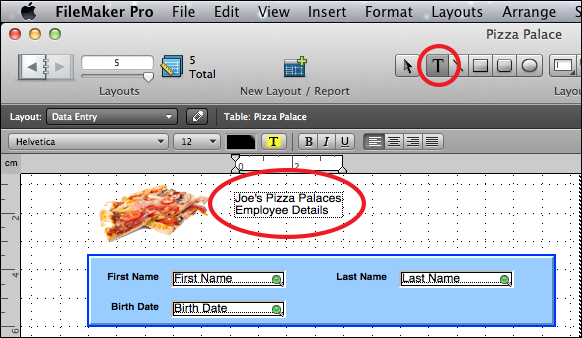
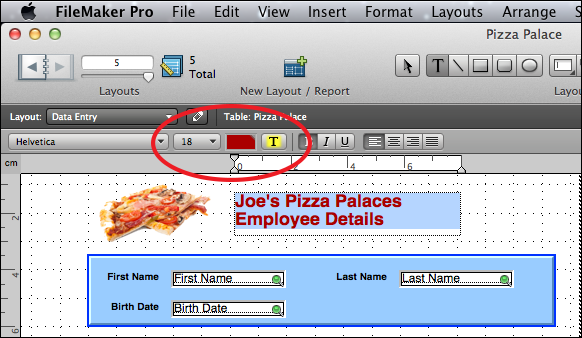
Select the TEXT TOOL from the STATUS TOOLBAR, click the cursor next to the top right of the graphic and enter: Joe’s Pizza Palaces<Enter> Employee Details
Highlight the text and, in the FORMATTING BAR or APPEARANCE section of the INSPECTOR panel, set the FONT SIZE to 18 pt, the STYLE to bold and the TEXT COLOUR to dark red.
Note: If the FORMATTING BAR is not on the screen, it can be opened from the VIEW menu.
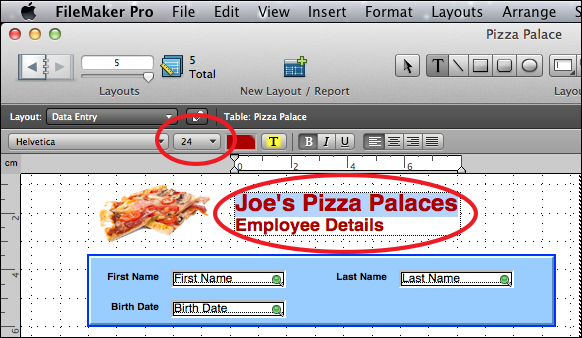
Highlight just Joe’s Pizza Palaces and set the FONT SIZE to 24 pt.
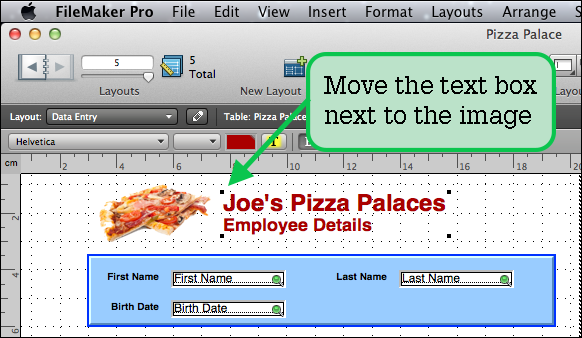
Click outside the text box and nudge the text next to the image.
Final adjustments
The layout simply needs some final checks and adjustments.
Set the view to BROWSE MODE to check how the layout looks so far then return the screen to LAYOUT MODE.
Click on the FIRST NAME field label, hold down the <Shift> key and click on the other labels then set the FONT SIZE to 11 pt, the STYLE to BOLD and the TEXT COLOUR to dark blue.
Use the arrow keys to nudge the labels down and to the right a little so that they are next to their fields.
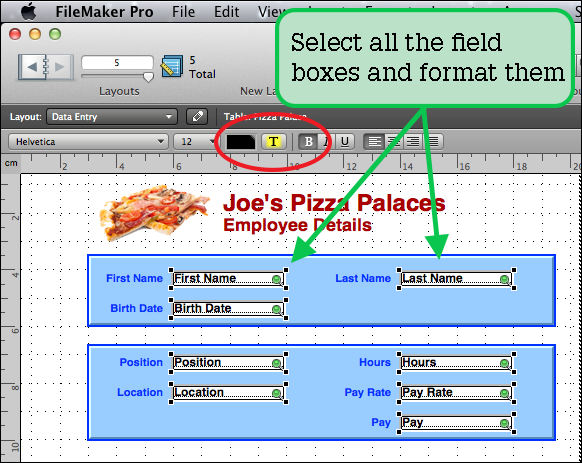
Use the <Shift> key to select all the fields and set their style to BOLD, and a TEXT COLOUR if you wish to.
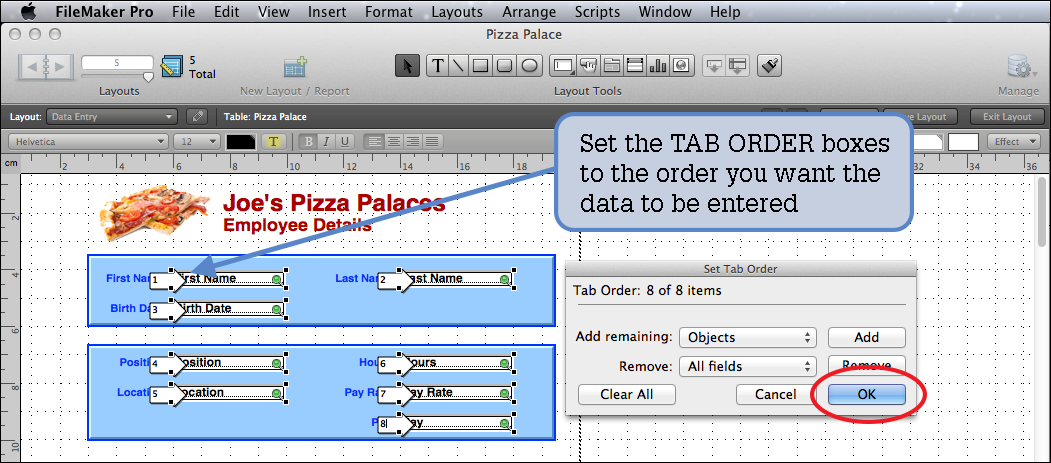
Setting the field entry order
Before entering the data, the order that data will be entered into the fields should be set. This is often required when you move fields around a layout. FileMaker Pro calls it setting the TAB ORDER.
Display the LAYOUTS menu and select SET TAB ORDER.
Change the number in the LOCATION box to 5, the HOURS box to 6 and the PAY RATE box to 7, then select OK.
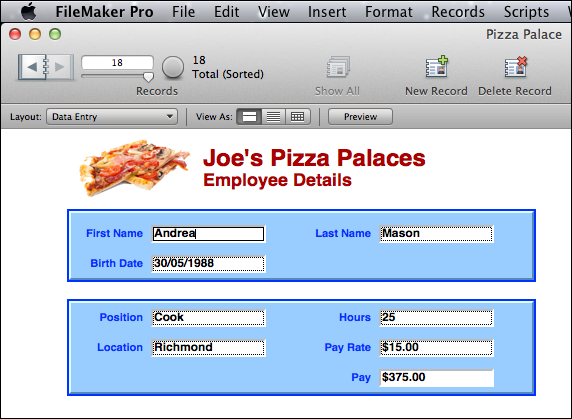
Entering data
Let’s add a few records to see how effective the data entry layout is.
Set the view to BROWSE MODE.
Click on the NEW RECORD button in the STATUS Toolbar and enter:
Andrea
<Tab>
Mason
<Tab>
30/5/88
<Tab>
Cook
<Tab>
Richmond
<Tab>
25
<Tab>
15
Enter another record:
Keith
<Tab>
Gilchrist
<Tab>
14/3/93
<Tab>
Delivery
<Tab>
Essendon
<Tab>
30
<Tab>
11
Printing
This is a data entry screen intended to make the data entry process easier. In normal circumstances you would create another layout to print the data. However, if your teacher wishes you to do so, print a copy of just the two new records that you entered, or ask your teacher to check your data entry screen.