8.6 Finding data
Databases allow you to display just part of the data. For example, a school may wish to just display details for the girls, or all the students who travel to school by bus, or those students who speak a language other than English.
You can search on just one request or entry, which is called a single selection search, or you can search on multiple requests or entries, which is called a multiple selection search.
Databases exercise 4
Single selection searches
Skills practised
- Single data searches
- Multiple data searches
Let’s display just the Richmond employees.
- In Microsoft Access:
- Open the
EMPLOYEE PAY QUERY, click in one of theRICHMONDvalues then click on theSELECTIONicon in the ribbon and selectEQUALS“RICHMOND”. - Just the Richmond employees are found and the number found is displayed in the Status Bar at the base of the screen.
- Click on the
TOGGLE FILTERicon in the ribbon to return all the records to the list.
- Open the
- In FileMaker Pro:
- Click on the
FINDbutton in the Toolbar (or press<Ctrl+F>or<Command+F>). - Enter
Richmondin the box underLOCATIONand click on thePERFORM FINDin the Toolbar (or press<Return>or<Enter>). - Just the Richmond employees are found and the number found is displayed in the Toolbar.
- Click on the
SHOW ALLbutton in the Toolbar to return all the records to the list.
Note: It is always a good practice to return all the records to the list before you carry out new searches.
- Click on the
Multiple selection searches
Searches can be made on more than one piece of data. For example, in the Pizza Palace database, Joe might want to know how many Delivery staff work at the Keilor shop or how many Cooks work over 35 hours a week.
- In Microsoft Access:
- Open the
EMPLOYEE PAY QUERYthen click on theADVANCEDicon in the ribbon and selectFILTER BY FORM. - Enter
KeilorunderLOCATIONDeliveryunderPOSITION.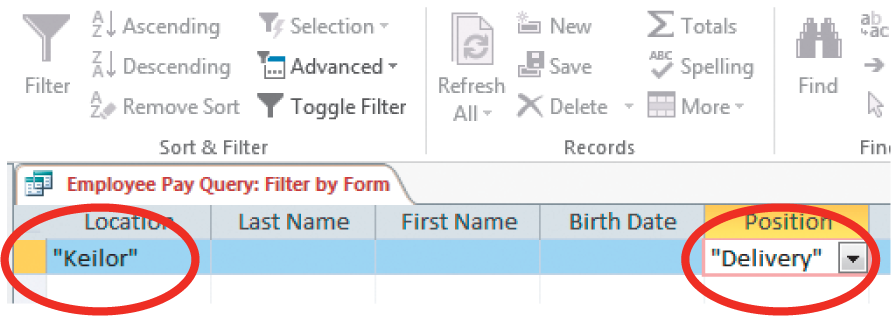
- Click on the
TOGGLE FILTERicon in the ribbon to show the employees. Two should be found. - Click on the
ADVANCEDicon again and selectCLEAR FILTERto return all the records to the list. - You can also do a search in the Query Design when you want to keep the search. You can duplicate the current query or create a new one. By doing this you could have a query for the Richmond employees, another for the Keilor employees, etc. In this case we will use the current query.
- Click on the
VIEWicon in the ribbon to open theQUERY DESIGN. - In the
CRITERIArow enterCookin thePOSITIONcell and>35in theHOURScell.
- Run the query and four cooks should be found.
- Return to the
QUERY DESIGN, remove the entries in theCRITERIArow and run the query to return all the records to the list.
- Open the
- In FileMaker Pro:
- Click on the
FINDbutton in the Toolbar (or press<Ctrl+F>or<Command+F>). - Enter
DeliveryunderPOSITIONandKeilorunderLOCATION.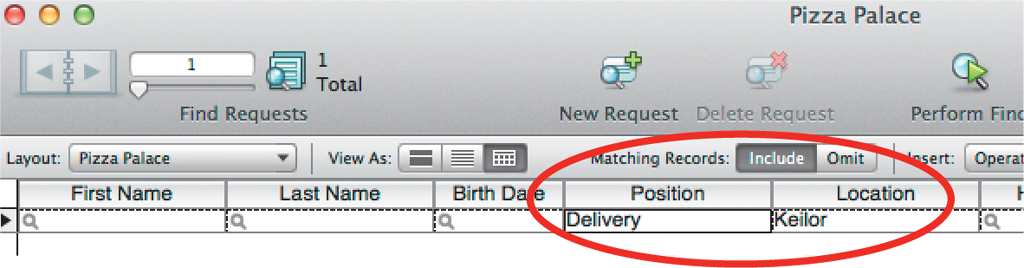
- Click on the
PERFORM FINDbutton in the Toolbar (or press<Return>or<Enter>) and two employees should be found. - Press
<Ctrl+F>or<Command+F>to perform another search. EnterCookin thePOSITIONbox and>35in theHOURSbox.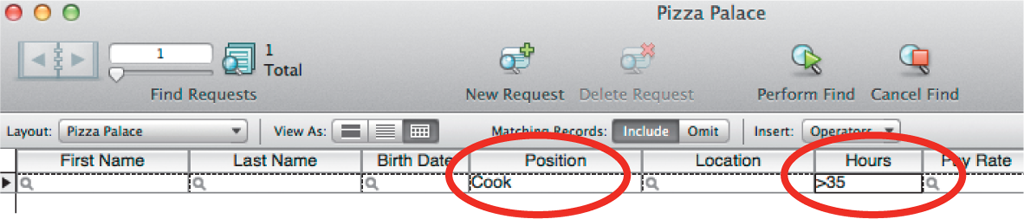
- Press
<Return>or<Enter>and four employees should be found. - Click on the
SHOW ALLbutton in the Toolbar to return all the records to the list.
- Click on the