Photoshop provides a range of filters that can be used to enhance photographs or create backdrops such as clouds, oceans and walls. To illustrate this a brick wall will be created and some graffiti added to it.
The colours will be set to fade from orange to red to simulate a lighting effect.
Start a new Photoshop file.
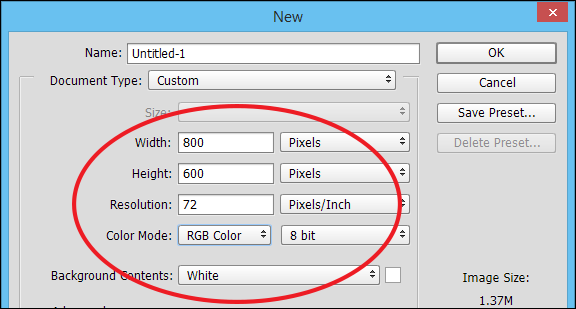
Set the WIDTH to 800 pixels, the HEIGHT to 600 pixels, the RESOLUTION to 72 pixels/inch, the COLOUR MODE to RGB Colour, 8 Bit and the BACKGROUND CONTENTS to White.
Select OK to start the file.
Click on the FOREGROUND COLOUR box in the TOOLS panel and select an orange colour.
Click on the BACKGROUND COLOUR box in the TOOLS panel and select a dark red colour.
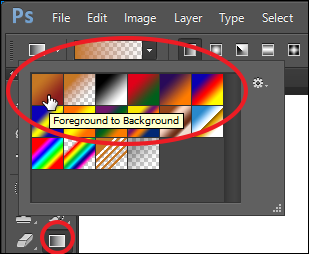
Select the GRADIENT TOOL from the TOOLS panel and, in the OPTIONS BAR, set the GRADIENT box to FOREGROUND TO BACKGROUND, the GRADIENT TYPE to LINEAR and the MODE to NORMAL.
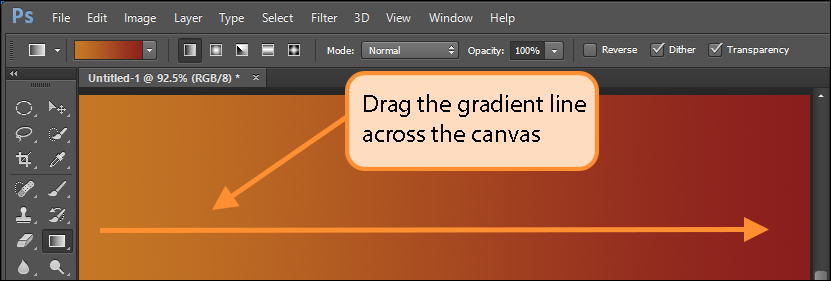
Drag a horizontal line through the canvas to create the gradient fill.
Adding noise
The Noise filter can be used to add a speckled effect to create a realistic brick surface.
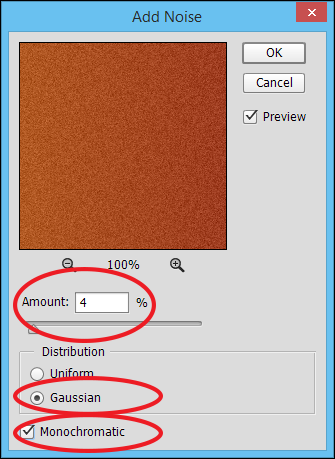
Display the FILTER menu, highlight NOISE and select ADD NOISE.
Set the AMOUNT to about 4%, the DISTRIBUTION to GAUSSIAN and turn on MONOCHROMATIC.
Select OK to set the noise.
Inserting the brick texture
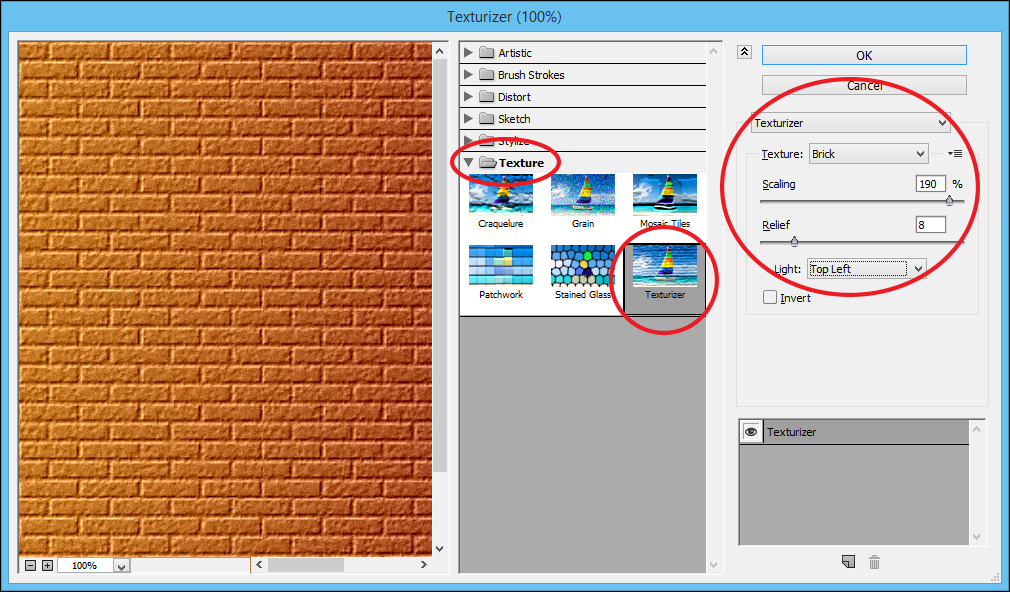
Display the FILTER menu and select FILTER GALLERY.
Open the TEXTURE folder, select TEXTURIZE and set the TEXTURE box to BRICK, the SCALING to 190%, the RELIEF to 8 and the LIGHT to TOP LEFT.
Some distorted text will be added to the brick wall and turned into graffiti.
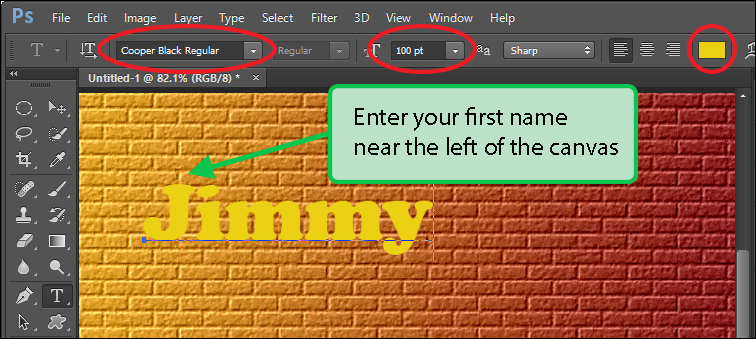
Select the HORIZONTAL TYPE TOOL from the TOOLS panel and, in the OPTIONS BAR, select a cursive font, a large font size, bold style (if available) and set the text colour to yellow.
Enter your first name at the left of the canvas.
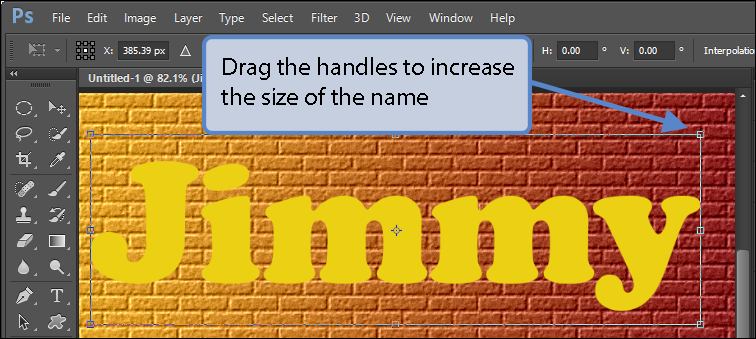
Select the MOVE TOOL from the TOOLS panel then display the EDIT menu and select FREE TRANSFORM (or press <Ctrl+T> or <Command+T>).
Hold down the <Shift> key and drag the size handles of the Free Transform frame to stretch your name to fill the brick wall.
Press the <Enter> or <Return> key to accept the transformation.
To distort the text, it needs to be converted into an image. This process is called Rasterizing. Display the LAYER menu, highlight RASTERIZE and select LAYER.
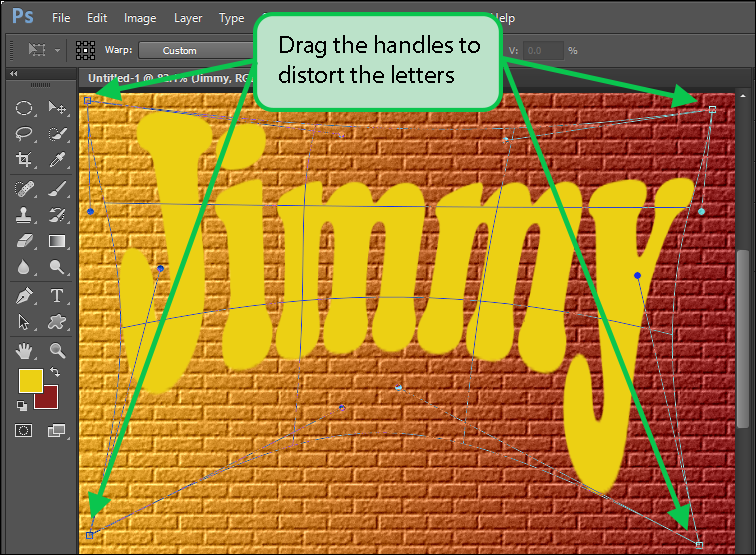
Display the EDIT menu, highlight TRANSFORM and select WARP.
Use the size handles that are placed on the text to distort it in the way that you want.
Press <Enter> or <Return> to accept the transformation. Note: You can apply some more warps on the warped text to improve the effect. You can also use EDIT – TRANSFORM – PERSPECTIVE to further distort the text or use the LIQUIFY filter.
Three-dimensional effects can be added to the text to make it stand out like graffiti.
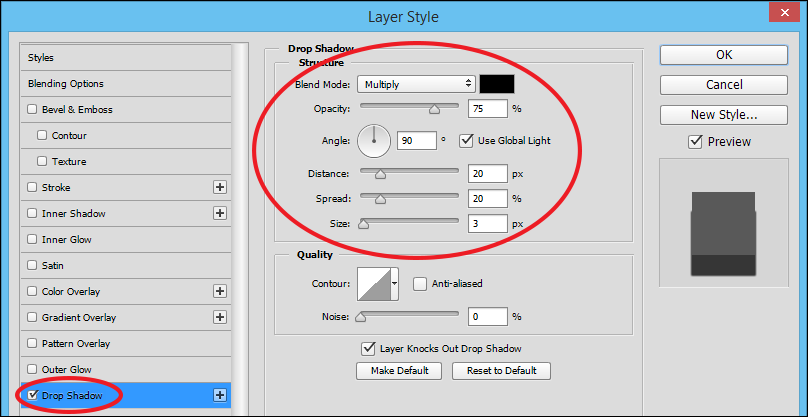
Display the LAYER menu, highlight LAYER STYLE and select DROP SHADOW.
Set the OPACITY to 75%, the DISTANCE to 20 px, the SPREAD to 20% and the SIZE to 3 px. You can select a different shadow colour (next to Blend Mode) if you wish.
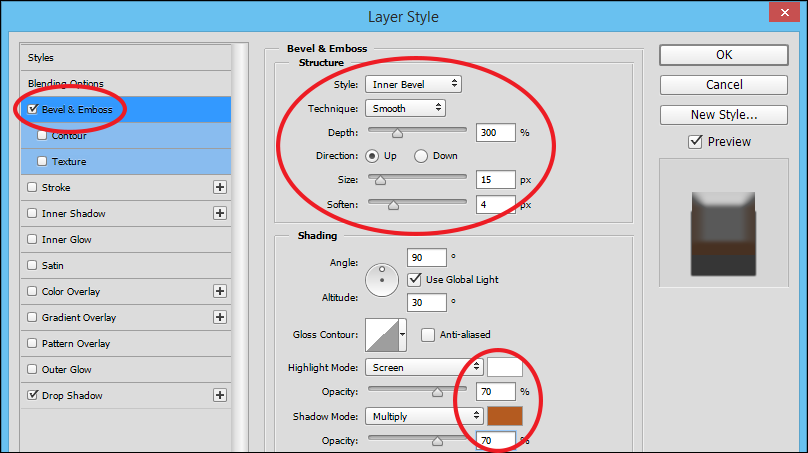
Click on BEVEL AND EMBOSS at the left of the dialogue box.
Set the DEPTH to 300%, the SIZE to 15 px, the SOFTEN to 4 px, the HIGHLIGHT MODE colour to white with 70% opacity and the SHADOW MODE colour to orange with 70% opacity. Note: You can experiment with some of the other settings (for example, some Gloss Contours) if you wish.
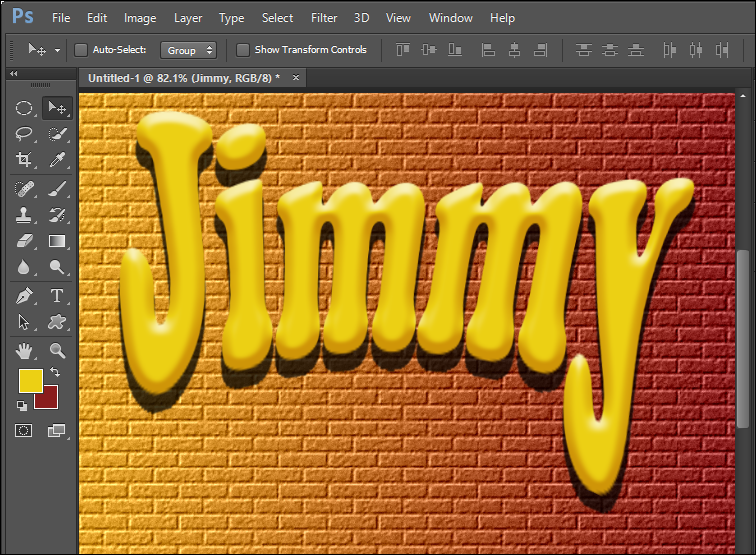
Select OK and your text should look similar to the following diagram.
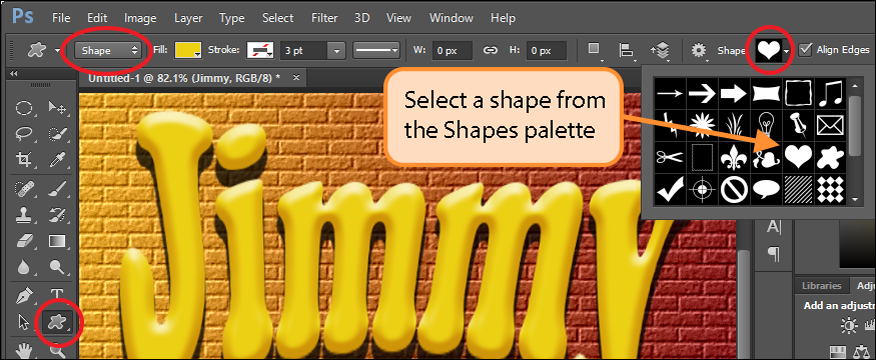
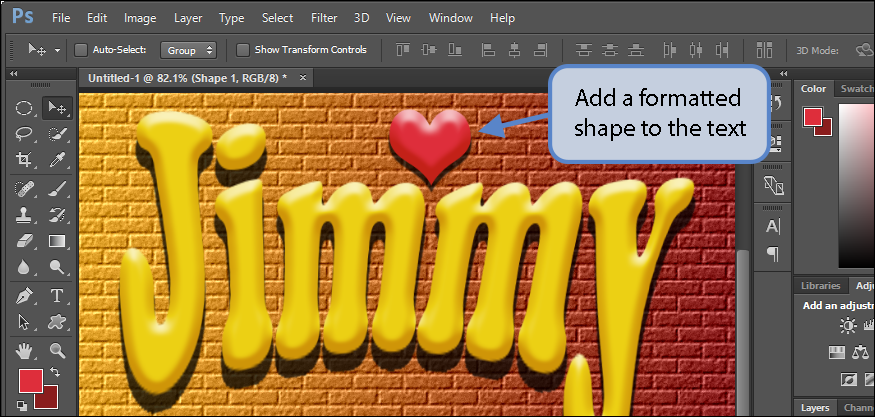
There are hundreds of shapes in Photoshop and they can be given the same three-dimensional effects that you have just applied to text.
Select the CUSTOM SHAPE TOOL from the TOOLS panel and, in the OPTIONS BAR, set the SHAPE box to a shape (for example, a heart) and check that SHAPE is selected at the left of the OPTIONS BAR (which places the shape in its own layer).
Select a foreground colour in the TOOLS panel then drag the shape on the brick wall.
Display the LAYER menu, highlight LAYER STYLE and select DROP SHADOW.
Apply some DROP SHADOW and BEVEL AND EMBOSS effects on the shape to create some three-dimensional effects.
Note: The MOVE TOOL can be used to move the shape on the canvas.