Photo editing programs allow you to accurately edit photos and they normally provide many tools to do this. These tools allow you to remove backgrounds, remove blemishes, improve skin tones, change eye colour, etc.
The exercises have been prepared using Adobe Photoshop, which is the most common photo editing program. You will need access to the PIT2 Support Files, which can be downloaded from the provided links or Cambridge Go.
Mario has had his car for a few years now and he has decided it is time to update to a newer model. He intends to advertise the car on the internet. He has taken a photograph of the car, but he does not want the background to be so prominent.
A selection will be placed around the car then the background will be altered.
Direct your browser to pixlr.com and launch the Pixlr Editor web app. Select OPEN IMAGE FROM COMPUTER from the Welcome screen.
Access the image data file downloaded from above link. This is a photograph of Mario’s car.
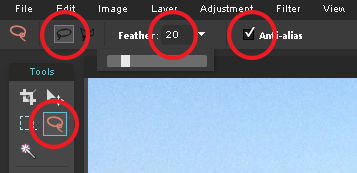
Select the LASSO TOOL from the Tools panel at the left of the screen. In the OPTIONS BAR across the top of the screen, select the FREEHAND LASSO TOOL.
Set the FEATHER size to 20 and make sure that the ANTI-ALIAS box is ticked.
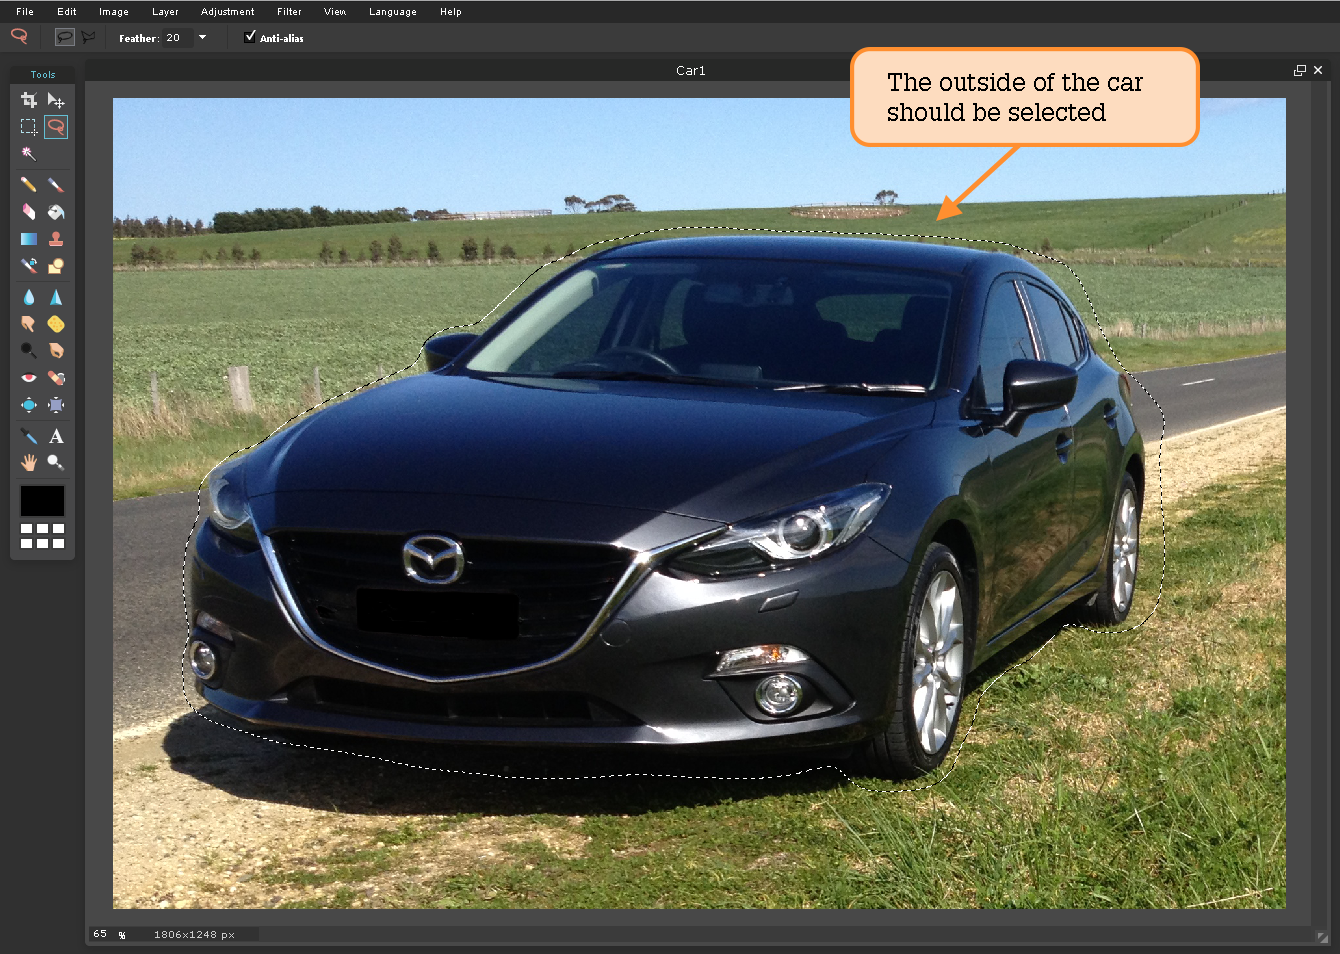
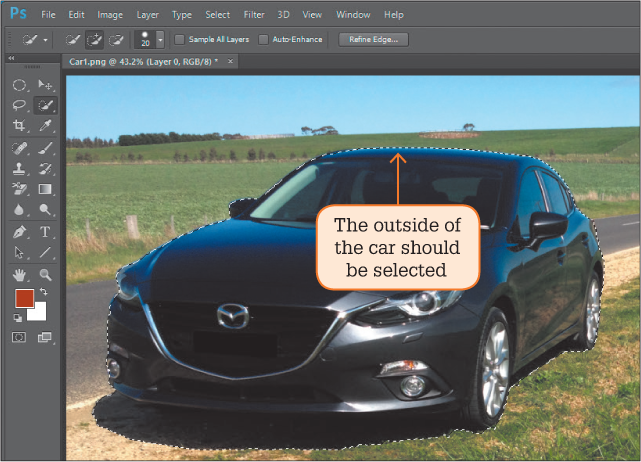
Select SHOW ALL from the VIEW menu. Drag the LASSO TOOL around the outside of the car until the whole car is selected.
Refining the selection
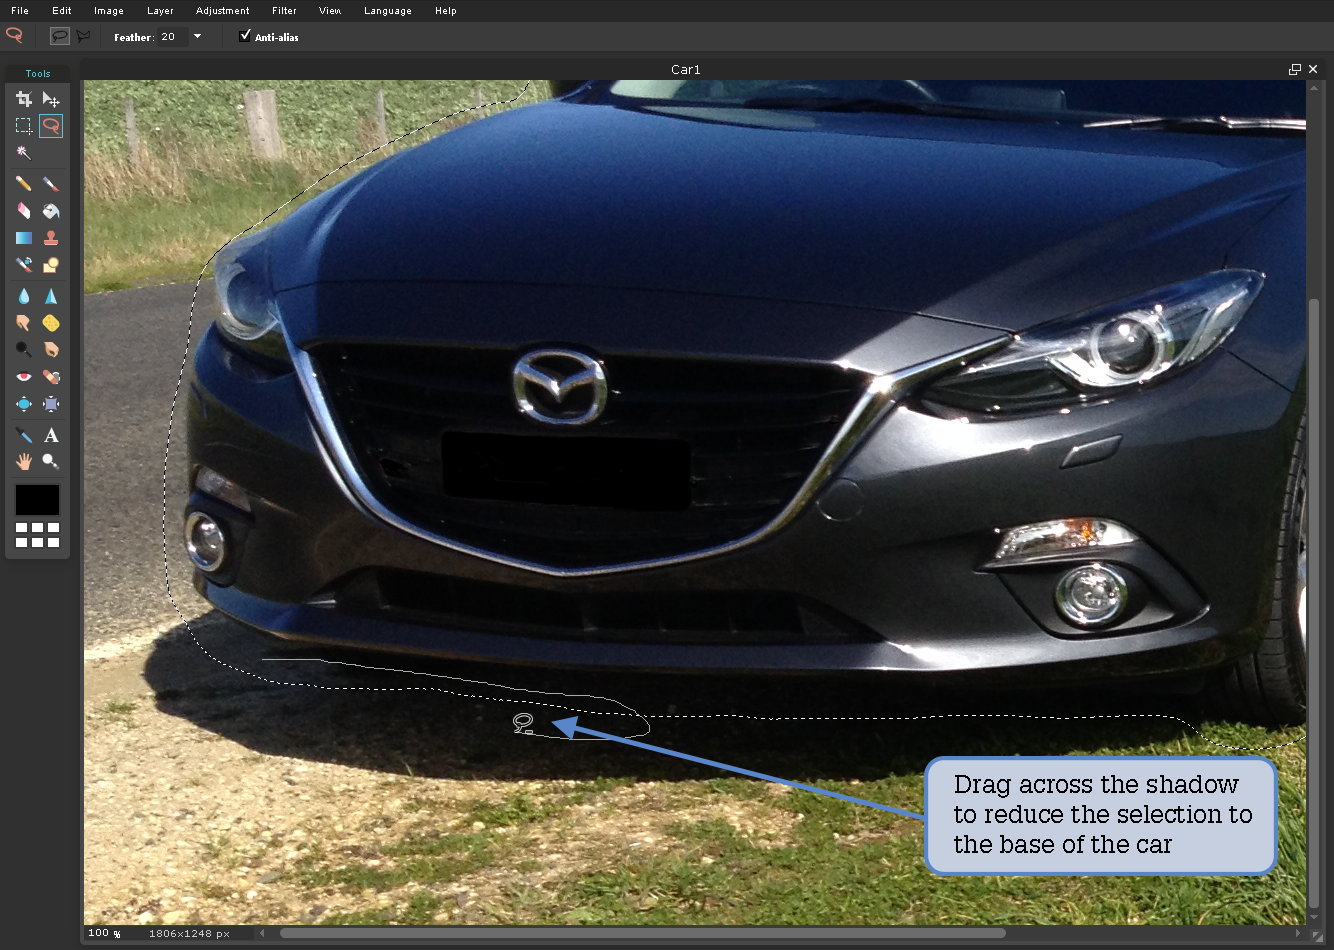
The LASSO TOOL does a reasonable job, but it’s a crude tool that doesn’t follow the exact outline of the car. In this case, the selection at the front and side of the car includes too much shadow. You can refine the selection by removing part of the ‘path’.
Press <Ctrl+> on Windows or <Command+> on Mac a couple of times to zoom in on the car.
Scroll to the front of the car where part of the background has been included in the selection.
Hold down the <Ctrl> or <Option> key, so that a minus sign appears next to the LASSO cursor.
Drag the cursor through the background area that has been included in the selection to reduce the selection. Make sure that you bring your cursor back to the starting point so that it forms a loop on screen. Release the <Ctrl> or <Option> key.
Hold down the <Shift> key to add a plus sign to the cursor. Move the cursor across any areas of the car that have not been included to add them to the selection. Again, make sure to bring the cursor back to the starting point.
Scroll around the rest of the car and repair any parts of the selection that are not close to the edge of the car. Hold down <Ctrl> or <Option> when you want to reduce the selection and <Shift> when you want to add to the selection. You can zoom in on areas of the car to make the selection easier. Note: The selection does not need to be perfect, just close to the outline of the car. You can use UNDO from the EDIT menu to remove changes that you are not happy with.
Once you are happy with the selection, select SHOW ALL from the VIEW menu so the whole car is in view.
Copying the car to another layer
The car needs to be placed in a separate layer so that the background can be altered without affecting the car.
In the EDIT menu, select COPY, then select PASTE. This creates a new layer with just the car in it.
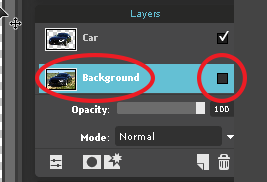
Double click on the LAYER 1 label in the Layers panel (on the right-hand side of your screen) and rename it ‘Car’.
Double click the ‘Background’ layer to unlock it. Now un-tick the box so that just the car is visible on a transparent background.
Altering the background
In Pixlr, each layer is a separate entity and must be selected if you need to make changes to objects in that layer.
Select the Background layer to make it active, and click the tick box to display it.
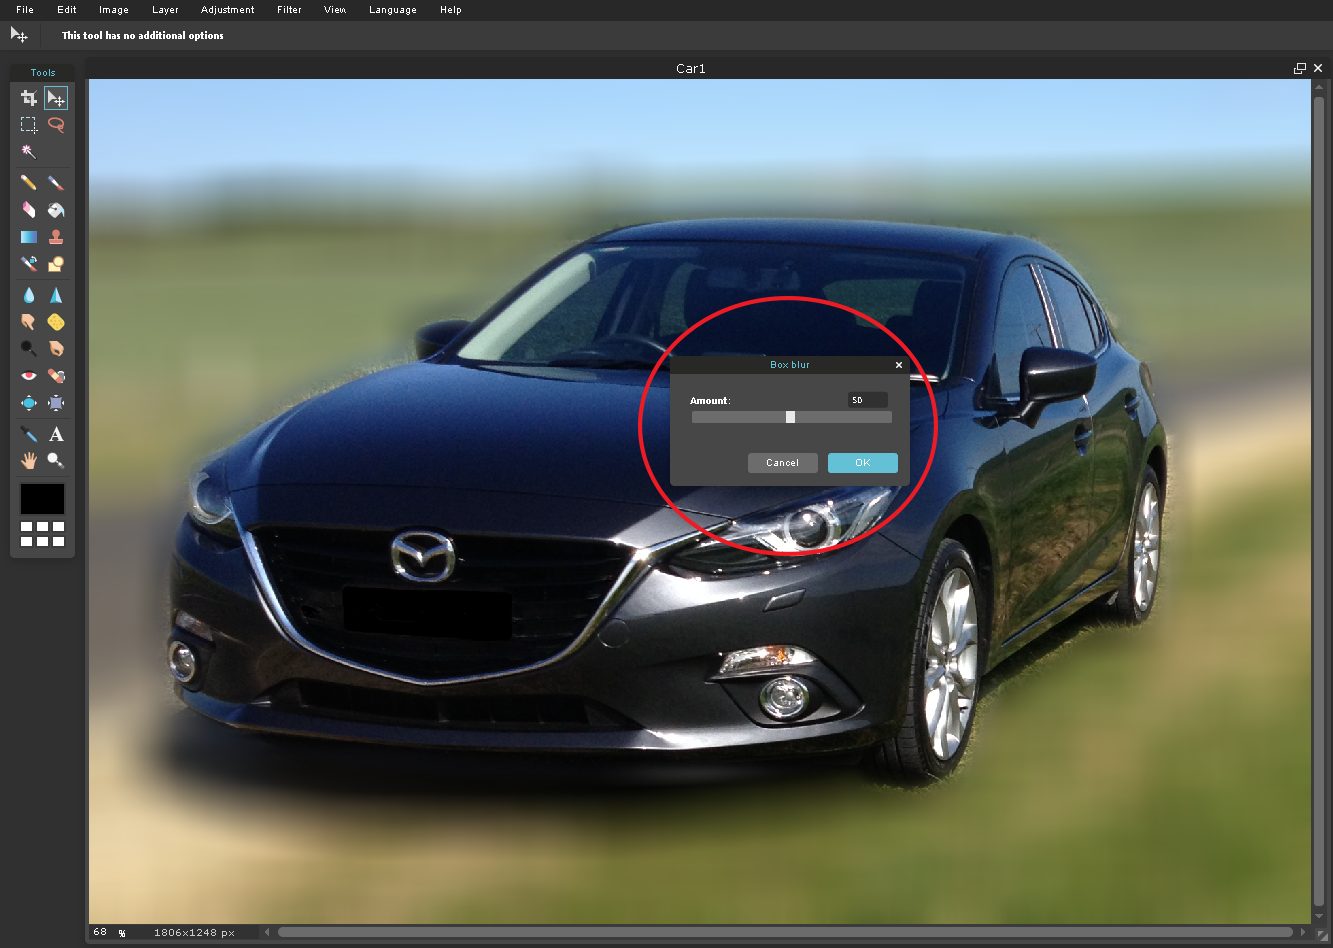
Go to the FILTER menu and select BOX BLUR. Move the slider until you get the effect that you like. Select OK to accept the change.
You can experiment with other background effects if you wish. For example, FILTER – BLUR – GAUSSIAN BLUR.
Go to the FILE menu and select SAVE. In the Format drop-down menu, set the image format to a .PXD file and call the file ‘Car Selected’.
Displaying just the car
Perhaps Mario would prefer no background at all behind the car. As the car is in its own layer, this is easy to achieve.
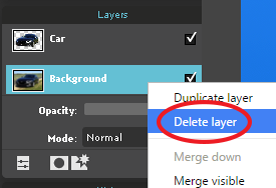
Select the Background layer in the Layers panel. Right-click on the layer and select the DELETE LAYER option.
Use SAVE from the FILE menu to save the image as a .PXD file in your Storage folder under the file name ‘Car Only’.
Mario has had his car for a few years now and he has decided it is time to update to a newer model. He intends to advertise the car on the internet. He has taken a photograph of the car, but he does not want the background to be so prominent.
A selection will be placed around the car then the background will be altered.
Load Adobe Photoshop and select OPEN from the FILE menu or select the OPEN icon in the Welcome screen.
Access the image data file downloaded from the above link. This is a photograph of Mario’s car.
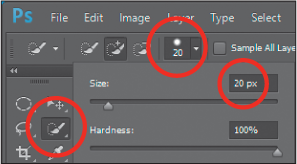
Select the QUICK SELECTION TOOL from the Tools panel at the left of the screen and, in the OPTIONS BAR across the top of the screen, click on the arrow next to the BRUSH PICKER box and set the brush SIZE to 20 px.
Click on the BRUSH PICKER box arrow again to set the brush size.
Set the view to FIT IN WINDOW (<Ctrl+0> or <Command+0>) and drag around the inside of the car until the whole car is selected.
Refining the selection
The QUICK SELECTION TOOL does a reasonable job of selecting the car, but it does have trouble when the colour of the background is close to the colour of the object being selected. In this case, that occurs with the shadows at the front and side of the car. The selection can be refined.
Press <Ctrl+> on the Windows system or <Command+> on the Mac system a couple of times to zoom in on the car.
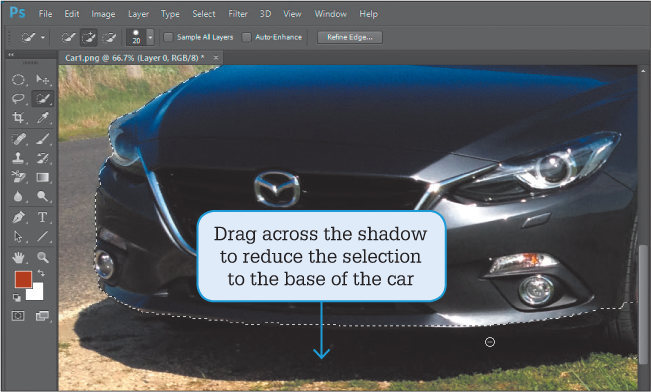
Scroll to the front of the car where part of the background has been included in the selection.
Press the OPEN SQUARE BRACKET key ([) a few times to reduce the Brush Size to 5 px.
Hold down the <Alt> or <Option> key and drag the cursor in the background area that has been included in the selection to reduce the selection.
Release the <Alt> or <Option> key and click the + marker in any areas of the car that have not been included in the selection.
Scroll around the rest of the car and repair any parts of the selection that are not close to the edge of the car. You keep the <Alt> or <Option> depressed when you want to reduce the selection and drag normally when you want to add to the selection. You can zoom in on one area of the car to make the selection easier. Note: The selection does not need to be perfect, just close to the outline of the car. You can increase the BRUSH SIZE when needed by pressing the ] key and you can use STEP BACKWARD from the EDIT menu to remove steps that you are not happy with.
Once you are happy with the selection, press <Ctrl+0> or <Command+0> to set the view to FIT ON SCREEN so the whole car is in view.
Refining the edges
To complete the selection you can refine the edges of the selection to give it a more professional look.
Click on the SELECT AND MASK button in the OPTIONS BAR and set the VIEW box in the Select and Mask dialogue box to ON WHITE with a 100% OPACITY.
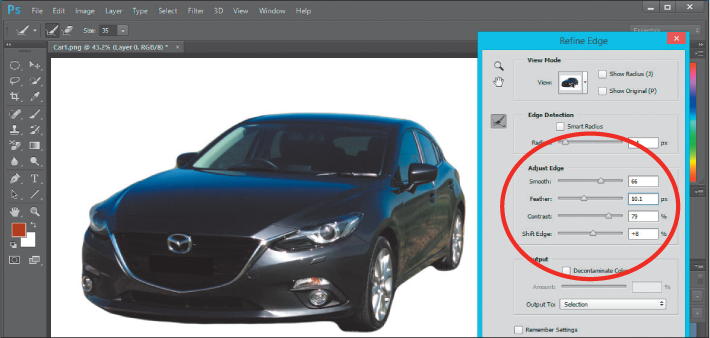
Adjust the RADIUS, CONTRAST, SMOOTH and SHIFT EDGE settings to improve the look of the selection.
Increase the FEATHER to about 10 px to soften the edges of the selection.
You can look at different previews of the selection by clicking on the VIEW BOX arrow at the top of the REFINE EDGE dialogue box then return the VIEW to MARCHING ANTS.
Once you are happy with the settings, select OK.
Copying the car to another layer
The car needs to be placed in a separate layer so that the background can be altered without affecting the car.
Display the LAYER menu, highlight NEW and select LAYER VIA COPY. A new layer is created with just the car in it.
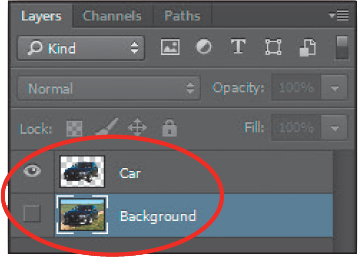
Double click on the LAYER 1 label in the Layers panel and rename it ‘Car’, then rename LAYER 0 to ‘Background’.
Turn the background layer off by clicking on its VISIBILITY box so that just the car is visible on a transparent background.
Altering the background
In Photoshop each layer is a separate entity and must be selected if you need to make changes to objects in that layer.
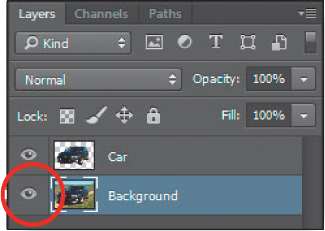
Click on the BACKGROUND layer to make it active and click on its VIEW box to turn its view back on.
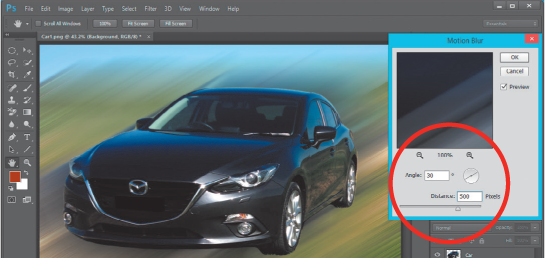
Display the FILTER menu, highlight BLUR and select MOTION BLUR.
Set the ANGLE box to 30° and move the DISTANCE slider until you get the effect that you like. About 500 pixels should produce the effect of the car moving.
Select OK to accept the change. You can experiment with other background effects if you wish. For example, FILTER – BLUR – GAUSSIAN BLUR.
Display the FILE menu and select SAVE. In the SAVE AS TYPE (or FORMAT) box set the image format to a Photoshop .PSD file and call the file: Car selected.
Select OK and you will be asked whether to Maximize the Compatibility. Select OK to save the file.
Displaying just the car
Perhaps Mario would prefer no background at all behind the car. As the car is in its own layer this is easy to achieve.
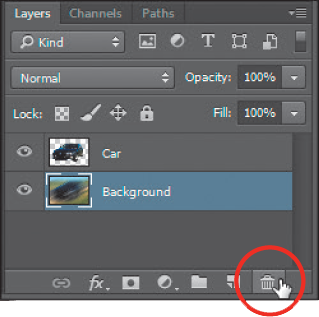
Select the BACKGROUND layer in the LAYERS panel and click on the DELETE LAYER icon to delete it.
Click on YES in the warning dialogue box to remove the background.
Use SAVE AS from the FILE menu to save the image as a Photoshop .PSD file in your storage folder under the file name: Car only.