Most drawing programs offer much greater text editing and formatting options than painting programs. You can easily alter text, and format it at any time in the production of the design.
Additional computer graphics exercise 7
Using text in designs
To illustrate the use of text in designs, a simplified drawing of a calculator will be created.
Drawing the calculator keys
Start a new Illustrator document with the same settings as in Exercise 1.
Use the VIEW menu to turn on SHOW RULERS, SHOW GRID and SNAP TO GRID.
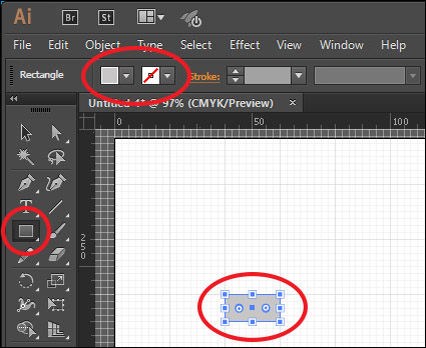
Select the RECTANGLE TOOL from the TOOLS panel and drag a rectangle that is 20 mm across and 10 mm down near the top left of the canvas.
Set the FILL COLOUR for the rectangle to a light grey and the STROKE COLOUR to none.
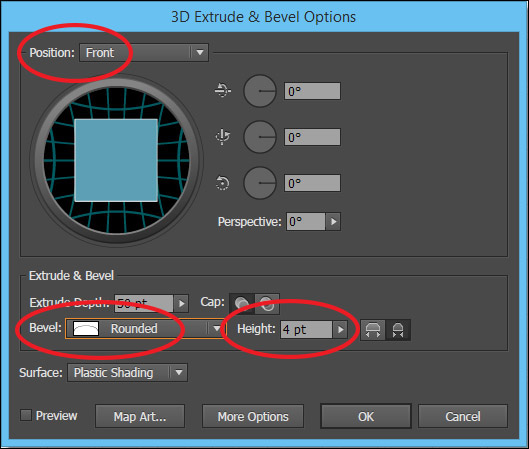
The key can be given a bevel effect. Display the EFFECT menu, highlight 3D and select EXTRUDE AND BEVEL.
Set the POSITION box to FRONT, the BEVEL box to ROUNDED and the HEIGHT to 4 pt, then select OK.
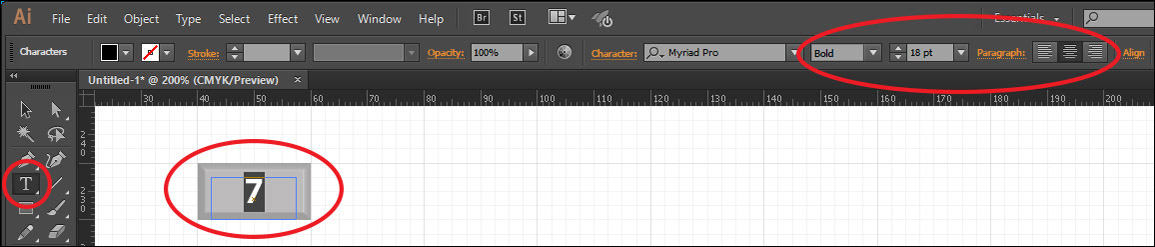
Zoom the screen to 200% by pressing <Ctrl+> or <Command+> and scroll to the key.
Select the TYPE TOOL in the TOOLS panel, drag a frame inside the key, enter: 7 then highlight the text and, in the CONTROL panel, set the STYLE to BOLD, the FONT SIZE to 18 pt and click on the ALIGN CENTRE icon.
Note:You can turn off SNAP TO GRID in the VIEW menu then use the SELECTION TOOL to move the text box if the number is not centred within the key.
Copying the keys
The keys can be copied and pasted rather than re-entered. To do this efficiently, the rectangle and text box can be grouped into one object.
Select the SELECTION TOOL from the TOOLS panel, hold down the <Shift> key and click on the rectangle so that both it and the text box are selected.
Display the OBJECT menu and select GROUP to combine the objects into one object.
Press <Ctrl+C> or <Command+C> to copy the key.
Press <Ctrl+V> or <Command+V> to paste the key and move the copy 10 mm to the right of the previous key.
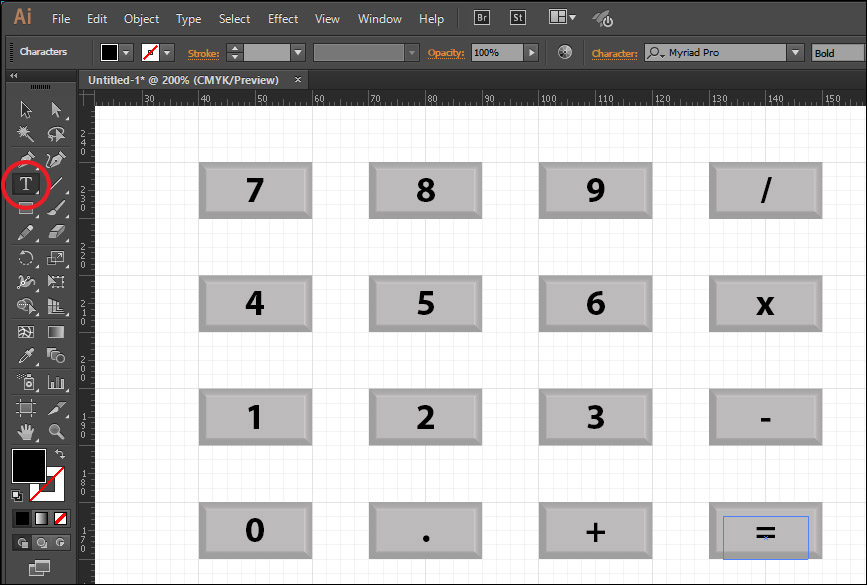
Repeat step 4 two more times to create a row of four keys.
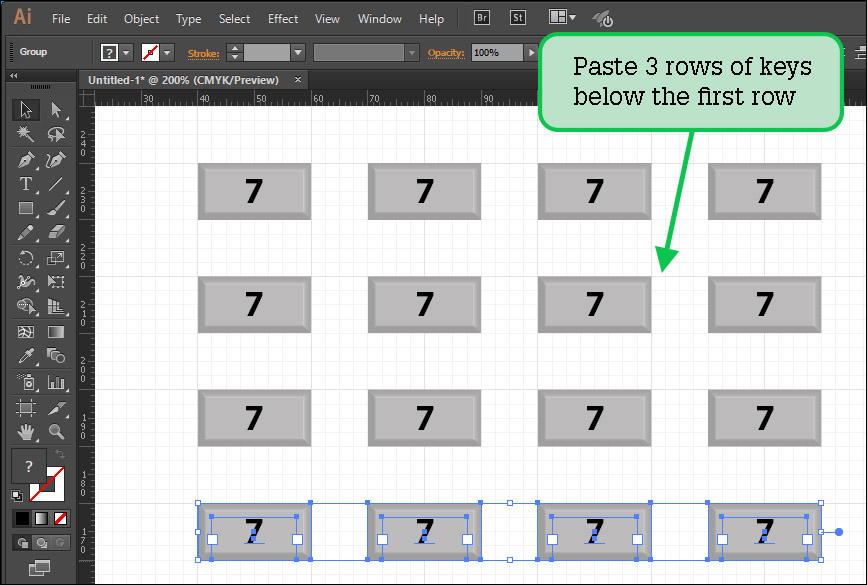
The row of keys can be copied and pasted to produce four rows of keys. Hold down the <Shift> key and click on any unselected keys so that all four are selected and press <Ctrl+C> or <Command+C> to copy them.
Paste three copies of the row of keys 10 mm below each row.
Select the TYPE TOOL from the TOOLS panel, click in each pasted text box in turn and change the numbers and symbols to those displayed in the diagram.
Select the SELECTION TOOL and click on the = key.
Display the OBJECT menu and select UNGROUP to split the = key back into its individual objects.
Select just the rectangle and set the FILL COLOUR to orange.
Completing the calculator
To complete the calculator a viewer and the base of the calculator will be added.
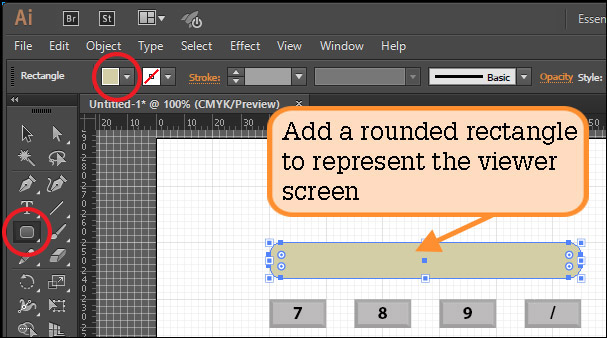
Press <Ctrl+1> or <Command+1> to return the view to 100%.
Select the ROUNDED RECTANGLE TOOL from within the RECTANGLE TOOL and drag a viewer frame above the top row of keys.
Set the FILL COLOUR to light green. Note: You can open the COLOUR GUIDE panel (second icon) from the PANEL GROUP at the right of the screen and select lighter shades of the fill colour.
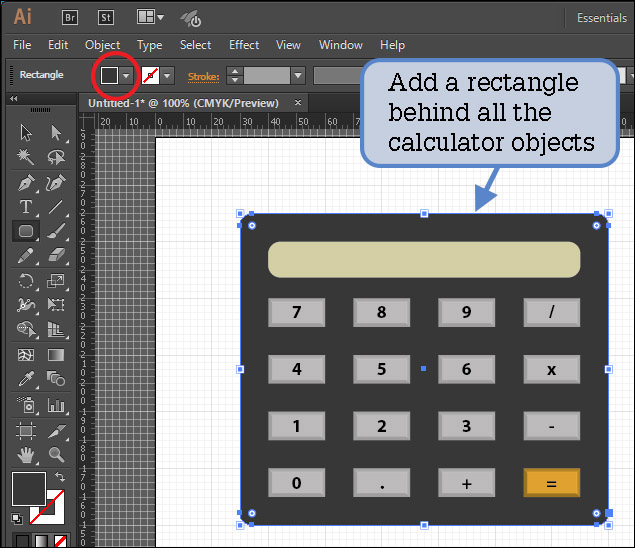
Drag a rounded rectangle around all the calculator objects then set the FILL COLOUR to dark grey.
Display the OBJECT menu, highlight ARRANGE and select SEND TO BACK to move the rectangle behind all the other objects.
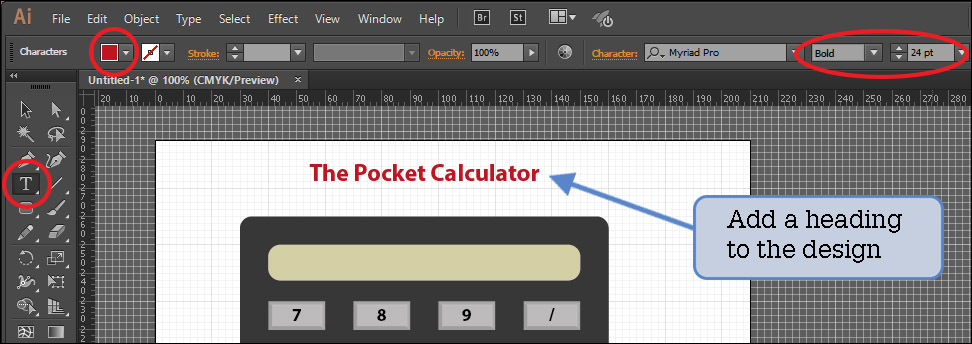
To complete the design, a heading will be added. Select the TYPE TOOL and click either above or to the right of the calculator.
Enter the heading: The Pocket Calculator.
Highlight the text and use the CONTROL PANEL to set the FILL COLOUR to red, the STYLE to BOLD and the FONT SIZE to 24 pt.
Use the SELECTION TOOL to centre the heading over or to the right of the calculator and save the design in your Storage folder as: Calculator.