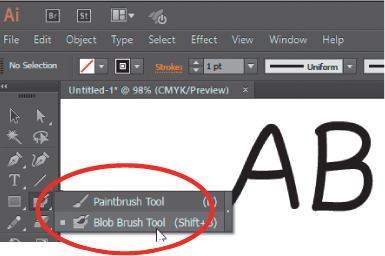
Vector-based graphics programs provide tools to create freehand drawings. These tools emulate painting tools from pixel-based programs. The freehand drawing tools include the paintbrush tool, the blob brush tool and the eraser tool.
The BLOB BRUSH TOOL is a little more flexible than the paintbrush tool, so it will be used for the freehand sketches.
Start a new Adobe Illustrator document with the same settings as in Exercise 1.
Select the BLOB BRUSH TOOL from within the PAINTBRUSH TOOL in the Tools panel and paint your initials on the canvas. Make sure the letters are separate from one another.
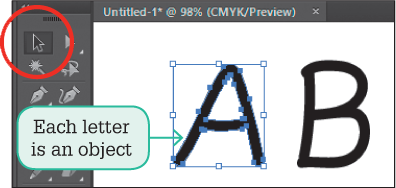
Select the SELECTION TOOL, click on one of the letters and move it. The letter is a separate object.
Select the BLOB BRUSH TOOL and drag a line to connect the two letters.
Select the SELECTION TOOL and drag a letter. Both letters should move as they have been joined.
Click outside the letters to deselect them.
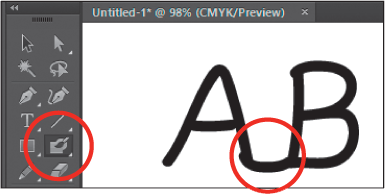
Select the BLOB BRUSH TOOL and select a FILL COLOUR that is very different to the colour of the letters.
Drag a line to connect parts of one of your initials.
Select the SELECTION TOOL and try to move the new join. It should move individually as it is a separate object. Note: The BLOB BRUSH TOOL uses colours to identify objects so, if you want to join objects together, you need to ensure that the paint colour is similar to the colour of the object to be joined.
Eraser tool
The eraser tool can be used to erase lines from a sketch. The difference with this tool and similar tools in a painting program is that in a vector-based program, the object to be erased must first be selected.
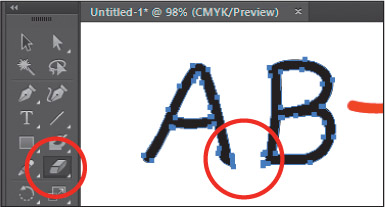
Select the SELECTION TOOL and click on your initials to select them.
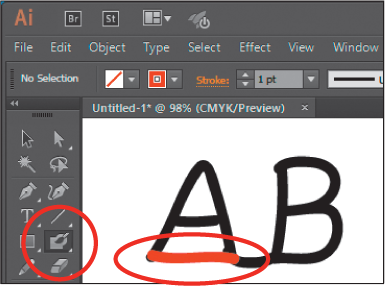
Select the ERASER TOOL from the Tools panel and erase the joint between the two letters.
You now have two separate letters again.
Try erasing the different coloured line that you drew. You should not be able to do so until you select it.
To practise the use of the freehand drawing tools, a simple sketch of a mobile phone will be created.
Drawing the phone outline
Skills practised
Blob brush tool
Eraser tool
Live Paintbrush tool
Filling objects
Start a new Adobe Illustrator document with the same settings as in Exercise 1.
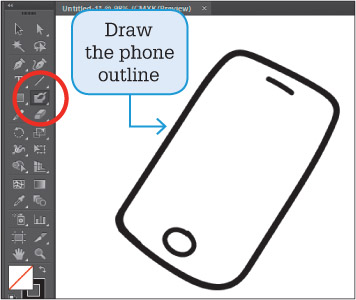
Select the BLOB BRUSH TOOL from the Tools panel, set the FILL COLOUR to BLACK and draw the outline of the phone. The < and > keys can be used to increase or decrease the size of the brush. Note: The ERASER TOOL can be used to remove any parts of the outline you are not happy with.
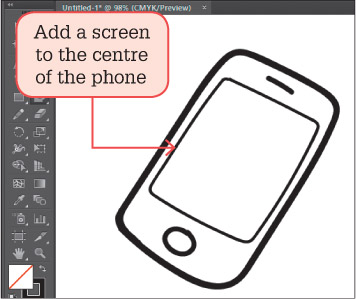
Reduce the size of the brush by pressing the [ key and draw the outline of the viewer screen in the centre of the phone.
Filling the sketch
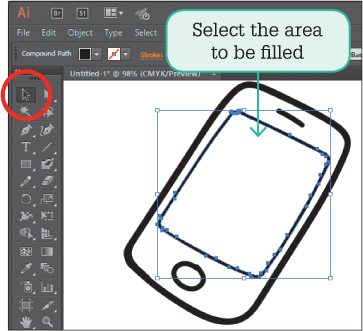
The sketch can be filled with colours. The limitation with a vector-based program is that the area to be filled must first be selected.
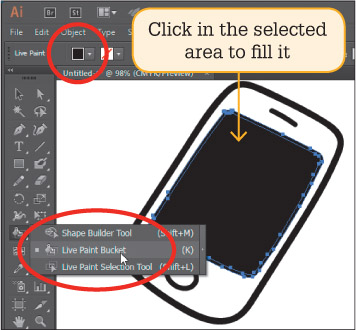
Select the SELECTION TOOL and click on the view screen to select it.
Select the LIVE PAINTBUCKET TOOL in the Tools panel, set the FILL COLOUR to BLACK and click the pointer in the selected area to fill that area. Note: The LIVE PAINTBUCKET TOOL is within the SHAPE BUILDER TOOL.
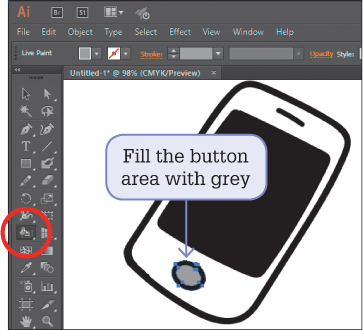
Select the SELECTION TOOL and select the button at the base of the phone.
Select the LIVE PAINTBUCKET TOOL, set the FILL COLOUR to a medium grey and click inside the button area to fill it.
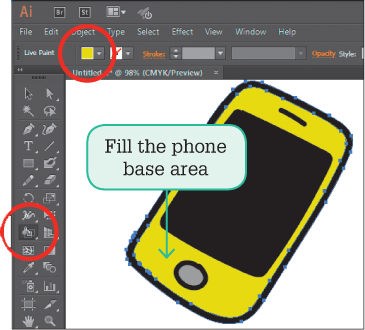
Select the SELECTION TOOL and select the base area of the phone.
Select the LIVE PAINTBUCKET TOOL, set the FILL COLOUR to a different colour and click inside the selected area to fill it.
Save the document in your storage folder as: Phone.