All drawing programs provide a range of drawing tools that allow you to accurately produce designs. Some of these tools include Line, Arc, Rectangle and Ellipse tools.
A cone shape will be created using the drawing tools.
Setting the grid
Skills practised
Rectangle tool
Line segment tool
Ellipse tool
Arc tool
Rulers and grid
Most vector-based drawing programs provide a grid to make accurate drawings easier to do.
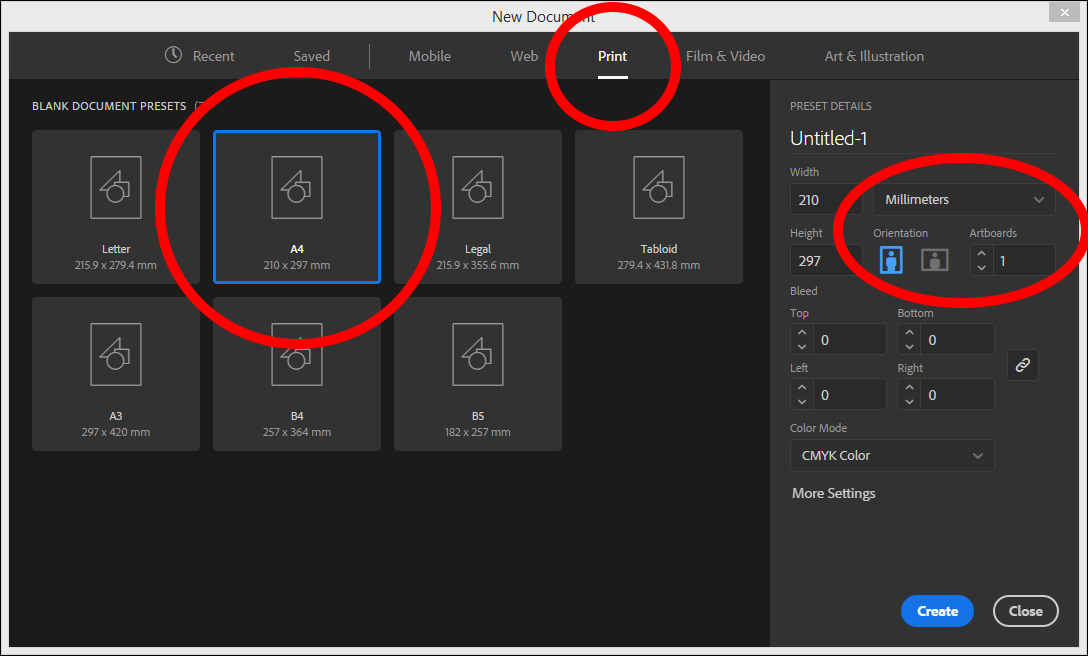
Load Adobe Illustrator and, in the Welcome screen, click on NEW to open the NEW DOCUMENT dialogue box.
Open the PRINT category and select the A4 preset (or use the default settings). Check that the UNITS are set to MILLIMETRES, the ORIENTATION is set to PORTRAIT and select CREATE.
Display the VIEW menu, highlight RULER and select SHOW RULERS to add rulers to the left and top of the canvas.
Display the VIEW menu again and select SHOW GRID to add a grid to the canvas.
Display the VIEW menu again and turn on SNAP TO GRID and turn off SNAP TO POINT.
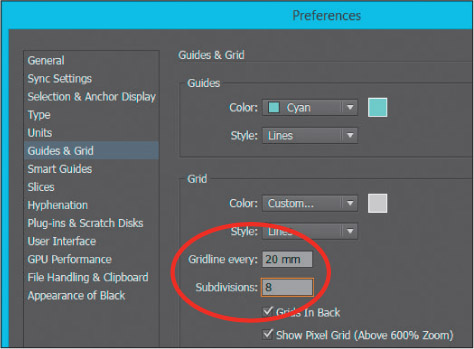
The grid can be set to match the increments in the RULERS. Display the EDIT menu on the Windows system or the ILLUSTRATOR menu on the Mac system, highlight PREFERENCES and select GUIDES & GRID.
Set the GRIDLINE EVERY box to 20 mm and the SUBDIVISIONS box to 8, then select OK.
Drawing the ovals and lines
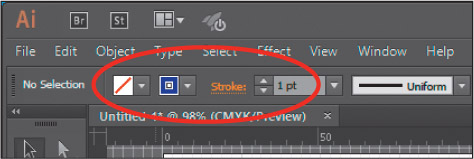
The base of the cone will be created using an oval and lines. When creating these you should decide what fill and stroke colours are required. In this case we do not want any objects to be filled and the lines need to be a dark colour.
In the CONTROL panel at the top of the screen set the FILL box (the left box) to NONE and the STROKE box to the dark colour. The STROKE WEIGHT box should be set to 1 pt.
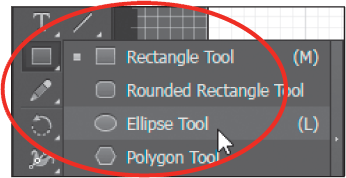
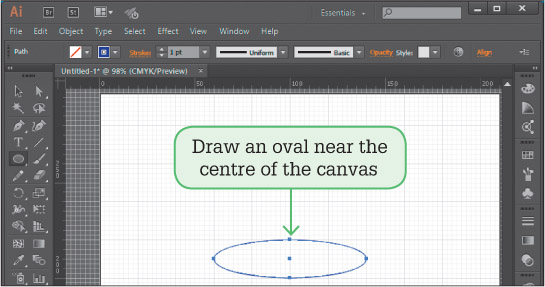
Click and hold on the SHAPES box in the Tools panel at the left of the screen and select the ELLIPSE TOOL.
Drag an oval 80 mm across and 30 mm down near the centre of the canvas. That is, 4 solid grid lines across and 1 solid grid line down.
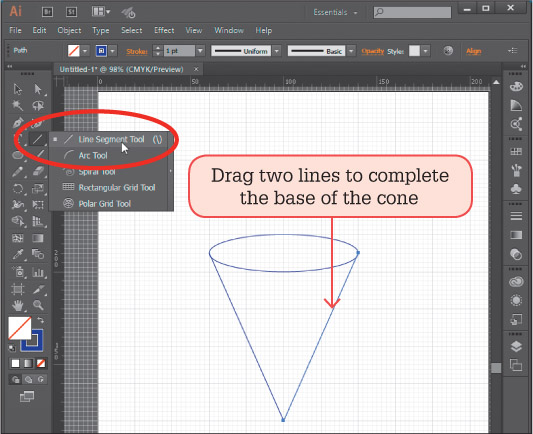
Select the LINE SEGMENT TOOL from the Tools panel and drag a line from the left edge of the oval down 90 mm and 40 mm to the right (four-and-a-half solid grid lines down and two solid grid lines to the right).
Drag another line from the bottom point of the line to the right edge of the oval.
Drawing the arcs
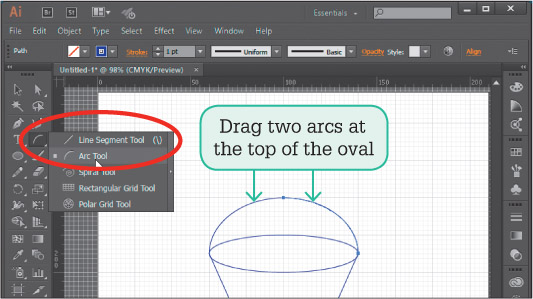
Two arcs will be added to the oval to complete the cone.
Select the ARC TOOL from within the LINE SEGMENT TOOL.
Drag an arc from the left edge of the oval up 30 mm and 40 mm to the right.
Drag another arc from the right edge of the oval to the right point of the first arc.
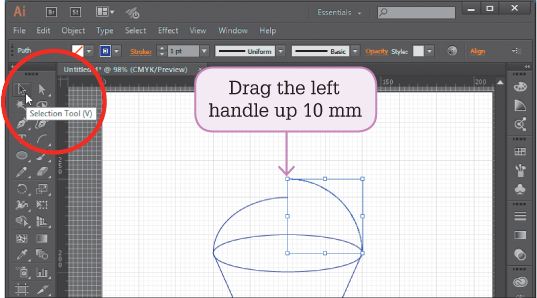
Vector drawings can be easily edited at any time. Let’s make the arcs a little larger. Select the SELECTION TOOL from the Tools panel.
Click on the right arc and drag its left handle up 10 mm.
Repeat step 5 for the right handle of the first arc.
Select SAVE AS from the FILE menu and save the file in your storage folder as: Cone.
Select OK to the Save Options.
Other drawings
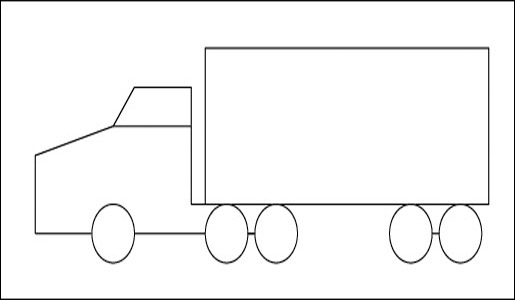
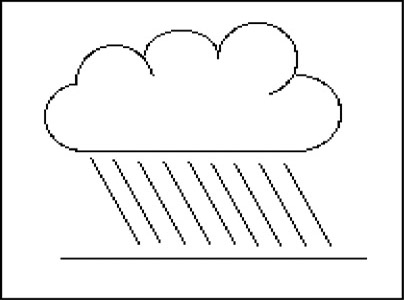
Use the LINE SEGMENT, RECTANGLE, ELLIPSE and ARC tools to create the following drawings.