Movie clips are self-contained animations with their own independent timeline so they do not complicate the timeline of the main animation you are creating. You can create an animated movie clip and use it many times within other animations without affecting the size of the file. Think of a movie clip as a separate animation that can be used as required.
To illustrate the use of movie clips, a bird movie clip will be created, then added to an animation.
The instructions in this exercise feature Adobe Flash, but may also be followed step-by-step for Adobe Animate.
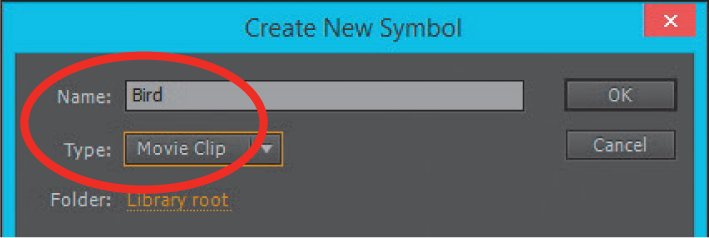
Create a new Flash (or Animate) ActionScript 3.0 document, then display the INSERT menu and select NEW SYMBOL.
Name the symbol Bird, set the TYPE to MOVIE CLIP and click on OK.
The screen will be set to MOVIE CLIP EDIT MODE. Notice that the Bird label is added above the Stage to indicate that you are editing the symbol.
Drawing the bird
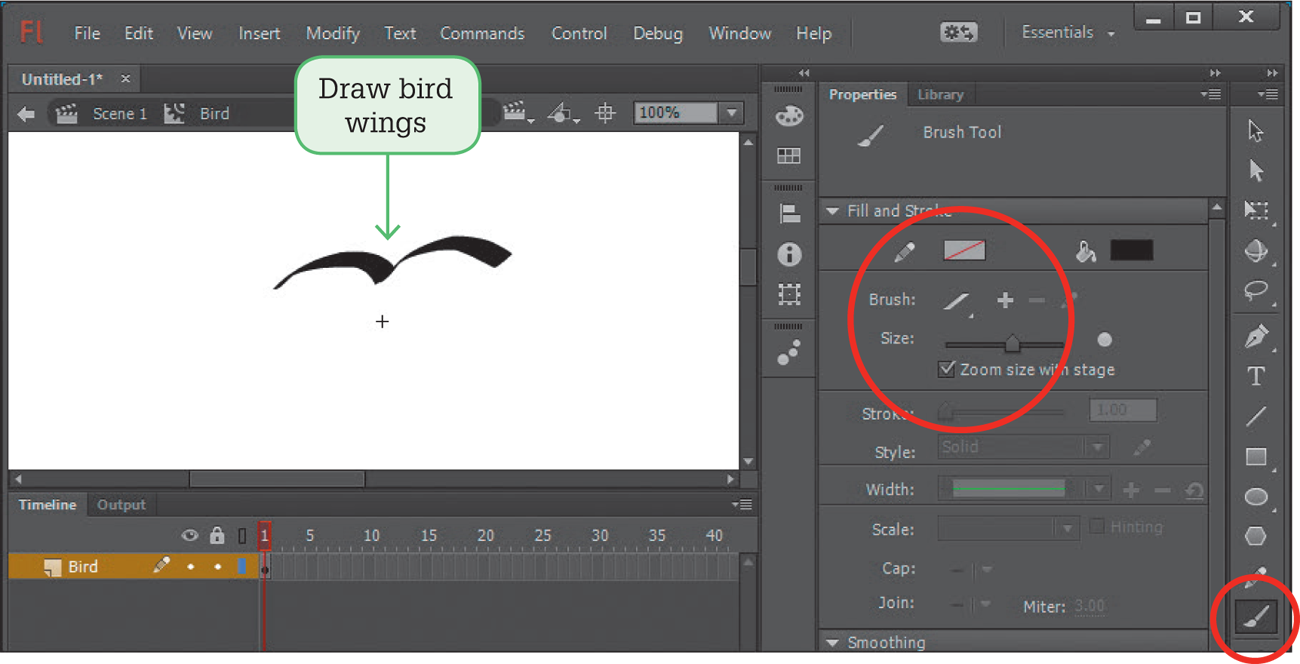
In the Timeline panel, change the layer name to ‘Bird’.
Select the BRUSH TOOL from the Tools panel and in the Properties panel set the BRUSH SHAPE to the last diagonal shape and BRUSH SIZE slider to about half.
Draw the bird wings near the top centre of the stage.
Note: It might take a few goes to get the wing looking right. Use <Ctrl+Z> or <Command+Z> to undo the wing until you produce the shape you want. The Library panel in the PANEL GROUP can be used to see a zoom of the symbol as you are creating it.
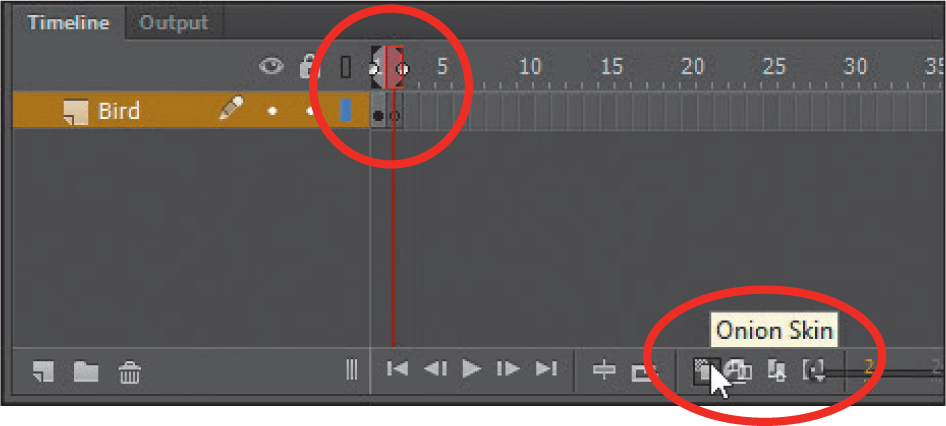
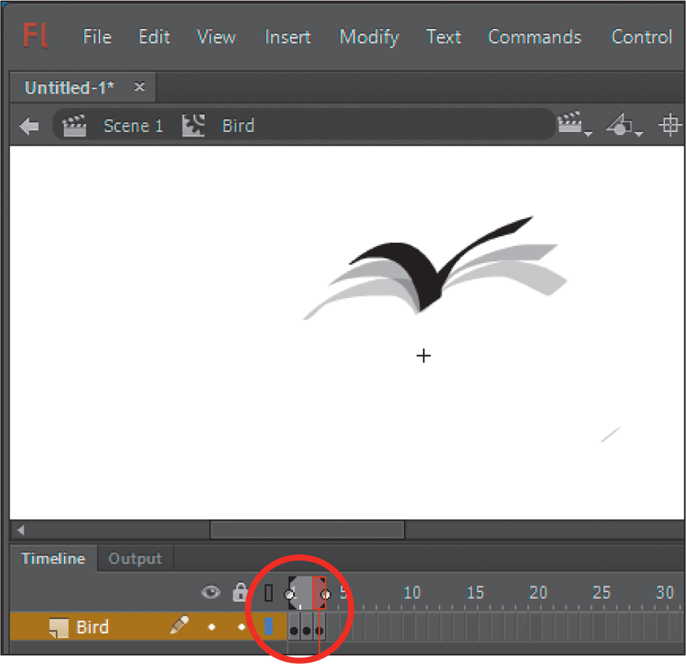
Display the INSERT menu, highlight TIMELINE and select BLANK KEYFRAME to add a second (empty) keyframe to the Timeline. The bird disappears.
Click on the ONION SKIN button at the base of the TIMELINE panel to see a watermark of the bird from Frame 1. Note: The Blank Keyframe will allow you to alter the shape of the bird. The Onion Skin image is just a watermark on the screen. It cannot be altered.
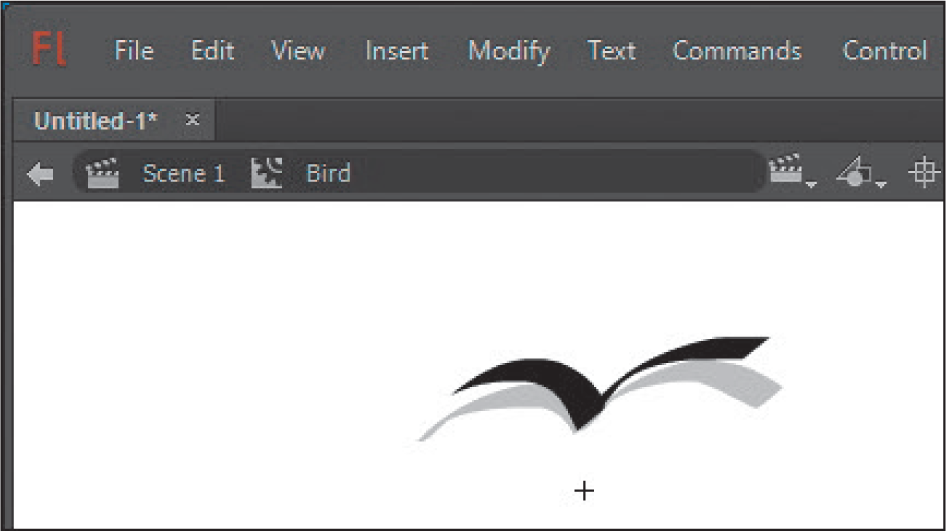
Draw another set of wings over the Onion Skin image, but make the wings a little higher and narrower.
Use the INSERT menu – TIMELINE – BLANK KEYFRAME to insert another empty keyframe and the two previous images will be displayed as Onion Skins.
Draw another set of wings over the Onion Skin image, but make the wings a little higher and narrower.
Run the PLAYHEAD over the frames to see the animation.
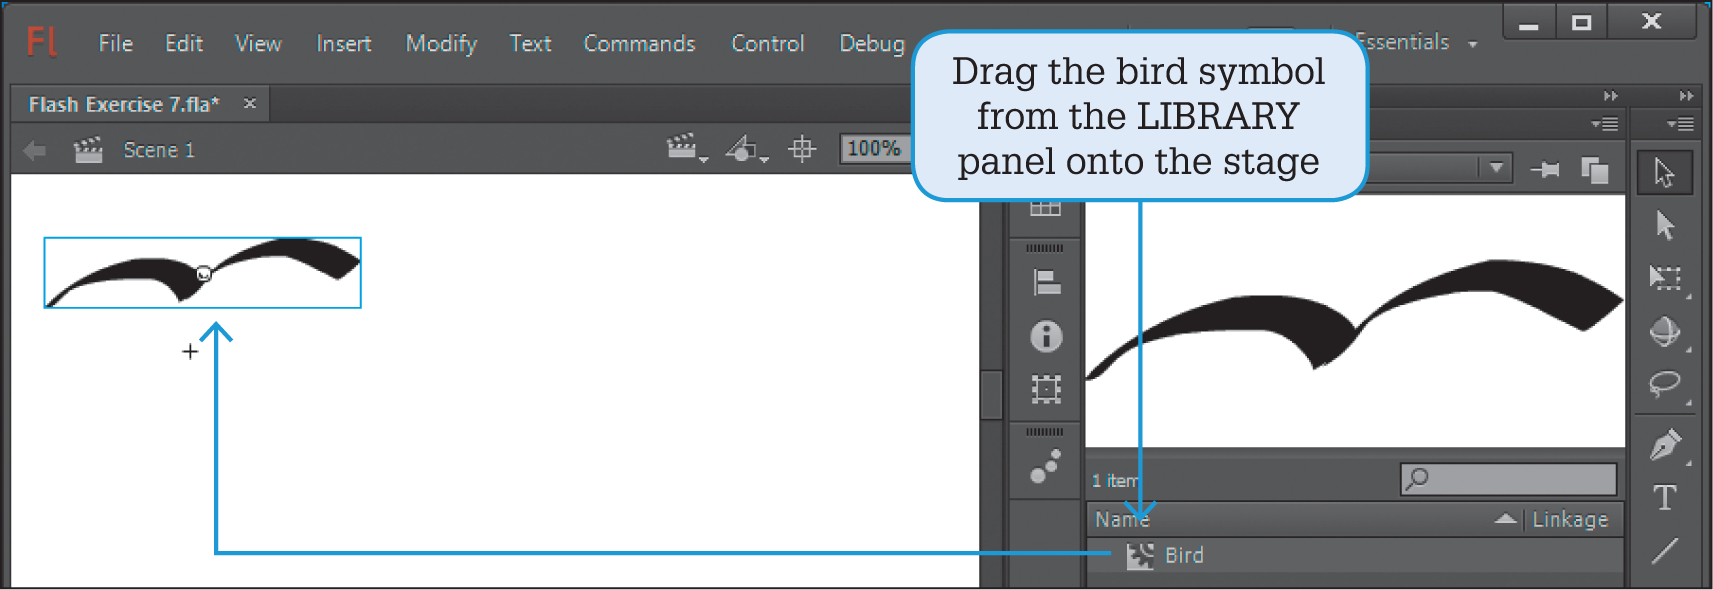
Click on the SCENE 1 heading at the top of the stage to return to the normal screen. The bird will disappear. It is in the LIBRARY panel.
Save the document in your storage folder as: Flash Exercise 7. Note: This is an example of a Keyframe animation where the object is altered a little at Keyframes that are next to one another. A Motion or Shape tween could have been used. Movie clips do not have to involve Keyframe animations.
Using the movie clip
The movie clip can now be used in animations as many times as needed.
Turn off the ONION SKIN button in the TIMELINE panel, open the LIBRARY panel in the PANEL GROUP and drag the bird symbol onto the stage.
Note: Notice that none of the keyframes are displayed in the Timeline panel. If you need to edit the bird movie clip you simply double click on it on the stage or in the LIBRARY panel and the screen will be returned to MOVIE CLIP EDIT MODE.
Test the movie and the bird should simply flap its wings. Movie clips do not operate when you simply play an animation. You need to use TEST from the CONTROL menu to see them operate.
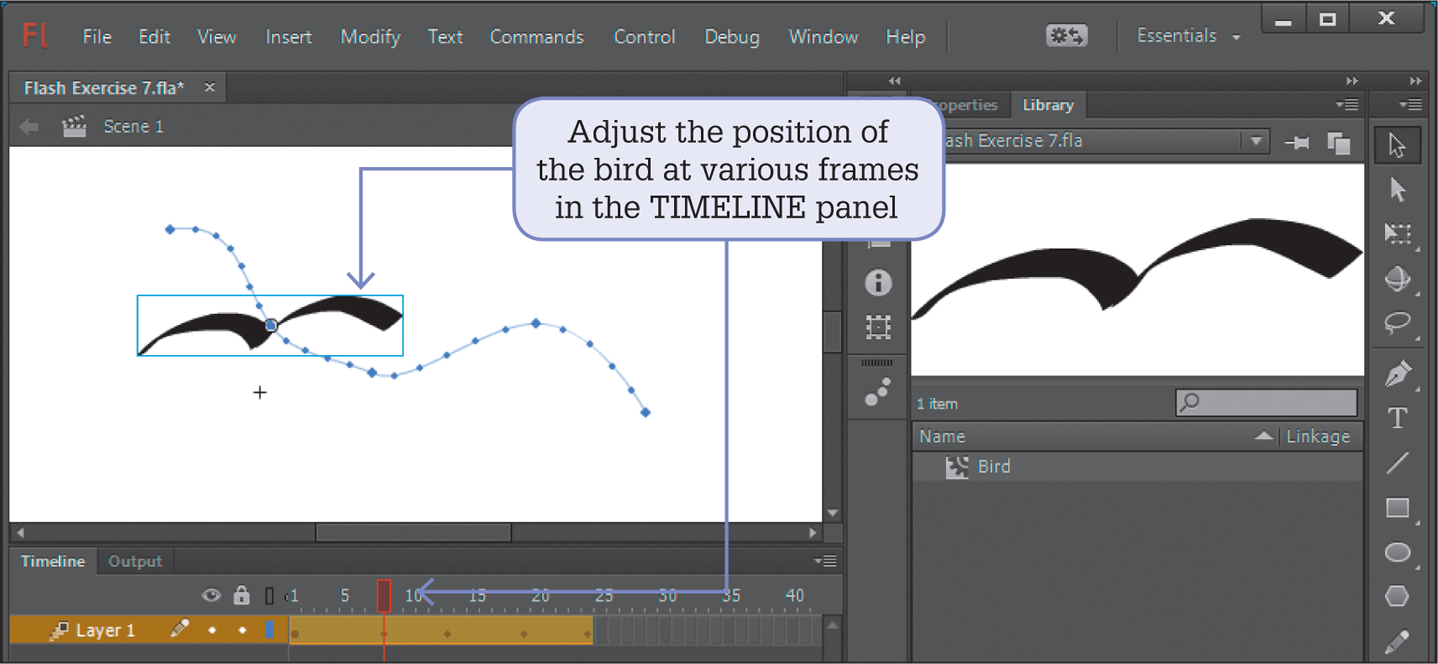
Click on Frame 1 in the TIMELINE panel and insert a MOTION TWEEN from the INSERT menu.
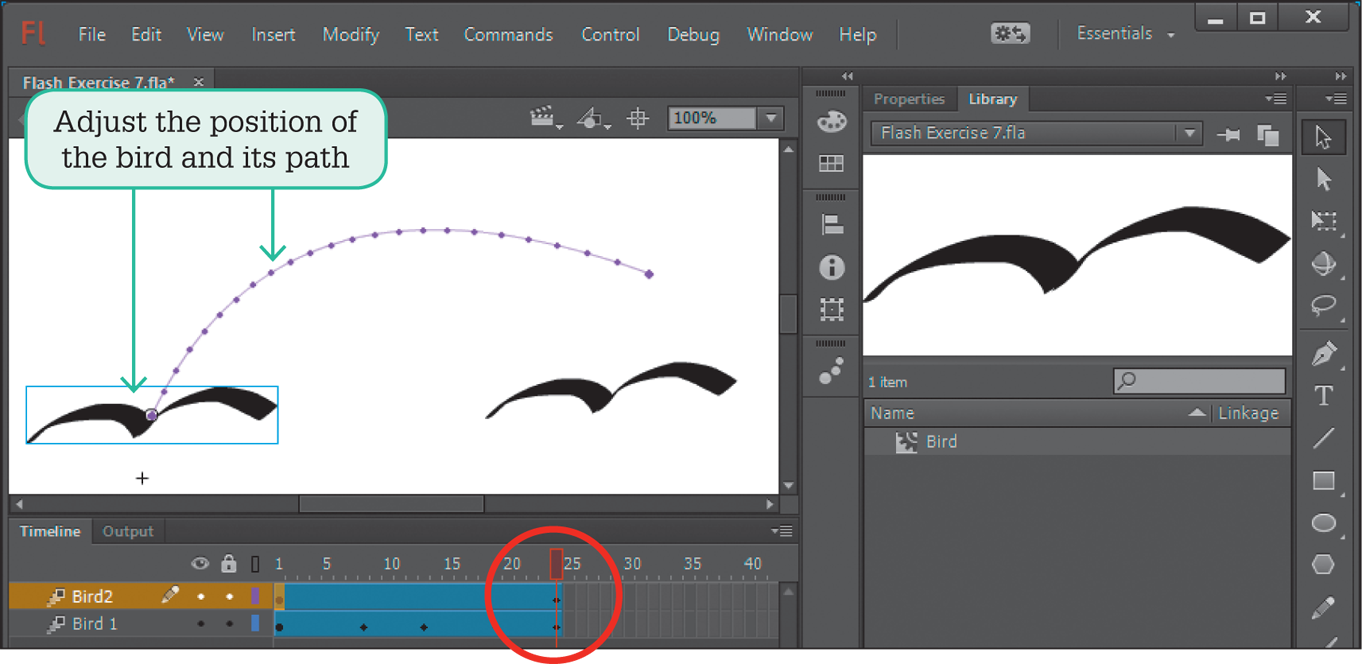
Use the SELECTION TOOL to move the bird to a new position at Frame 24 and then adjust its path to be curved.
Move the PLAYHEAD in the TIMELINE panel to some other positions and change the position of the bird to further adjust the path.
Test the movie and the bird should flap its wings as it moves.
Adding another movie clip instance
More instances of the movie clip can be added to the animation.
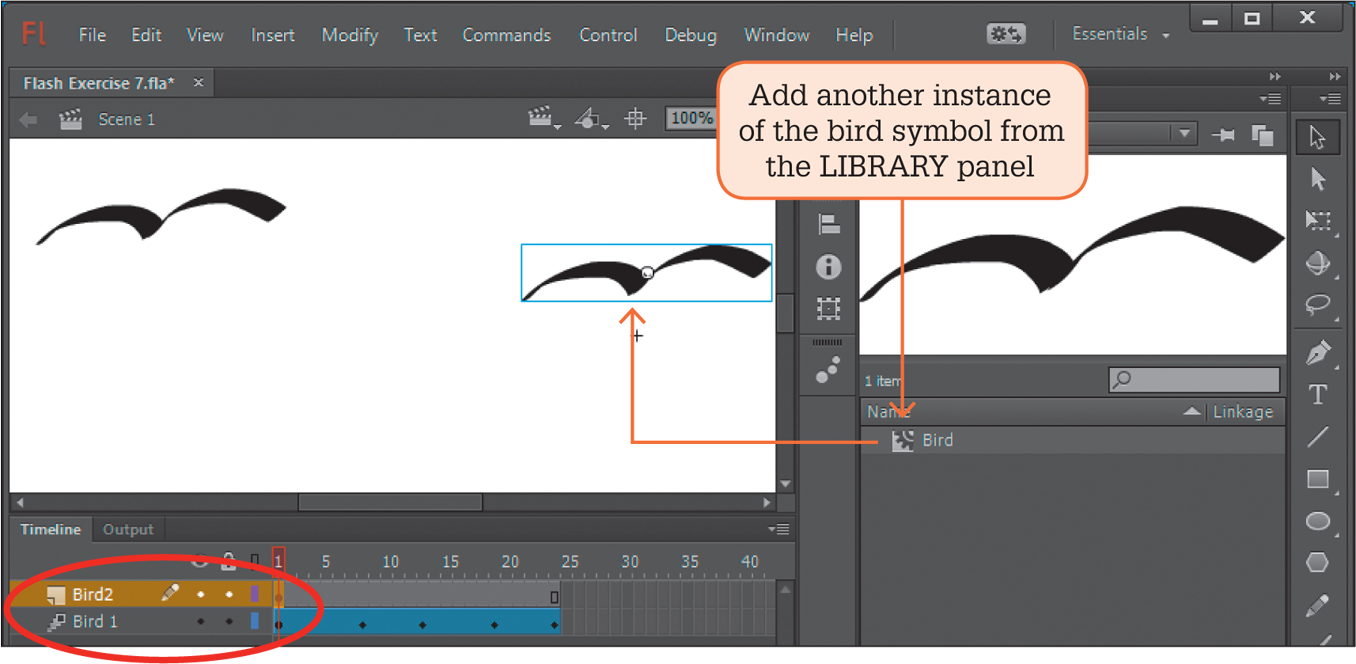
Rename the layer in the Timeline panel to ‘Bird 1’, insert a NEW LAYER and call it ‘Bird 2’.
Select FRAME 1 of the Bird 2 layer and drag another instance of the bird to the stage from the LIBRARY panel.
Use MOTION TWEEN from the INSERT menu to animate the second bird symbol.
Move the PLAYHEAD in the TIMELINE panel to Frame 24 and move the second bird symbol to a new position on the stage, then adjust its path to be curved.
Test the movie and both birds should move as they flap their wings.
Adjust the position of the second bird symbol at various frames of the TIMELINE panel if you wish to. Note: You might like to set the STAGE to blue to simulate the sky, or insert a picture to the stage for the birds to fly over. You might also like to use the FREE TRANSFORM tool to adjust the size of the birds at various keyframes.