The instructions in this exercise feature Adobe Flash, but may also be followed step-by-step for Adobe Animate.
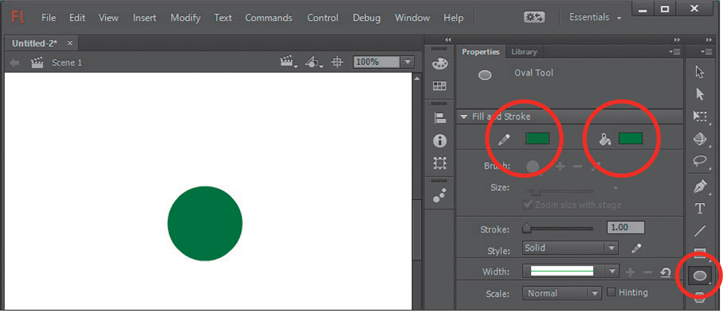
A large green circle will be used to represent the Earth.
Create a new Flash (or Animate) ActionScript 3.0 document.
Select the OVAL TOOL from the Tools panel and set the FILL and STROKE colours to green.
Hold down the <Shift> key and draw a large circle (about 2 cm in diameter) near the centre of the stage.
Select the SELECTION TOOL and click on the stage area to set the circle.
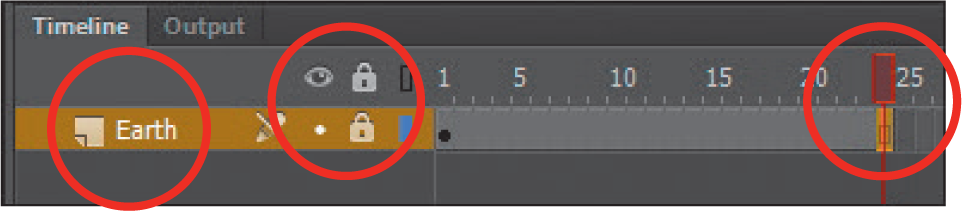
Name its layer ‘Earth’ in the TIMELINE panel then click on Frame 24 of the layer and press the F5 key to insert frames to Frame 24. You can also use the INSERT menu – TIMELINE – FRAME to insert frames.
Lock the layer so that no changes can be accidentally made to it.
Creating the moon
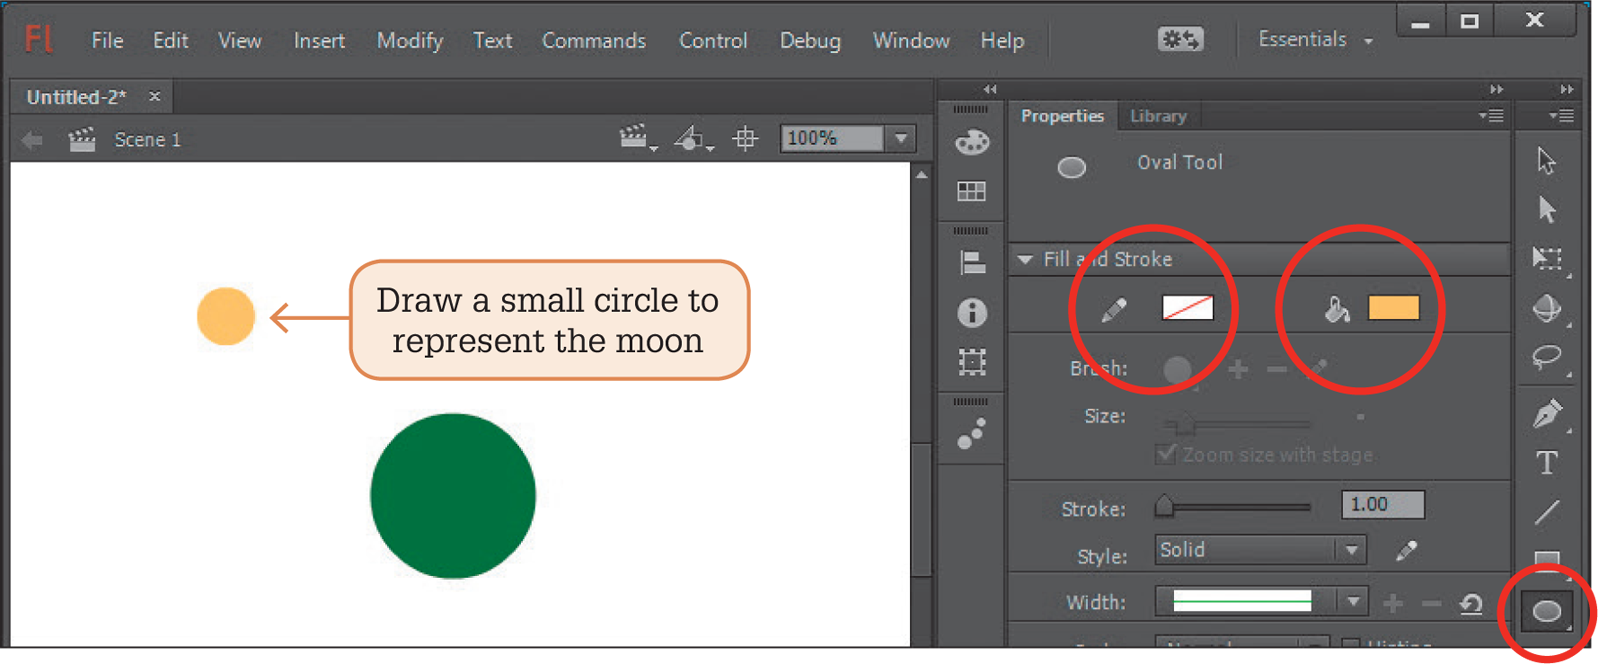
A smaller orange circle will be used to represent the moon.
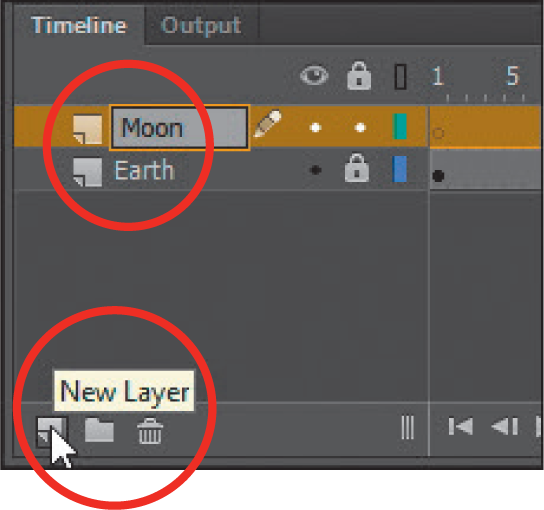
Create a new Layer in the TIMELINE panel and call it ‘Moon’.
Click on FRAME 1 of the MOON layer then select the OVAL TOOL from the Tools panel and set the STROKE colour to NO COLOUR and the FILL COLOUR to a light orange.
With the <Shift> key depressed, draw a small circle near the left of the Earth.
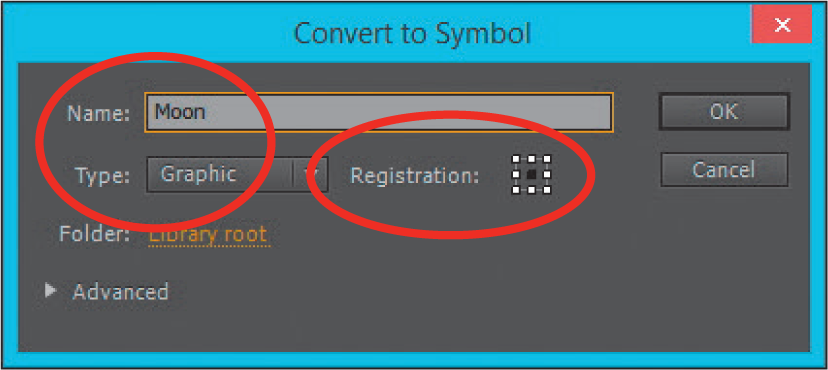
The moon needs to be converted to a symbol. Click on the SELECTION tool in the Tools panel and click on the orange circle.
Select CONVERT TO SYMBOL from the MODIFY menu.
Name the symbol Moon, set its TYPE to GRAPHIC, its REGISTRATION to CENTRE and select OK.
Creating a path for the moon
To create the orbit of the moon around the Earth, a circle will be added with a small hole cut in it so that the moon can be set to have a start and finish point.
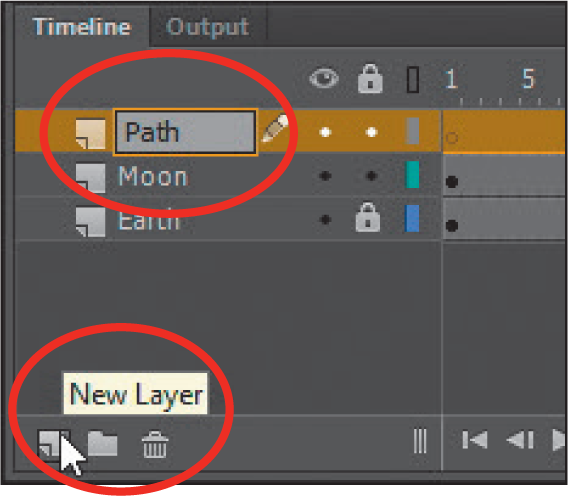
With the MOON layer selected in the TIMELINE panel click on the NEW LAYER button and call the new layer ‘Path’.
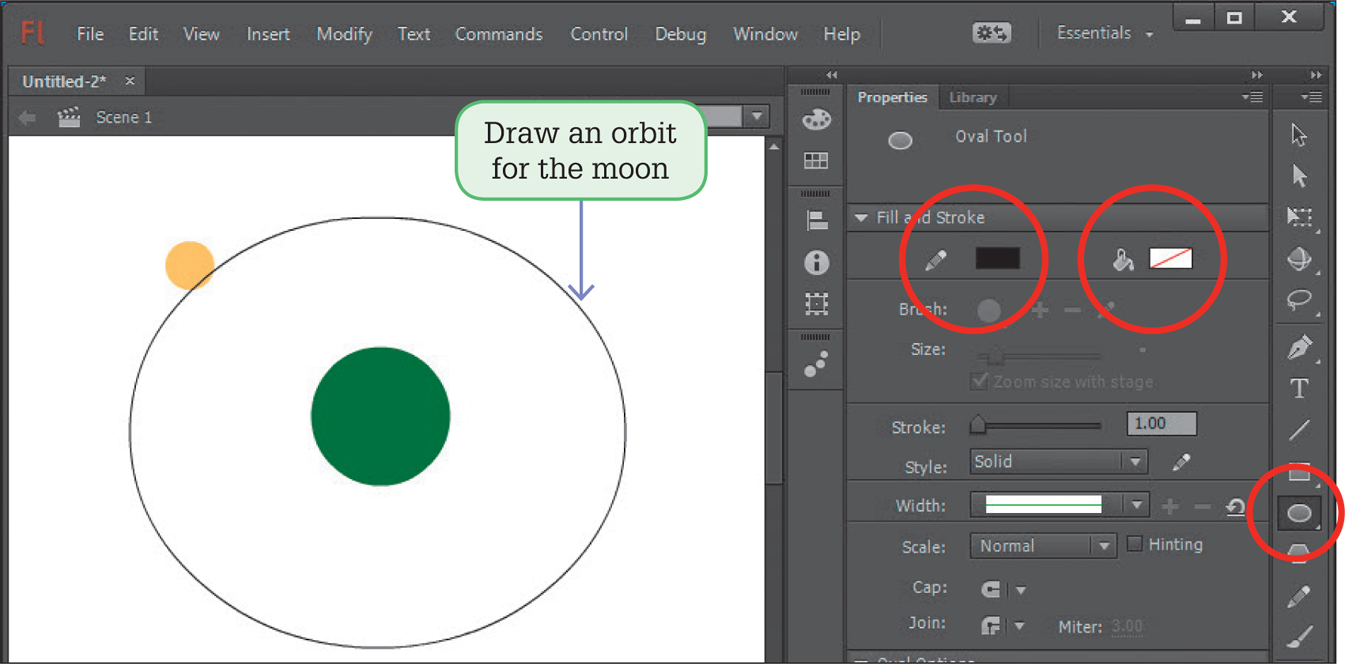
Select the OVAL TOOL from the Tools panel and set the STROKE COLOUR to Black and the FILL COLOUR to No Fill.
Draw a large circle around the Earth to represent the path that you want the moon to take. You can click on the FREE TRANSFORM TOOL, click on the circle and use its handles to adjust its size if need be.
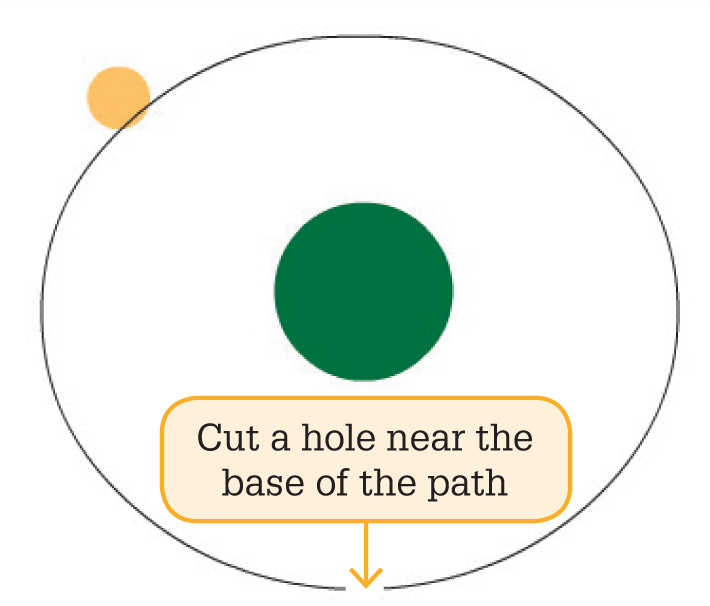
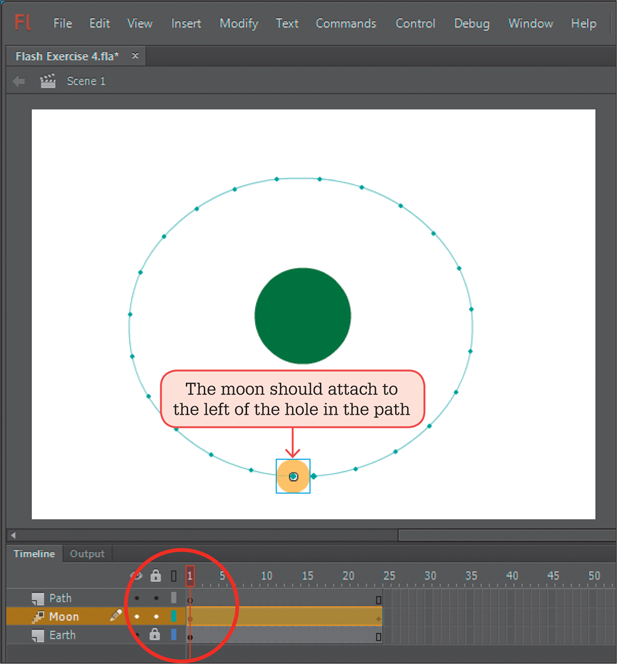
Select the ERASER TOOL from the Tools panel and cut a small hole near the base of the circle. Note: Cutting away from the circle should force the circle to attach to the left of the hole and rotate clockwise. If you cut the hole near the orange circle, the moon might orbit counter-clockwise.
Animating the moon
To attach an object to the path, the path is cut and pasted into the object’s layer.
Select the SELECTION TOOL, click on the circle and press <Ctrl+X> or <Command+X> to cut the path from the stage.
Select the KEYFRAME marker at Frame 1 of the MOON layer in the TIMELINE panel.
Display the INSERT menu and select MOTION TWEEN to create the motion tween animation.
Display the EDIT menu and select PASTE IN PLACE to paste the path onto the MOON layer at its same position. The moon should attach itself to the path.
Save the file in your storage folder as: Flash Exercise 4.
Test the movie and the moon should orbit the Earth.
You might like to click on the white area of the stage and set the STAGE to a dark colour in the Properties panel, then retest your movie. Note: Paths do not have to be circular. You can use the PENCIL tool to draw any path you like. As long as it is one continuous line, a symbol can be set to follow that path.