The instructions in this exercise feature Adobe Flash, but may also be followed step-by-step for Adobe Animate.
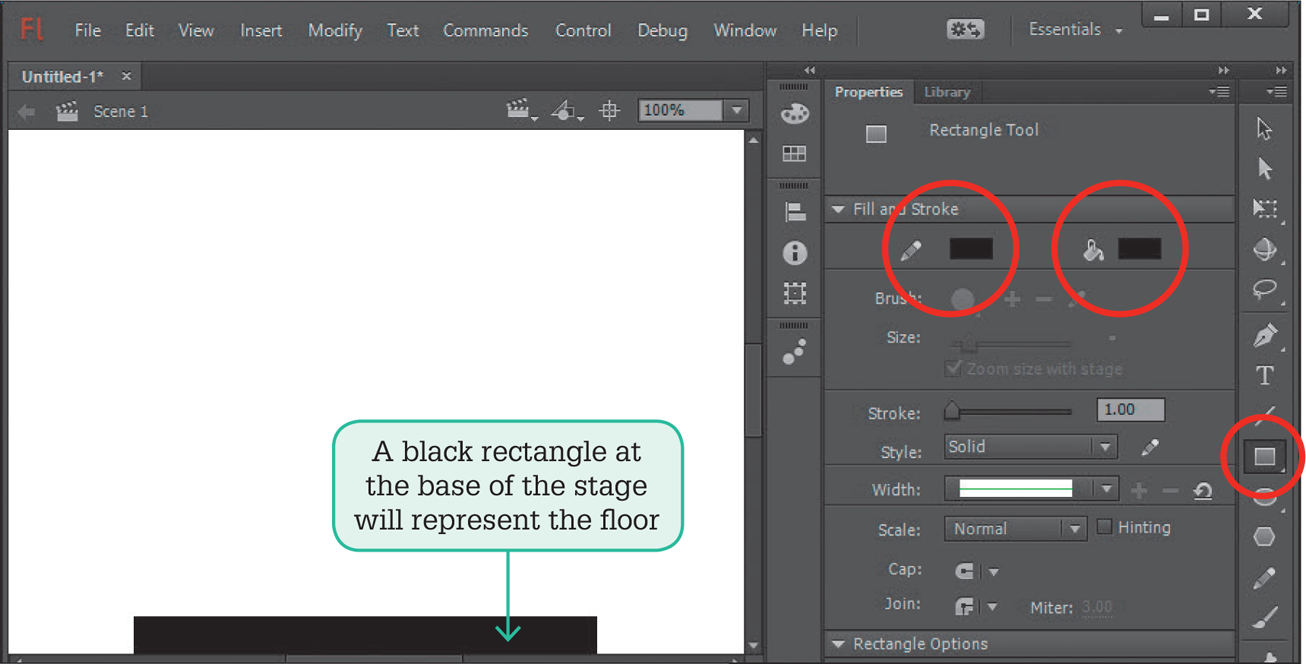
A rectangle will be used to represent the floor.
Create a new Flash ActionScript 3.0 document.
Click on the RECTANGLE TOOL from the Tools panel and, in the FILL AND STROKE section of the Properties panel, set both the STROKE and FILL COLOUR boxes to Black.
Drag a thin rectangle across the bottom of the stage.
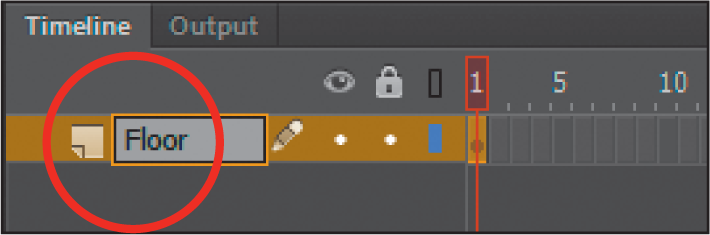
It is good practice to name the layers in the TIMELINE panel when you are going to use more than one layer. Double-click on the LAYER 1 label and call the layer ‘Floor’.
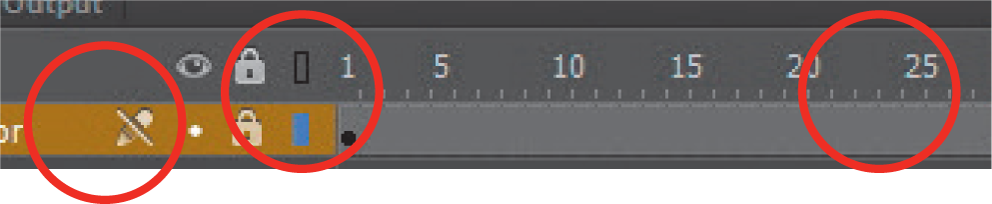
Click on Frame 30 of the FLOOR layer. Display the INSERT menu, highlight TIMELINE and select FRAME to set 30 frames for the animation. (The F5 key can be pressed as a shortcut.)
Click on the dot under the LOCK symbol in the FLOOR layer to lock the layer. This prevents changes being made accidentally to the rectangle. Note: If you need to make changes to the layer, it can be unlocked at any time.
Drawing the ball
A circle will be used to represent the ball and the circle will need to be converted to a Symbol. Symbols reduce the file size of an animation and they can be used over and over in an animation without increasing the animation’s file size.
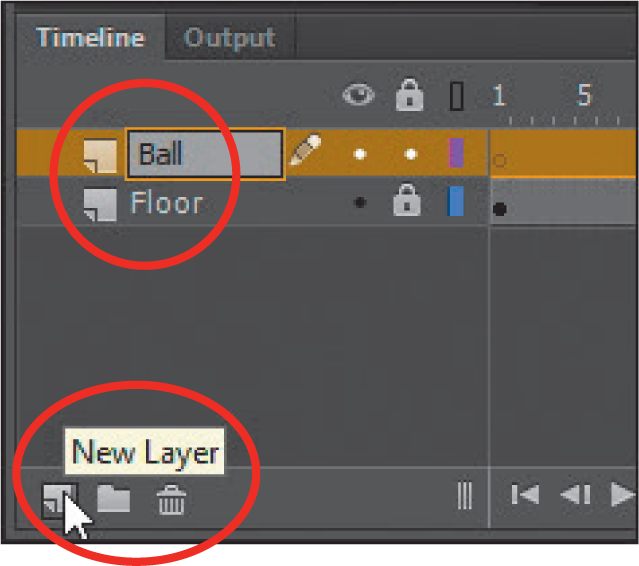
Click on the NEW LAYER button at the bottom left of the TIMELINE panel to insert a new layer and call the new layer ‘Ball’.
Click on the KEYFRAME marker at FRAME 1 of the Ball layer.
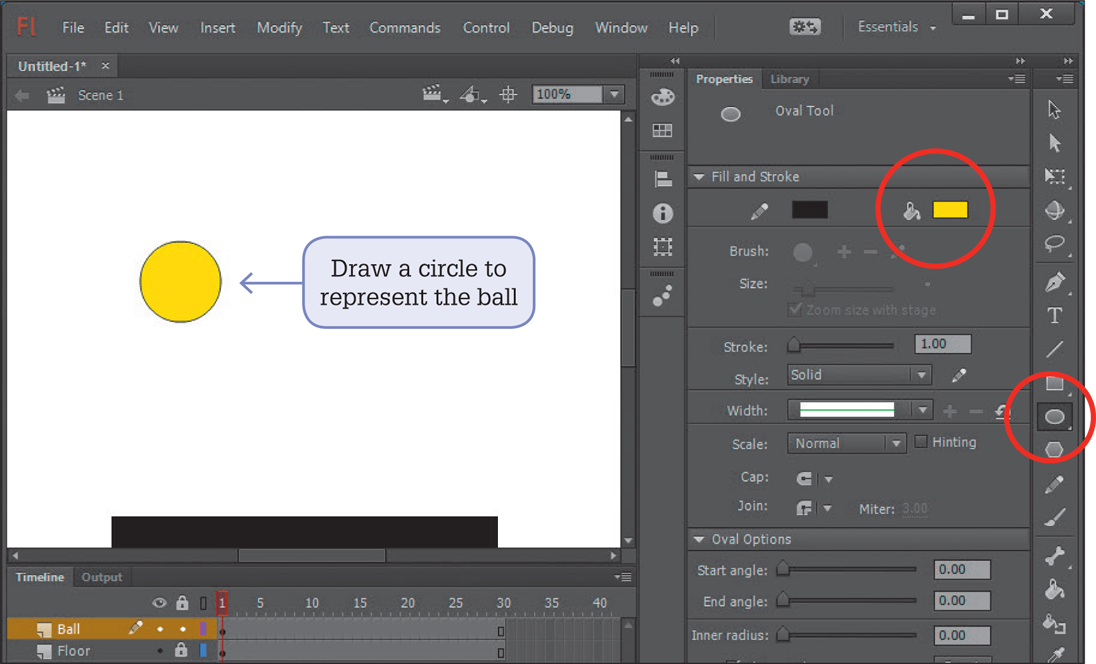
Click on the OVAL TOOL from the Tools panel and set the FILL COLOUR to Yellow.
Hold down the <Shift> key and drag a small circle near the top left of the stage. The <Shift> key ensures that the oval is a perfect circle.
Click on the SELECTION TOOL from the Tools panel and double click on the ball. This selects both the fill and the border of the circle, which are considered as two separate objects by Flash.
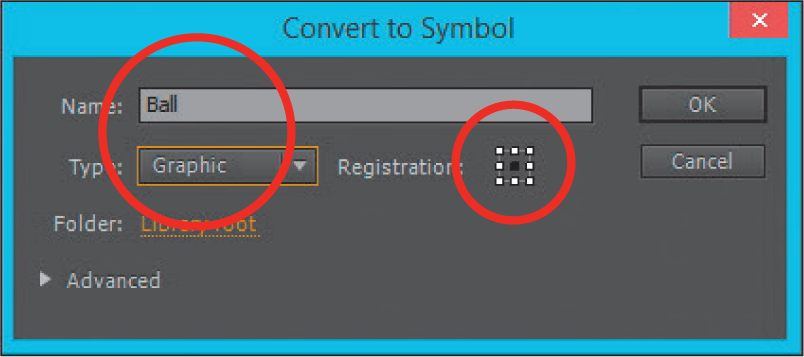
Display the MODIFY menu and click on CONVERT TO SYMBOL.
Name the symbol Ball, set its TYPE to GRAPHIC, its REGISTRATION to the CENTRE and select OK. Note: Objects must be converted to symbols before they can be animated. The Registration is the position on the graphic symbol where it connects to other objects.
Animating the ball
Click on the KEYFRAME marker at FRAME 1 of the BALL layer.
Insert a motion tween by selecting MOTION TWEEN from the INSERT menu.
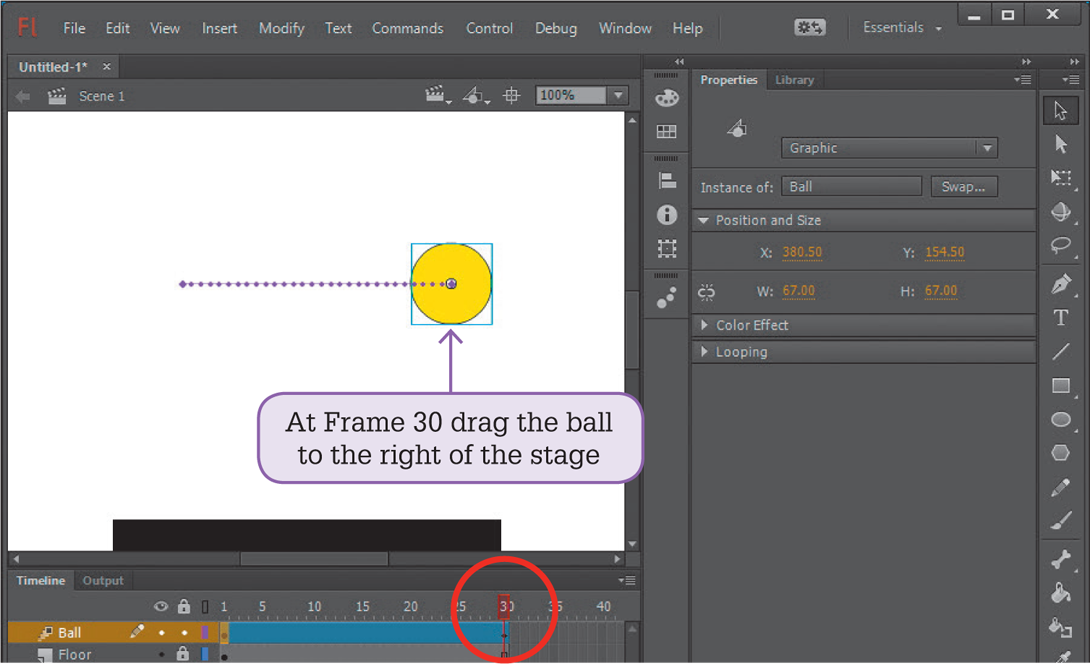
Move the PLAYHEAD in the TIMELINE panel to FRAME 30 then use the SELECTION TOOL to move the ball to the top right of the stage to create the animation.
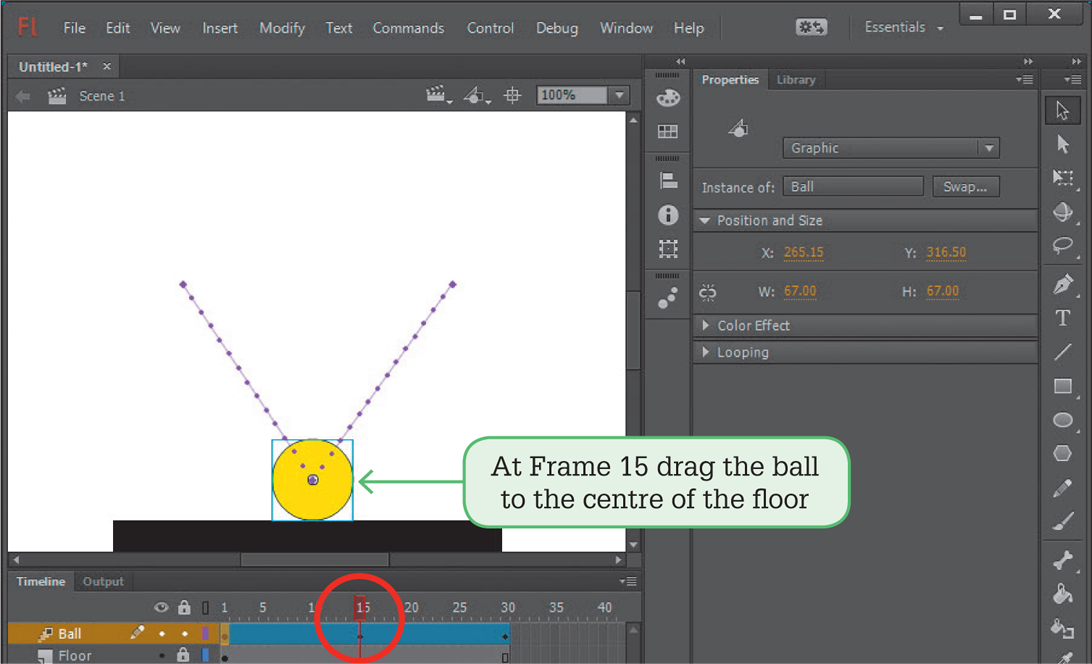
Move the PLAYHEAD in the TIMELINE panel to FRAME 15 then use the SELECTION TOOL to move the ball to the centre of the floor to create the bounce.
Test the animation by pressing <Enter> or <Return>.
You can add a background to the stage. Click on the stage and, in the Properties section of the Properties panel, set the STAGE box to a colour.
Save the movie in your storage folder under an appropriate name, such as: Flash Exercise 3.