The instructions in this exercise feature Adobe Flash, but may also be followed step-by-step for Adobe Animate.
Load Flash (or Animate) and in the Welcome screen, click on ACTIONSCRIPT 3.0 in the CREATE NEW Section
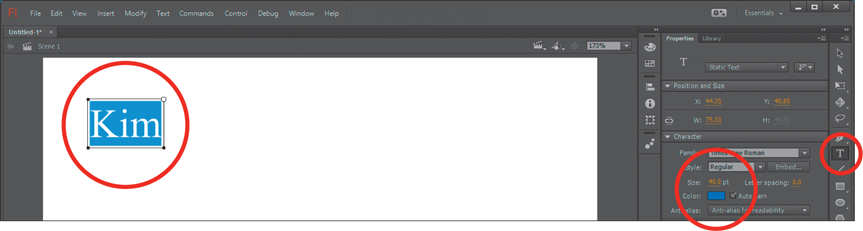
Click on the TEXT TOOL (T) from the Tools panel, click near the top left of the stage area and enter your first name.
Highlight the letters of your name and use the Properties panel to set the Font Size to 40 pt and the TEXT COLOUR to a colour of your choice.
Note: The Properties panel can be used to set other text formats such as font types, alignments and styles, etc.
Setting a motion tween animation
To animate an object, frames are inserted in the Timeline panel. There are two types of frames in Flash: Frames and Keyframes. Frames are small segments of your animation. Keyframes are important frames where some change occurs; for example, an object changes direction.
At the moment there is a KEYFRAME at Frame 1 of the TIMELINE panel. This is automatically inserted as soon as you add content to the stage. To create a motion tween animation, the animation is inserted and the object moved to a new location. Note: Tween is an abbreviation of between. You animate objects beTWEEN two points.
Click on the KEYFRAME marker (▪) at Frame 1 in the TIMELINE panel.
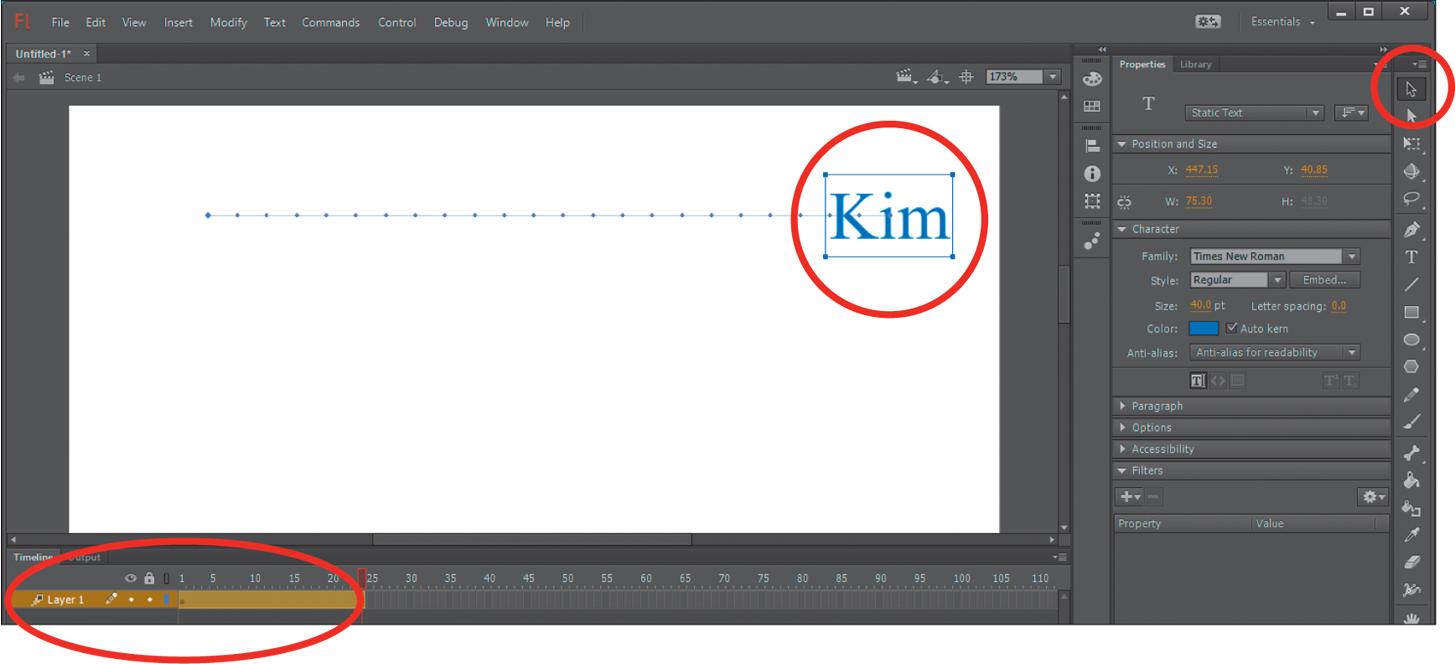
Display the Insert menu and select MOTION TWEEN. This inserts 23 extra frames into the TIMELINE.
Referring to the diagram below, click on the SELECTION tool at the top of the Tools panel and drag your name to the top right of the stage. This sets the position of your name and inserts a PROPERTY KEYFRAME at Frame 24.
To test the movie, display the CONTROL menu and click on TEST. A test screen is opened and your name should move across the screen continuously.
Close the Text Movie screen by clicking on the CLOSE box at the top of the Test Movie window.
Adjusting the animation
You can adjust the animation in numerous ways. For example, you can change the position of your name on the screen, change the size of one name so that the name changes size as the animation runs, or make your name rotate as it animates, etc.
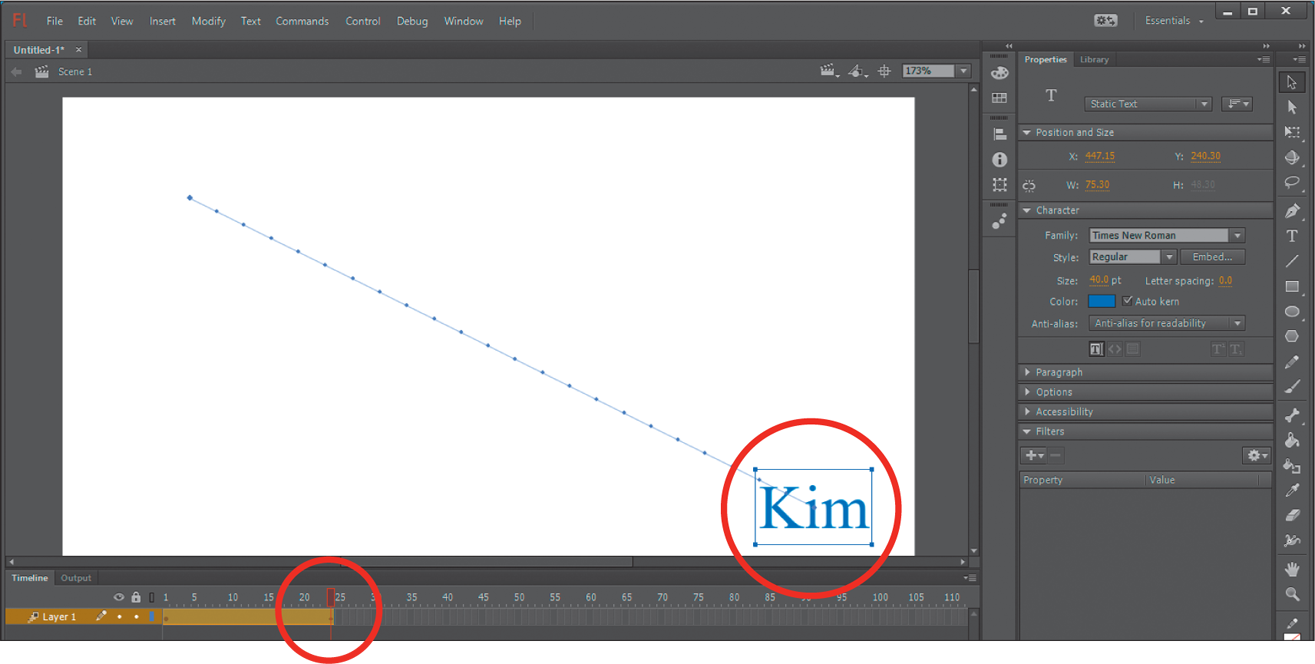
Click on the KEYFRAME marker at Frame 24 and use the SELECTION tool to drag your name to the bottom right of the stage.
Press <Enter> or <Return> to play the animation once without opening the Test Movie screen. This is a shortcut to quickly test how the animation looks. Your name should now animate diagonally down the screen. Note: <Ctrl+Enter> on the Windows system or <Command+Return> on the Mac system is the shortcut for opening the Test Movie screen.
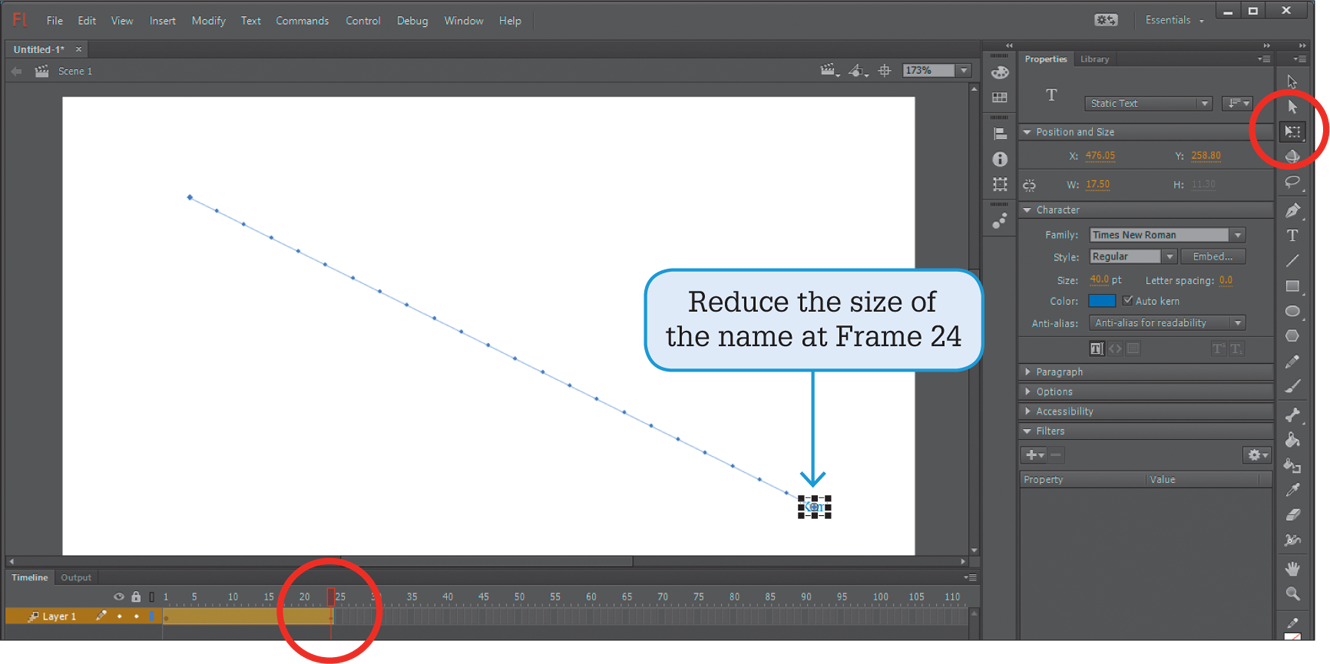
Click on the KEYFRAME marker at Frame 24, select the FREE TRANSFORM TOOL from the Tools panel and handles should be placed around your name.
Drag the bottom right handle to the centre of your name to reduce its size to be very small.
Test the animation again and your name should reduce in size as it moves.
Click on the KEYFRAME marker at Frame 1 and, in the Properties panel, set the DIRECTION box to CW (for clockwise) and the ROTATE box to 2 times so that your name will rotate twice as shown in the following diagram.
Test the movie to see the effect.
Save the movie in your storage folder under an appropriate name, for example: Flash Exercise 1.