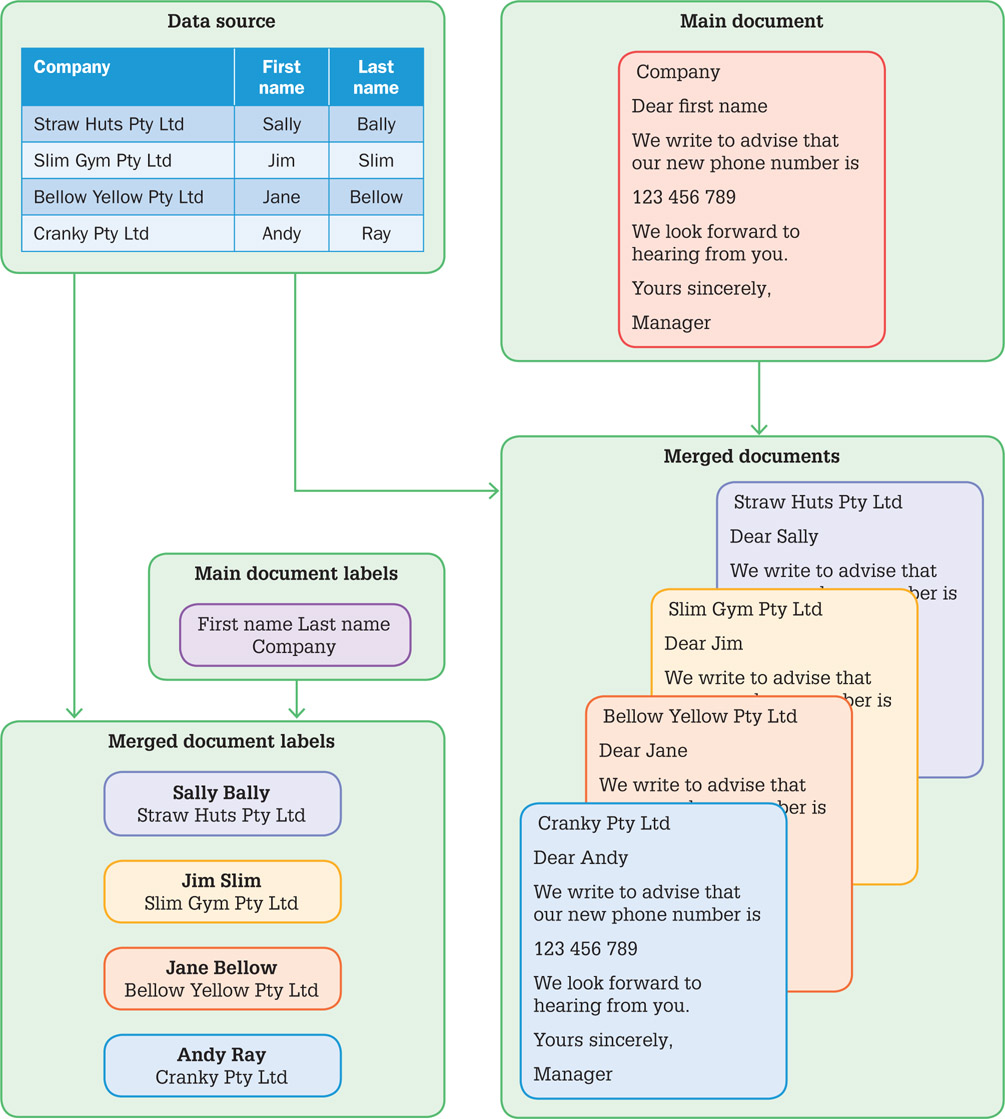
Mail merge is the term given to the process where we start with a main document, and a set of details (the data source) about customers, suppliers, members and so forth. We ‘merge’ the two together to produce a set of documents individualised for each customer, member and so forth. This process is more efficient than individualising each document with details, one at a time.
Another advantage is that the data source can be used repeatedly for various documents. In the example shown below the same data has been used to produce individualised documents regarding a change of phone number, and then to produce name labels.
The instructions in this exercise apply to Microsoft Word. If you are using Google Docs, you need a script installed to carry mail-merging processes.
The first requirement of a mail merge is a main document. The main document consists of the general information that will go to all recipients. The main document is often a letter or flyer. Next most common is a mailing label. In this exercise you will create a letter to send out to prospective customers to take part in an expo you are organising.
Open the data file downloaded from the above link. It contains a prepared business letter.
Use SAVE AS from the FILE tab or menu to save the file as: Expo Invite in your storage folder and leave it open for the next section.
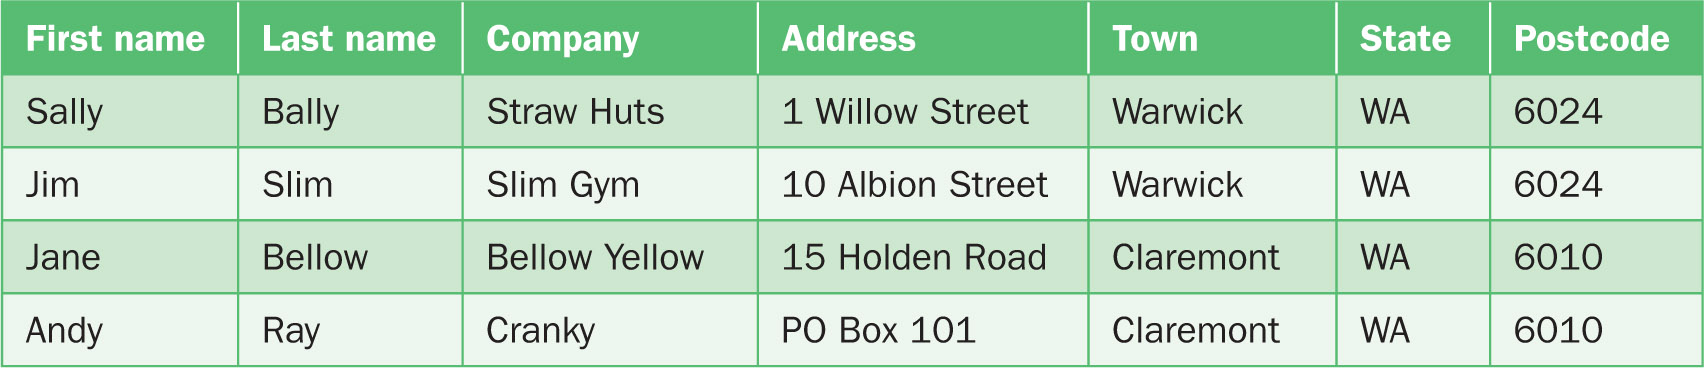
Now for the Data Source File. Start a new document; insert a seven-column, five-row table and enter the following data.
First Name
Last Name
Company
Address
Town
State
Town
Sally
Bally
Straw Huts
1 Willow Street
Warwick
WA
6024
Jim
Slim
Slim Gym
10 Albion Street
Warwick
WA
6024
Jane
Bellow
Bellow Yellow
15 Holden Road
Claremont
WA
6010
Andy
Ray
Cranky
PO Box 101
Claremont
WA
6010
Save the document as: Expo Exhibitors.
Check your work, save and close the Expo Exhibitors file. You now have the two files required for a mail merge: the main document and the data source. The main document, Expo Invite, should be open and displayed on the screen.
Open the MAILINGS tab of the ribbon, select the START MAIL MERGE icon and select LETTERS. The open Expo Invite file will be the Main document.
Click on the Select RECIPIENTS icon in the ribbon, select USE EXISTING LIST, navigate to your Expo Exhibitors file and open it. This sets the source file.
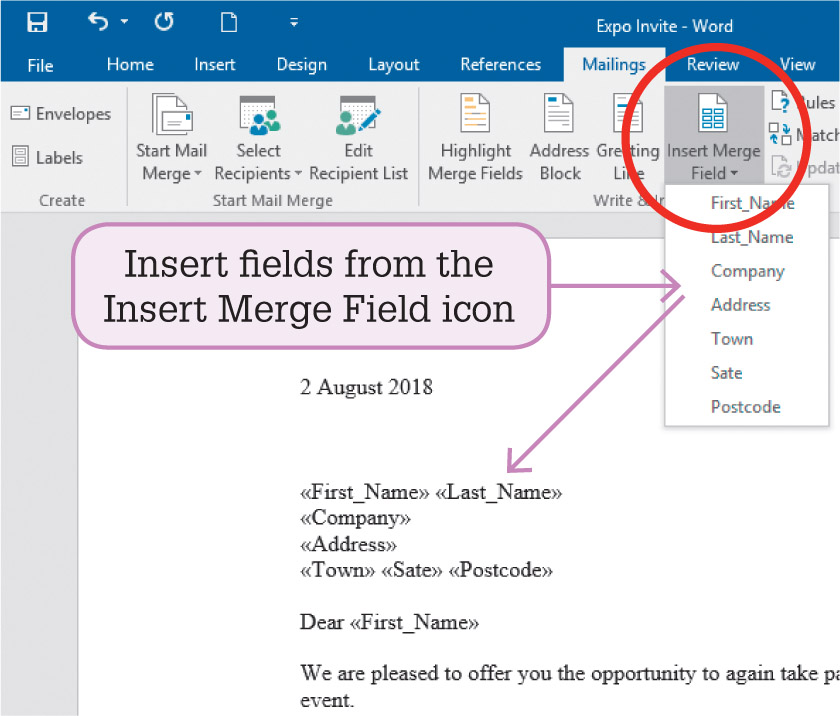
Insert Merge Fields into the letter using the diagram at the right as a guide, starting at the line above ‘Dear’. Position the insertion point where the field is to appear then click on the INSERT MERGE FIELD icon in the MAILINGS tab and choose the appropriate field. Remember to include a space between fields that are on the same line.
Use the PREVIEW RESULTS icon to check that the details are correct for each letter.
FINISH & MERGE by printing the letters. This creates four letters because there are four recipients and the main document is one page long.
This exercise only applies to Microsoft Word. Mail merge labels are often created along with a set of mail merge letters for the purposes of addressing the envelope. Self-adhesive labels can be purchased from stationery suppliers. Once printed on with address, all you need to do is peel and stick onto envelopes.
Start a new document – this will be used as the main document – the mailing label setup.
Now you have the two files required for a mail merge: the main document and the data source file from the previous exercise. The main document should be open and displayed on the screen.
In the MAILINGS tab of the ribbon set the START MAIL MERGE icon to LABELS so that the main document produces mailing labels.
Choose a LABEL VENDOR, such as Avery A4/A5 and a PRODUCT NUMBER such as L7160. This is a commonly used size for envelope labels. You can save yourself an enormous amount of grief by selecting the correct size labels, which is easy if you know the Brand name and code from the label’s box.
Click on the SELECT RECIPIENTS icon in the MAILINGS tab, select USE EXISTING LIST and open your Expo Exhibitors file. This is the source file.
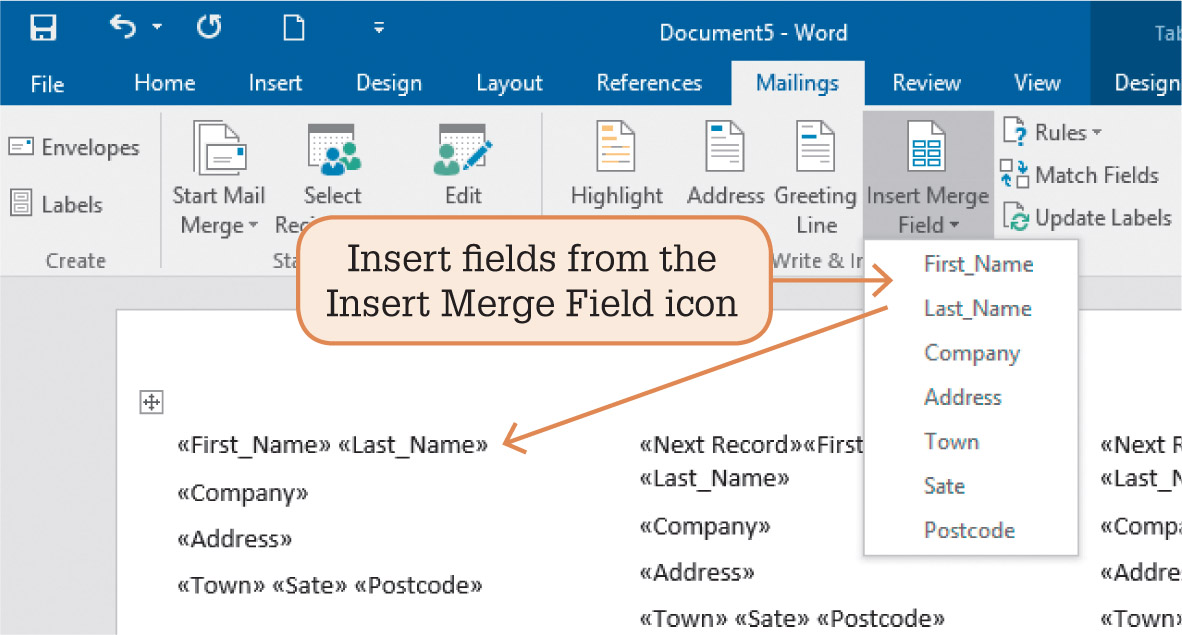
Insert fields into the first label using the diagram as a guide. Position the insertion point where the field is to appear then click on the INSERT MERGE FIELD icon and choose the appropriate field.
Click on the UPDATE LABELS icon in the MAILINGS tab to update the other labels.
Preview the results and check that the details are correct for each label. Finish the Merge by printing the labels.