3.5 More detailed newsletters
Sections allow you to produce quite complex documents as the following exercise demonstrates. In the exercise you will create a newsletter for a travel agency. It will need sections to be inserted. The text and images can be inserted from the PIT2 Support Files.
If you are using Google Docs, which doesn’t support sections, you will need to use a five-row, three-column table and merge appropriate cells to create the newsletter layout.
Word processing exercise 5
More detailed newsletters
Skills practised
- Using sections
- Using columns
- Inserting images
- Drawing tools
- Tab stops
- Page borders
- Download the above files and open the Word document.
- Your task is to format the page as shown at the end of this exercise. Start by formatting the main heading and use the Drawing tools to shade it.
- Set a right tab stop at the right edge of the screen for the second line (Issue 4 …).
- Format the ‘May Madness Again, Cut Price Tours to Europe’ lines to bold, larger and centre, then add horizontal lines above and below them.
- Insert a Continuous Section Break (Layout or Page Layout tab) at the beginning of the line ‘Due to the success …’ and format the section to three columns with 0.5 cm column spacing. There is a More Columns option at the base of the Columns icon for this.
- Insert another Continuous Section Break at the beginning of the subheading ‘Contents’ and set the columns back to 1. Press
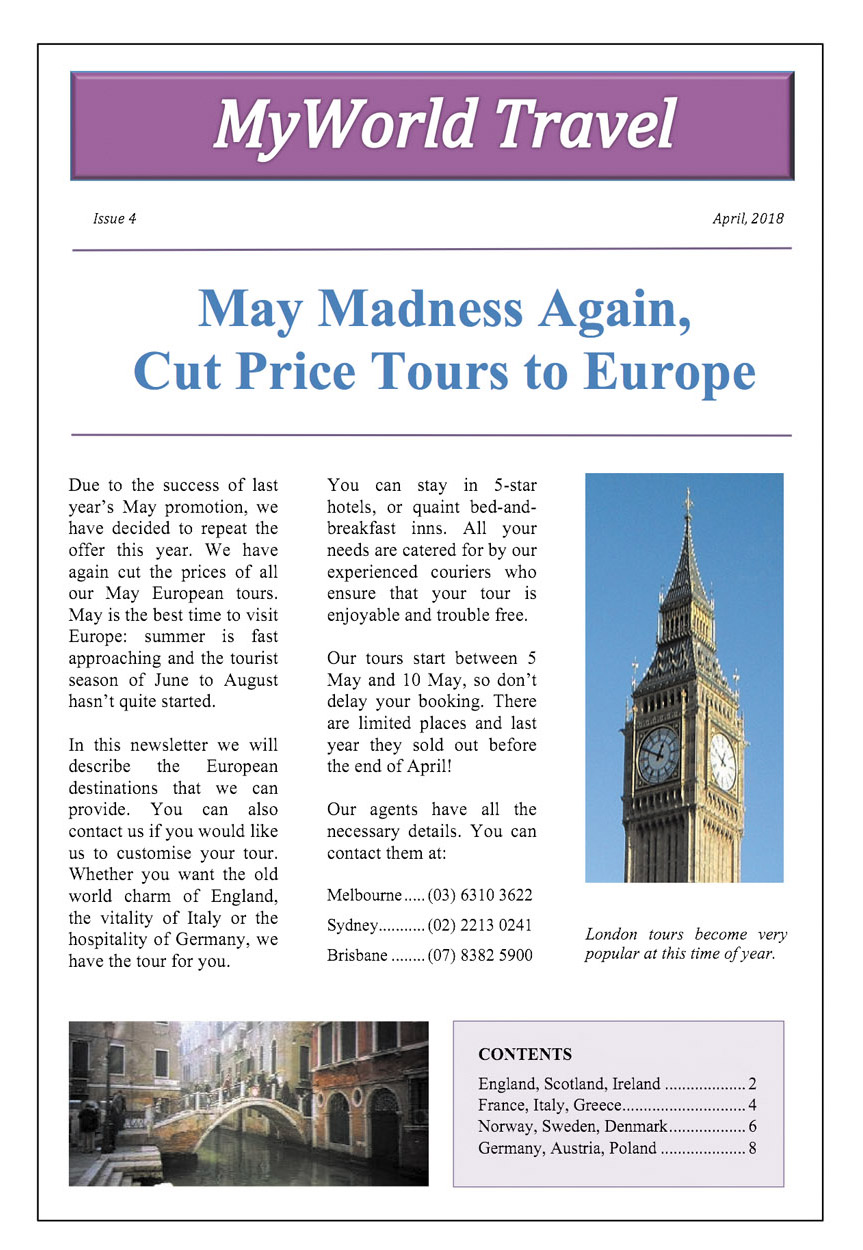
<Enter>or<Return>to add a blank line above ‘Contents’. - At the first blank line after the Brisbane phone number, insert the Big Ben picture downloaded from the above link.
- Format the text in the three columns to be fully justified and add a left tab stop to the ‘Melbourne’, ‘Sydney’ and ‘Brisbane’ lines at the end of the second column so that the phone numbers are in line. Set the tab stop to have leader characters.
- Use a text box to add a caption after the Big Ben picture that says ‘London tours become very popular at this time of year’. Format the caption text to italic, turn off the text box border.
- Position the cursor at the beginning of the ‘Contents’ subheading and insert the Venice picture downloaded from the above link.
- Reduce the size of the picture to 50% and format its
WRAP TEXTtoTIGHTso that the ‘Contents’ text is to the right of the picture. - Set the four sections of ‘Contents’ to have a right tab stop and dotted leader characters. If you wish, you can cut the five lines of the Contents section, paste them into a text box next to the Venice picture and then shade the text box and format the text.
- Add a border around the page in the Header and Footer view. Check the document and then print a copy of your finished product or share your work electronically.