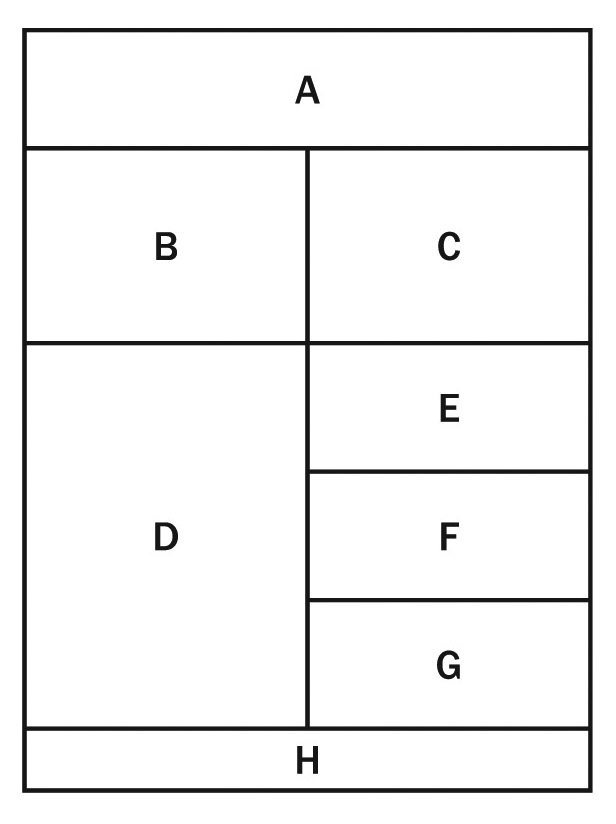
Your task is to create the layout shown at the end of this exercise. The layout of the page follows the diagram below. You will be able to copy and paste text into a new document from the above data file.
Start a New Blank Document and insert a two-column six-row table.
Merge the top two cells into one, the left column of rows three, four and five into one cell and the two cells in the last row into one cell so that your table looks like the layout diagram.
Copy the top two headings from the data file, paste them into cell A and format the text to fill the cell. Set the cell alignment to ALIGN CENTRE.
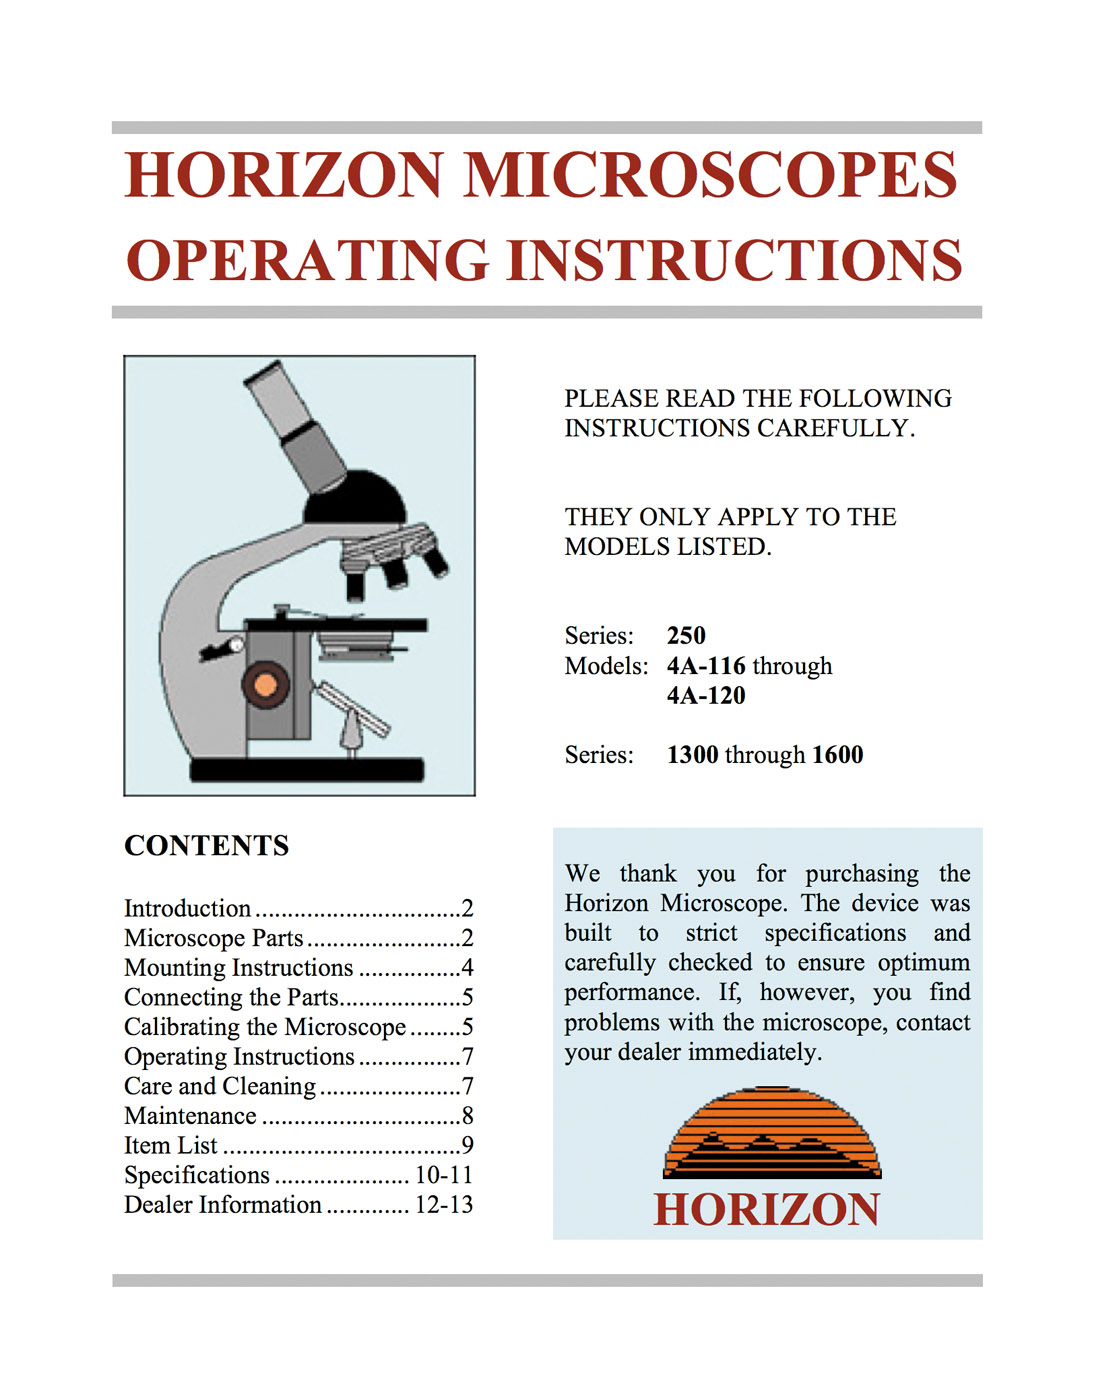
Use the INSERT tab – PICTURE or Insert menu – IMAGE to insert the Microscope image downloaded from the above link into cell B and set the cell alignment to ALIGN CENTRE LEFT.
Copy the Microscope Details text from the data file, paste it into cell C, format the text to 14 pt and set the model numbers to bold. Set the cell alignment to ALIGN CENTRE LEFT.
Copy the Contents text from the data file, paste it into cell D, format the heading to BOLD and 14 pt and add leader characters to the numbers. Google Docs does not support tabs in tables, but you can highlight the content items and in the Ruler set the LEFT INDENT to 6 cm and the FIRST LINE INDENT to 0 to align the numbers.
Increase the size of the Microscope image to be level with the text in cells C and D.
Copy the Thank-You text into cell E, leaving a blank line at the top and format the text to JUSTIFY.
Insert the Horizon image into cell F from the data file and centre it.
Enter HORIZON in cell G and format and centre it, then increase the size of the Horizon image to match the Horizon heading.
Set cells E, F and G to a similar shade to the Microscope background.
In Microsoft Word select the whole table, turn off all the borders then set the border weight to 6 pt, select a shading and turn on the TOP and BOTTOM borders of cell A and the BOTTOM border of cell H.
In Google Docs use the down arrow at the top right of cell A to select the TOP BORDER then set its BORDER WIDTH to 6 pt and a COLOUR. Repeat this for the cell’s BOTTOM border then set the cell’s LEFT and RIGHT borders to 0 pt. Set the BOTTOM border of cell H to 6 pt and a shading and its other borders to 0 pt. Set the borders of all the other cells to 0 pt.
Adjust the height of the cells so that the text and images are displayed clearly.
Check the document, save the file in your storage folder and then print a copy of your finished product or share your work electronically.