3.1 Business letters
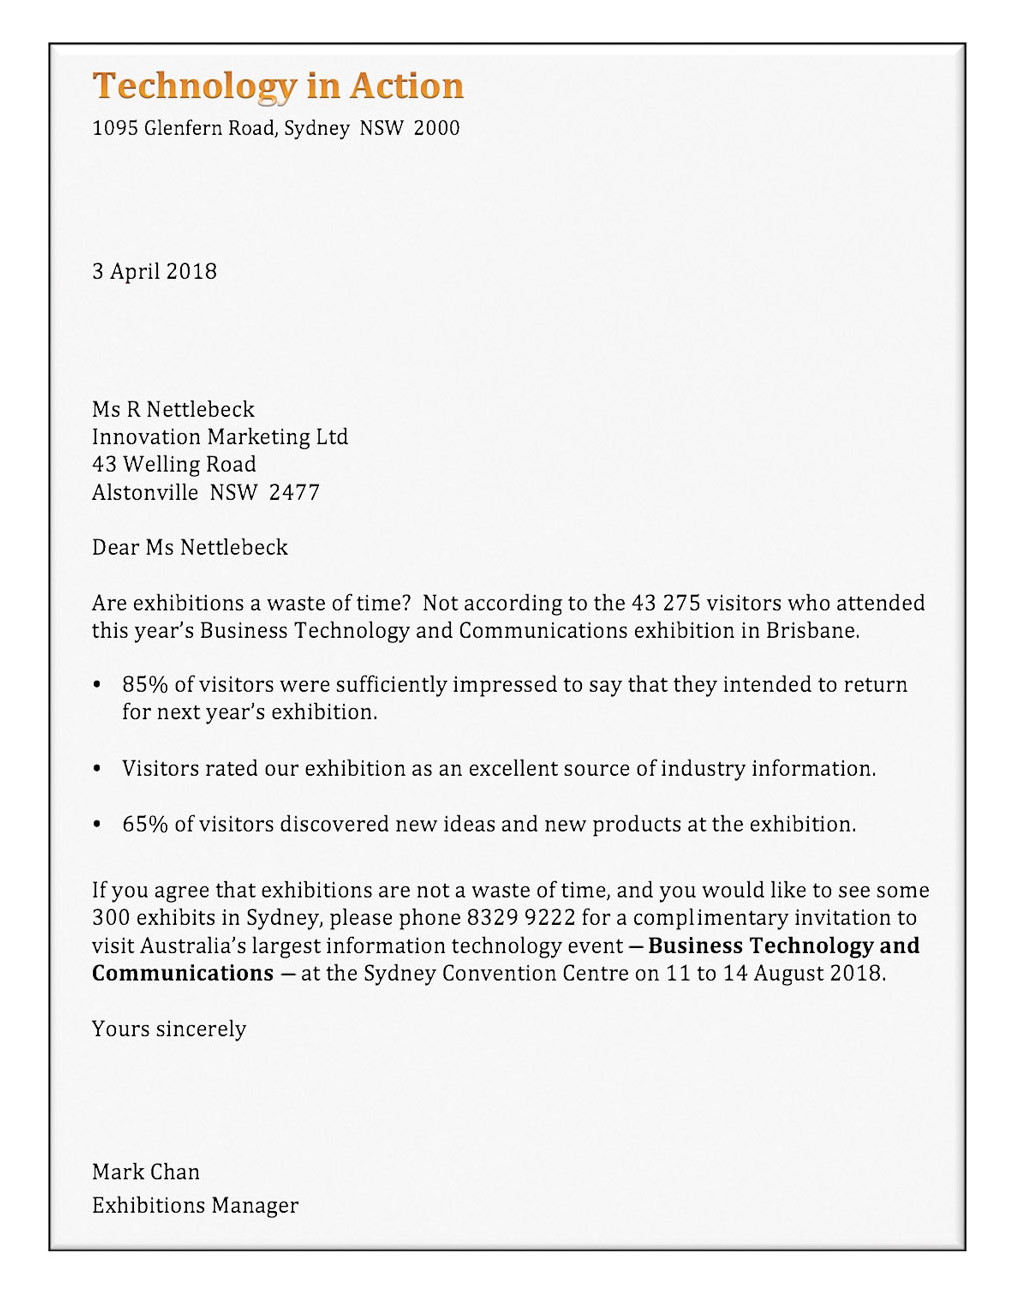
To revise your word processing skills from previous years, the next exercise directs you to produce a business letter. The letter will also revise the use of bullets (solid dots) to highlight points in a list.
When entering business letters, certain rules for the appearance and structure of the letter should be followed. Some of these include:
- Always use a plain or regular font throughout, set the size to 12 point and only use bold to highlight very important words. You can use a different font and font size to highlight the company name.
- Avoid the use of fancy fonts as they are difficult to read and are not very businesslike. Times New Roman or Arial are good fonts to use in a business letter.
- The line structure in the letter should be only four blank lines or one blank line. Four blank lines are used after the company address, after the date and after the ‘Yours sincerely’. All other line spacing should be one blank line.
- Any text in point form should have a hanging indent.
Word processing exercise 1
Business letters
Skills practised
- Entering text
- Formatting text
- Using bullets
- Start a new blank document in Microsoft Word or Google Docs.
- Enter the business letter shown below. Do not carry out any text formatting. There should be either one blank line or four blank lines throughout the letter.
- The bulleted points can be entered without any bullets at first.
- Once all the text has been entered, format the text in the desired fashion, referring to the points above. The business name should be larger and bold, and the exhibition name should be set to bold.
- Highlight the three points to be bulleted and set them to be bulleted points using the
BULLETED LISTicon in the home tab of the ribbon or in the toolbar. This should also create the hanging indents.
Note: You can format the bullets to be different from solid dots if you wish. - Once complete, save the document in your storage disk or folder under an appropriate name.
- Spell check the document then select
PRINT PREVIEWto see how it looks. - Carefully read through the preview and correct any errors. If you have difficulty proofreading from the screen, print a copy, mark any errors with a pen then correct the errors on the screen.
- After the corrections have been made to the document, resave it and print a final copy or share your document electronically.
